
Bosses
Bosses are aggressive, resilient enemies that offer a substantial challenge to players. Defeating a boss is usually instrumental in advancing the game in some way. Each has its own particular way of being summoned. For example, most bosses have associated summoning items that can be used to spawn them manually under certain conditions, while there are others that will appear after the player interacts in a certain way with the environment. Event bosses will only appear during their respective events and leave when the event ends. Mini-bosses also exist and spawn naturally in various biomes under various conditions, which pose a lesser yet still difficult challenge for unsuspecting players.
The Calamity Mod expands on the number of bosses that can be challenged throughout the game, each featuring unique AI and drops. Most require the use of boss summoning items in order to spawn, but others have more unique prerequisites. The initial defeat of bosses (both vanilla and Calamity) typically results in some form of change within the world, be it new enemies appearing or a meteor crash, indicated by status messages to direct players towards the new content. Many also drop Lore items, usually explanations about what they are and why they exist. The mod currently adds twenty-seven new boss encounters.
The Calamity Mod's new difficulty modes, Revengeance Mode and Death Mode, increase the challenge even further, often to levels that require rigorous training and complete knowledge of the boss fights.
Most bosses in Calamity are designed to be more difficult than those of vanilla Terraria, offering a challenge even to seasoned players, but are not required to progress through the vanilla game's content. To make up for this, they often drop more powerful equipment and open up new tiers of progression. During an active boss fight, the Boss Effects debuff will activate, which reduces enemy spawn rates, and the boss health bar will appear on-screen so the player can always keep track of their progress through the fight.
After the player has killed the Moon Lord, a whole new level of progression is unlocked, containing several very powerful bosses that will push the game's mechanics to their limits. These serve to test the player's skill and game knowledge and allow for additional tiers of weapons and items beyond what Terraria's endgame has to offer.
Unprepared players will find these bosses to be spectacularly difficult, but if proper preparations are made, all of them can be defeated at their respective level of progression. Players are advised to make use of arenas, potions and any other kind of aid they can muster before confronting these challenging bosses.
Pre-Hardmode Bosses
Desert Scourge

- For elaborate strategies on defeating the Desert Scourge, including Weapon and Arena recommendations, see Guide:Desert Scourge strategies.
|
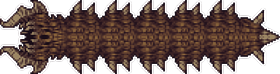
 The Desert Scourge is a large, dry, spiked serpent fought in the Desert biome. It is summoned with a Desert Medallion in the Desert, and does not spawn naturally. While it is intended to be one of the first bosses fought and has a relatively simple AI, its intimidating size and speed can easily overwhelm an unprepared player. It becomes a greater threat in Revengeance Mode, where two extra minions known as Desert Nuisances join in the fight, and the scourge is able to fire a barrage of sand bolts from its segments. The Desert Scourge drops weapons themed around water and electricity, as well as many Pearl Shards, an early game crafting material. It also drops many Angler quest rewards such as the Weather Radio or the Angler Earring. Additionally, it allows blocks in the Sunken Sea to be mined and enables Sandstorms. |
Crabulon

- For elaborate strategies on defeating Crabulon, including Weapon and Arena recommendations, see Guide:Crabulon strategies.
|
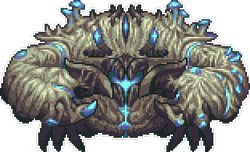
 Crabulon is a mushroom-infested crustacean fought in the Glowing Mushroom biome. It can be summoned by using a Decapodita Sprout while in the Glowing Mushroom biome. While it spawns initially passive, it begins to attack once damaged, jumping and lunging at the player. It fires bursts of mushroom projectiles and summons many Crab Shrooms and walls of mushrooms, which float down in the players direction, as it takes damage. Crabulon drops mushroom-themed weapons and materials related to the Glowing Mushroom biome. |
The Hive Mind

- For elaborate strategies on defeating the Hive Mind, including Weapon and Arena recommendations, see Guide:The Hive Mind strategies.
|
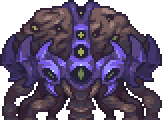
  The Hive Mind is a large, brain-like amalgamation fought in The Corruption. It is summoned by using a Teratoma in The Corruption or by killing a Hive Tumor. For its first phase it is immobile, teleporting from time to time, instead relying on its many corrupt minions to attack the player. After losing 25% of its health, it transitions into its second phase, fully healed and no longer bound to the ground. It now rushes and teleports towards the player, performing special dash attacks while continuing to summon its servants. The Hive Mind drops weapons themed around corruption and the dark, as well as Rotten Matter, which can be used to craft its drops and other items. After defeating it for the first time, Aerialite Ore will generate in Space. |
The Perforators

- For elaborate strategies on defeating the Perforators, including Weapon and Arena recommendations, see Guide:The Perforators strategies.
|
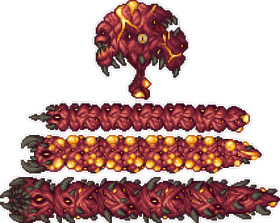
  The Perforators are a trio of fleshy worms, along with a main hive boss, fought in The Crimson. They are summoned by using Bloody Worm Food in The Crimson or by killing a Perforator Cyst. The Perforator Hive floats above the player, firing blood clots and ichor blobs in an upward arc. As it loses health, it will spawn Perforator worms of increasing size and strength. The Perforators drop weapons themed around flesh and blood, as well as Blood Samples, which can be used to craft their drops and other items. After they have been defeated for the first time, Aerialite Ore will generate in Space. |
The Slime God

- For elaborate strategies on defeating the Slime God, including Weapon and Arena recommendations, see Guide:The Slime God strategies.
|
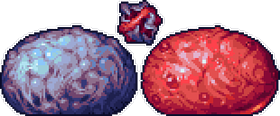
 The Slime God consists of two separate, giant slimes (the Ebonian Paladin and Crimulan Paladin, both the size of King Slime) and a smaller Slime God Core. It is summoned anywhere and at any time with an Overloaded Sludge. The Slime God itself will fly around very quickly, attempting to charge at the player while leaving most of the fighting to its Ebonian and Crimulan Paladin bodyguards. These slimes will perform great jumps towards the player while firing lingering mines, orbs and summoning their own minions. When they reach half health, they will split into smaller, weaker slime gods that will continue to attack. The Slime Gods will get stronger depending on which one is killed first. The Slime God drops weapons themed around slime, The Corruption, and The Crimson, as well as Purified Gel, which can be used to craft its drops and several late Pre-Hardmode items. |
Hardmode Bosses
Cryogen

- For elaborate strategies on defeating Cryogen, including Weapon and Arena recommendations, see Guide:Cryogen strategies.

|
 Cryogen is a crystal of sealed frost magic fought in the Snow biome. It is summoned by using a Cryo Key in the Snow biome. It has many phases that it transitions through as it loses health, each with different methods of attack, from firing a barrage of ice blasts to trying to ram the player, all the while summoning minions to assist it. Cryogen drops ice-themed weapons. Defeating it for the first time will generate Cryonic Ore in the Ice biome and cause the Archmage town NPC to move into an available house. |
Aquatic Scourge

- For elaborate strategies on defeating the Aquatic Scourge, including Weapon and Arena recommendations, see Guide:Aquatic Scourge strategies.
|
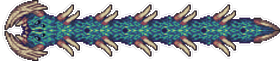
 The Aquatic Scourge is a mutated oceanic scourge fought in the Sulphurous Sea. It spawns naturally, although very rarely, in the Sulphurous Sea biome, and can also be summoned manually with Seafood. It constantly moves towards the player to ram them, both through the ground and through the air. It periodically vomits bursts of many projectiles, from sulphuric water and gas clouds to homing teeth. The Aquatic Scourge drops weapons themed around water and electricity, much like the Desert Scourge to which it is the same species. Defeating it for the first time unlocks the second tier of the Acid Rain event. |
Brimstone Elemental

- For elaborate strategies on defeating the Brimstone Elemental, including Weapon and Arena recommendations, see Guide:Brimstone Elemental strategies.
|
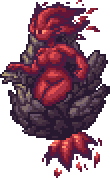
 The Brimstone Elemental is a defiled spirit fought in the Brimstone Crag. She is summoned by using a Charred Idol in the Brimstone Crag biome. She has three different methods of attack which she switches between randomly: teleporting around and leaving behind harmless brimstone eruptions, hovering frantically above the player while shooting fireballs and darts, and encasing herself in highly defensive rose petals while firing blasts of projectiles. She also summons minions called Brimlings that shoot gravity affected brimstone fireballs and follow a similar movement pattern to the Brimstone Elemental's first phase. The Brimstone Elemental drops brimstone-themed weapons and accessories. |
Calamitas Clone

- For elaborate strategies on defeating Calamitas Clone, including Weapon and Arena recommendations, see Guide:Calamitas Clone strategies.
|
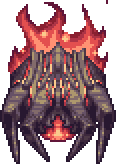
 Calamitas Clone is a large scarlet mechanical eye fought on the surface. She is summoned by using an Eye of Desolation at night. Calamitas Clone behaves much like Retinazer, hovering around the player and firing lasers at them, though her lasers will burst into three fast, homing versions after a short time. Upon reaching 75% of her health, she enrages and begins shooting fireballs. Throughout the fight she summons her brothers Catastrophic Construct and Cataclysmic Construct. The brothers will spit fireballs and spew a flamethrower, respectively, and charge toward the player. Calamitas Clone also spawns a ring of Soul Seekers around her and swarms of Life Seekers at half health. Calamitas Clone drops several calamitous weapons and materials. |
Leviathan and Anahita

- For elaborate strategies on defeating Leviathan and Anahita, including Weapon and Arena recommendations, see Guide:Leviathan and Anahita strategies.
|
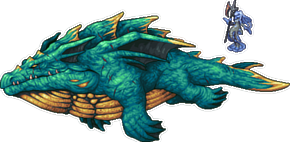
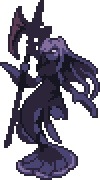 The Leviathan is a colossal aquatic aberration masked by Anahita's amiable appearance. Anahita must be summoned by killing ??? in the Ocean. The Leviathan will appear when Anahita reaches 40% health. Although intended to be fought after defeating Plantera, they can be summoned at any point in the game. Anahita will periodically generate an ice shield to protect herself, while attacking the player with a variety of projectiles. The Leviathan will spend most of her time at the player's side, repeatedly launching meteors and summoning minions, while occasionally charging into the player. If either of them are defeated, the boss left alive will become enraged, increasing the aggressiveness of their attacks. The Leviathan (or Anahita, depending on who is killed last) drops ocean-themed weapons and accessories. |
Astrum Aureus

- For elaborate strategies on defeating Astrum Aureus, including Weapon and Arena recommendations, see Guide:Astrum Aureus strategies.
|
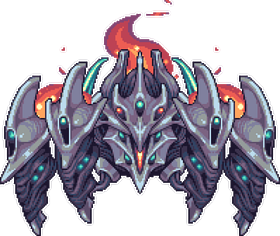
 Astrum Aureus is a massive astral-infected automaton fought in the Astral Infection. It can only be summoned on the Surface Astral Infection at night using an Astral Chunk. It crawls around and occasionally jumps into the air to crush the player. It also fires astral crystals and lasers at varying speeds at the player. Astrum Aureus drops an abundance of Stardust, Fallen Stars and Aureus Cells as well as unlocking several enemy drops in the Astral Infection. Defeating it for the first time unlocks the Astral Chest in the Dungeon. |
The Plaguebringer Goliath

- For more elaborate strategies on defeating the Plaguebringer Goliath, including weapon and arena recommendations, see Guide:The Plaguebringer Goliath strategies.
|
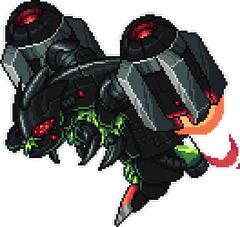
 The Plaguebringer Goliath is a mechanically augmented Queen Bee fought in the Jungle. She is summoned by using an Abombination in the Jungle. Being an infected Queen Bee, she possesses similar attacks, although improved and much more dangerous. Upon reaching half health, The Plaguebringer Goliath will release a Plague Nuke Barrage, launching a multitude of devastating plague missiles in quick succession. She will periodically perform this attack for the rest of the fight. The Plaguebringer Goliath drops plague-themed weapons and Infected Armor Plating. |
Ravager

- For more elaborate strategies on defeating Ravager, including weapon and arena recommendations, see Guide:Ravager strategies.
|
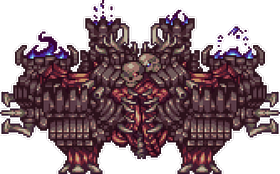
 The Ravager is the walking carcass of a failed ritual consisting of the main boss and its five body parts. It is summoned with the Death Whistle anywhere on the surface. It behaves similarly to the Golem, attempting to jump onto the player and slam back down on them and hit them with its claws. When its claws and feet are destroyed, sparks and fireballs will be shot from the empty sockets. It will also summon large stone pillars, fire-throwing pillars, homing missiles and, after its head is destroyed, bursts of lasers and white bolts in every direction. Each of its five body parts must be destroyed before the body itself can be damaged. The Ravager drops flesh and bone themed weapons and two powerful accessories: The Flesh Totem, which cuts enemy contact damage in half every 15 seconds, and the Blood Pact, which doubles the player's maximum health, but allows them to be critically hit at a 25% chance. The Ravager also drops all ingredients to the Core of Calamity and also all the ingredients to the Life Alloy. After Providence is defeated, all of its stats are buffed, its health raises to 708,325 (947,625 |
Astrum Deus

- For elaborate strategies on defeating Astrum Deus, including Weapon and Arena recommendations, see Guide:Astrum Deus strategies.

|
 Astrum Deus is a spacefaring creature fought anywhere at night. It is summoned by using the Titan Heart or Starcore at the Astral Beacon at night. The worm fires lasers and mines from its segments, and splits into two when under half of its health. In its second phase, defeating either of the worms will end the fight. Astrum Deus drops astral-themed items and an abundance of Lunar Fragments, as well as allowing Astral Ore to be mined. |
Post-Moon Lord Bosses
Profaned Guardians

- For elaborate strategies on defeating the Profaned Guardians, including Weapon and Arena recommendations, see Guide:Profaned Guardians strategies.
|
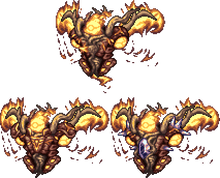
 The Profaned Guardians are three eternal servants to Providence fought either in The Underworld or The Hallow. They are summoned by using a Profaned Shard in either the Underworld or the Hallow during the day. Each of the three entities serve a different role in the fight and possess various attacks, such as charging, shooting fireballs and flares, and firing holy spears. The Profaned Guardians drop the Profaned Core, which is used to summon their Goddess. Each one can also drop a unique usable "Relic" item: Relic of Deliverance, Relic of Resilience, and Relic of Convergence. |
Dragonfolly

- For elaborate strategies on defeating Dragonfolly, including Weapon and Arena recommendations, see Guide:Dragonfolly strategies.
|
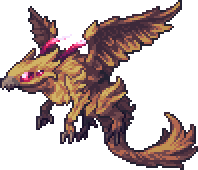
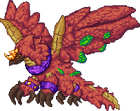
 Dragonfolly is a electrical bird-like dragon fought in the Jungle. It can be summoned using Exotic Pheromones in the Jungle. It attacks by flying around and charging incredibly quickly, launching bursts of electric feathers, birthing copies of itself, and creating sustained pillars of lightning. Dragonfolly drops weapons themed around birds and red lightning, as well as Effulgent Feathers, which are used to craft the Blessed Phoenix Egg and the Silva armor. |
Providence, the Profaned Goddess

- For elaborate strategies on defeating Providence, including Weapon and Arena recommendations, see Guide:Providence, the Profaned Goddess strategies.
|
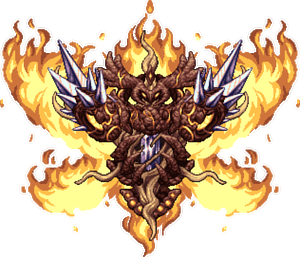
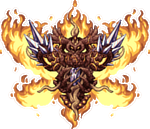
 Providence, the Profaned Goddess is the brutal Goddess of fire and ash fought either in The Underworld or The Hallow. She is the first major Post-Moon Lord boss, and her defeat causes several prior bosses to be buffed. She is summoned in the Hallow or the Underworld using a Profaned Core. She has many dangerous attacks and several different phases, such as hiding in her cocoon while emitting stars and spears, dropping flare bombs on the player, shooting molten globes, and summoning Profaned Guardians. Additionally, she spawns a large crystal above the player or fires a Holy Ray depending on the biome she is spawned in. During the night, her color changes and her attacks become faster and stronger alongside many other changes. Providence drops weapons themed around the profaned flame, and an abundance of Unholy Essence and Divine Geodes. If she is spawned in the Hallow, she will drop the highly mobile Elysian Wings. If she is spawned in the Underworld, she will drop the heavily defensive Elysian Aegis. She will always drop the Rune of Kos, a non-consumable item which is used to summon the Rune of Kos bosses. Uelibloom Ore will generate in Mud Blocks upon her first defeat. |
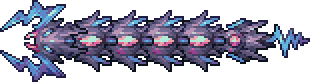
Storm Weaver

- For elaborate strategies on defeating Storm Weaver, including Weapon and Arena recommendations, see Guide:Storm Weaver strategies.
|
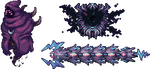
 Storm Weaver is a cosmic worm fought in the sky. It can be summoned by using the Rune of Kos while in the sky. It has two different forms and uses lightning bolts to attack, as well as dashing towards the player in phase 2. Storm Weaver drops Armored Shells, a material used for the Cosmic Worm and several weapons. |
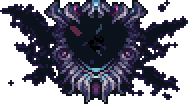
Ceaseless Void

- For elaborate strategies on defeating Ceaseless Void, including Weapon and Arena recommendations, see Guide:Ceaseless Void strategies.
|
Ceaseless Void is a flying dark portal fought in the Dungeon. It can be summoned by using the Rune of Kos while in the dungeon. Its attacks consist of manipulating Dark Energies to orbit it, or pull them towards it in a spiral pattern. Ceaseless Void drops Dark Plasma, a material used for the Cosmic Worm and several weapons. |
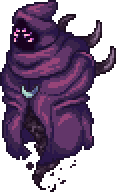
Signus, Envoy of the Devourer

- For elaborate strategies on defeating Signus, including Weapon and Arena recommendations, see Guide:Signus, Envoy of the Devourer strategies.
|
Signus, Envoy of the Devourer is a cosmic wraith fought in The Underworld. It can be summoned by using the Rune of Kos while in the Underworld. It attacks by shooting scythes and Cosmic Mines towards the player, along with spawning Cosmic Lanternas and dashing towards the player. Signus drops Twisting Nethers, a material used for the Cosmic Worm and several weapons. |
Polterghast

- For elaborate strategies on defeating the Polterghast, including Weapon and Arena recommendations, see Guide:Polterghast strategies.

|
 Polterghast is a ravenous ethereal amalgamation fought in the Dungeon. It can be summoned by killing 30 Phantom Spirits or by using the Necroplasmic Beacon in the Dungeon. It has 3 different forms and various attacks from spitting bouncing bolts and mines to trying to ram into the player and hit them with its hooks, all while summoning minions and clones of itself to assist it. Polterghast drops phantoplasmic-themed weapons, as well as Ruinous Souls, which are used to craft the Bloodflare armor. Defeating it causes some Abyss and Sulphurous Sea enemies to drop new items, as well as unlocking the final tier of the Acid Rain event. |
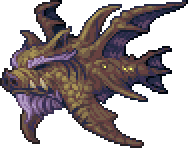
The Old Duke

- For elaborate strategies on defeating The Old Duke, including Weapon and Arena recommendations, see Guide:The Old Duke strategies.
|
 The Old Duke is an old Fishron fought in the Sulphurous Sea. The Old Duke spawns after completing the Acid Rain event or can be summoned by fishing with a Bloodworm. It has 3 phases and multiple attacks, ranging from charging at the player to creating a massive sulphurous vortex. Its main mechanic is accounting for the player's movement before charging, essentially predicting where the player will move towards. The Old Duke drops sulphur-themed weapons. |
The Devourer of Gods

- For elaborate strategies on defeating The Devourer of Gods, including Weapon and Arena recommendations, see Guide:The Devourer of Gods strategies.
|
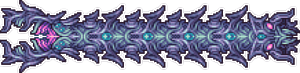
 The Devourer of Gods is an enormous cosmic worm that can be fought anywhere. The Devourer of Gods is a difficult boss, requiring significant preparation before attempting to fight, and causing several changes to the world after its defeat. It is summoned with a Cosmic Worm anywhere at any time. The Devourer of Gods drops cosmic-themed weapons, as well as Cosmilite Bars, a versatile Post-Moon Lord material. After its defeat, the player gains access to Nightmare Fuel, Endothermic Energy, and Darksun Fragments from various now-buffed events. |
Yharon, Dragon of Rebirth

- For elaborate strategies on defeating Yharon, including Weapon and Arena recommendations, see Guide:Yharon, Dragon of Rebirth strategies.
|
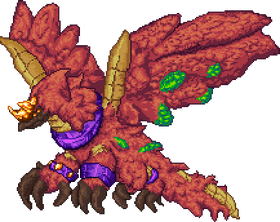
 Yharon, Dragon of Rebirth is an Auric Dragon that can be fought anywhere. He is summoned with a Blessed Phoenix Egg anywhere at any time. Yharon is incredibly powerful and has dozens of attacks and several phases, each harder than the last. Some of his attacks include summoning massive flarenados, ramming at great speeds, and creating many rings of fireballs while flying in quick loops. After defeating his first phase, his second phase begins with Yharon regaining his health, and then assaults the player with a new set of attacks including launching fireballs, creating rings of flares, and charging alongside teleports. Yharon drops weapons themed around dragons and fire. When defeated for the first time, Auric Ore, one of the final crafting materials, will generate underground. |
Exo Mechs

- For elaborate strategies on defeating the Exo Mechs, including Weapon and Arena recommendations, see Guide:Exo Mechs strategies.
|
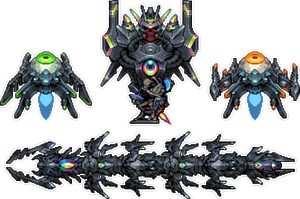
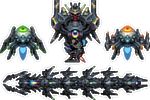
 Draedon is a master blacksmith and scientist, and the player battles against his Exo Mechs: Ares, Apollo, Artemis, and Thanatos. Alongside Calamitas, they are the final bosses of the Calamity Mod, excluding hidden bosses, and are both arguably the hardest enemies to beat in the mod. The Exo Mechs are summoned anywhere by pressing the Contact button on a fully completed Codebreaker. The three Exo Mechs are upgraded versions of the three Mechanical bosses, with similar designs to the originals, but with unique attacks and an intricate fight progression that the player has influence over. Each mech drops their own set of complex mechanical weaponry, as well as Exo Prisms, which are used to craft Draedon's Forge and Miracle Matter, and therefore the ultimate Exo weapons. |
Supreme Witch, Calamitas

- For elaborate strategies on defeating Supreme Witch, Calamitas, including Weapon and Arena recommendations, see Guide:Supreme Witch, Calamitas strategies.

|
 Supreme Witch, Calamitas is an incredibly powerful brimstone witch. Alongside Draedon and the Exo Mechs, she is the final boss of the Calamity Mod, excluding hidden bosses. She is summoned at an Altar of the Accursed at any time with Ashes of Calamity or Ceremonial Urn in the player's inventory. Calamitas' attacks are primarily enormous waves or floods of projectiles which are very difficult to dodge, which become more chaotic and introduce more elements as the fight progresses. She also summons servants to aid her, such as her brothers, Soul Seekers, and Sepulcher. She drops royal items themed around hatred and the occult, as well as the Ashes of Annihilation crafting material, which are used alongside Exo Prisms to craft Shadowspec Bars, the final crafting material. After her defeat, Calamitas will also spawn as the Brimstone Witch town NPC, allowing the player to utilize the Enchantment system to significantly modify or even transform their items. |
Hidden Boss
A hidden boss is a boss that is not intended to be fought by the player as part of normal progression, and its existence is not readily apparent to the average player. As such, it is excluded from mods such as Boss Checklist, and the player will receive minimal unique rewards for defeating it.
Primordial Wyrm

|
 The Primordial Wyrm is a hidden boss fought deep within the Abyss. It is one of the hidden bosses in the Calamity Mod. It drops the Halibut Cannon, an extremely powerful endgame gun, alongside the Eidolon Wyrm's loot. |
XB-∞ Hekate

|
 XB-∞ Hekate is a joke hidden boss exclusive to the Get fixed boi seed. It is one of the three hidden bosses exclusive to the seed, and serves as an alternative route to Exo Mechs. It drops Exo Mechs normal loot along with Pot of Pain, a food item that inflicts various fire debuffs. |
Supreme Alchemist, Cirrus

|
 Supreme Alchemist, Cirrus is a joke hidden boss exclusive to the Get fixed boi seed. She is one of the three hidden bosses exclusive to the seed and serves as an alternative route to Supreme Witch, Calamitas. She drops the normal loot of Supreme Witch, Calamitas, along with Alicorn on a Stick. |
THE LORDE

|
 THE LORDE is a joke hidden boss exclusive to the Get fixed boi seed. It is one of the three hidden bosses exclusive to the seed, and utilizes the various Boss AIs throughout the game. Its only unique drop is the Suspicious Looking NO U, a light pet item. |
Mini Bosses
Mini bosses, also spelled mini-bosses or minibosses, are powerful enemies that do not fit the criteria for being a boss — having no dedicated music, typically spawning naturally and more commonly, and having generally weaker stats than most bosses — but still cause the boss health bar to appear and are a greater challenge for the player to defeat than most normal enemies.
Mini bosses almost always drop weapons, accessories, or valuable materials upon defeat.
Giant Clam
|
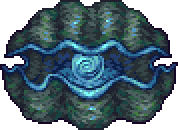
The Giant Clam is a large clam mini-boss fought in the Sunken Sea. It makes nearby Clams aggressive and attacks by teleporting on top of the player and closing its shell, spawning additional Clams. In Hardmode, it gains additional attacks utilizing psychic pearls. It can be found uncommonly in the Sunken Sea. It drops Navystone, the Amidias' Pendant and the Giant Pearl in Pre-Hardmode, as well as causing the Sea King town NPC to move in if he is not already present in the world. In Hardmode, it additionally drops Mollusk Husks, the Poseidon, the Clamor Rifle, the Shellfish Staff, and the Clam Crusher. |
Earth Elemental
|
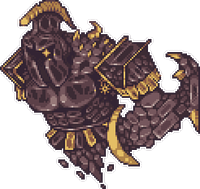
The Earth Elemental is a large armored earth-based mini-boss fought in the Cavern layer. It travels through blocks, floating directly at the player to deal contact damage. It also fires bursts of rock projectiles at the player. It will appear rarely in the Cavern layer during Hardmode, often ambushing unsuspecting players. It drops the Aftershock, Slag Magnum and Earthen Pike. |
Cloud Elemental
|
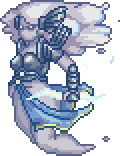
The Cloud Elemental is a well-armored air-based mini-boss fought in Space. She possesses several storm-themed attacks, including summoning tornadoes, Angry Nimbi, and lightning clouds, as well as teleportation and charging at the player. She can be found rarely in Space during Hardmode while it is raining, near Floating Islands. She drops the Eye of the Storm, which summons a friendly cloud elemental and can be crafted into the Heart of the Elements, as well as the Storm Saber. |
Cragmaw Mire
 
|
The Cragmaw Mire is a sulphuric shell-like mini-boss that spawns during the Acid Rain Event after Aquatic Scourge is defeated. It fires lasers and bubbles. In the 3rd Tier, it gains a 2nd phase where it fires teeth at the player and pulls them towards it with a tether. It drops the Spent Fuel Container and the Nuclear Fuel Rod. |
Armored Digger

|
The Armored Digger is a steel worm mini-boss that spawns in the cavern layer after Plantera has been defeated. It attacks by charging at the player and turning, akin to The Destroyer. It also fires small yellow projectiles from its segments, which fall and linger on the ground. It drops Demonic Bone Ash, Dubious Plating, and Mysterious Circuitry. |
Great Sand Shark
|
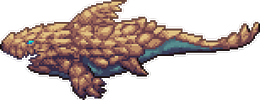
 The Great Sand Shark is a vicious Sandstorm shark mini-boss fought in the Desert. It swims through the sand and leaps out to attack the player with special movements, while summoning Sand Sharks to assist it. It either spawns after killing 10 Sand Sharks, or is summoned by using a Sandstorm's Core in the Desert. It drops a Grand Scale, which can be used to craft powerful upgrades to previous weapons. |
Plaguebringer
|
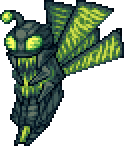
The Plaguebringer is a bio-mechanical bee mini-boss fought in the Jungle. It acts very similar to Queen Bee, cycling between a horizontal ram and shooting stingers from above while spawning Plague Chargers. It appears randomly in the Jungle after Golem has been defeated, making the area quite hazardous to inhabit until the player acquires stronger gear. It drops an abundance of Plague Cell Canisters, which can be crafted into several plague-related items. It also occasionally drops the Plagued Fuel Pack, a rogue-based accessory. |
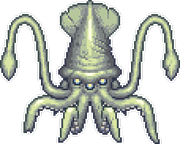
Colossal Squid
|
The Colossal Squid is an enormous cephalopodic mini-boss fought in the Abyss. It is passive at first, only attacking the player if they get too close or deal damage to it. Once aggressive, it attempts to float onto the player and crush them underneath itself or shoot ink bombs. It appears in the third layer of the Abyss. It drops lots of Black Ink, as well as the Calamari's Lament after Polterghast has been defeated. |
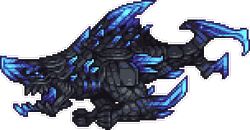
Reaper Shark
|
The Reaper Shark is a brutal yet stealthy mini-boss fought in the Abyss. It is passive at first, only attacking the player if they get too close or deal damage to it. Once aggressive, it swims towards the player, being able to pass through blocks, and also charges them occasionally. It appears in the two lowest layers of the Abyss. After Polterghast has been defeated, it drops the Valediction, Deep Sea Dumbbell, and Reaper Teeth, along with Anechoic Coating. |
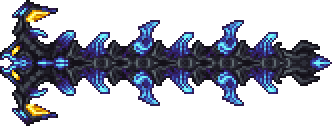
Eidolon Wyrm
|
The Eidolon Wyrm is a large ghostly serpent mini-boss fought in the Abyss. They initially float nearby the player and deal no damage, but will become hostile if attacked. They attack by dealing contact damage with their heads. It appears in two lowest layers of the Abyss. They drop an abundance of Lumenyl, Ectoplasm and Voidstone, as well as the Soul Edge, the Eidolic Wail and the Eidolon Staff after Polterghast has been defeated. |
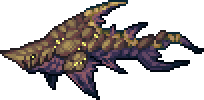
Mauler
|
The Mauler is a mutant shark mini-boss fought during the Acid Rain event after Polterghast has been defeated. It is passive at first, only attacking the player if they get too close or deal damage to it. Once aggressive, it swims extremely fast towards the player while shooting sulphuric mist at them. It also explodes if it is out of the water for too long. It drops several Shark Fins, as well as the Sulphuric Acid Cannon. |
Nuclear Terror
|
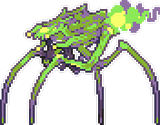
The Nuclear Terror is a radioactive crustacean-like mini-boss fought during the Acid Rain event after Polterghast has been defeated. It attacks the player by teleporting and firing barrages of irradiated shots. It drops the Phosphorescent Gauntlet and the Gamma Heart. |
Vanilla Boss Additions
The Calamity Mod adds several differences to vanilla bosses ranging from drops to behavior in other difficulty modes.
Resistances
The Calamity Mod also modifies the amount of damage certain projectiles do to certain bosses.
- Creepers take 50% damage from Demon Scythe and true melee damage.
- Eater of Worlds takes 50% damage from Demon Scythe and true melee damage. It also takes 60% damage from Sky Glaze.
- The Destroyer takes 50% damage from Dormant Brimseeker minion and true melee damage.
- The Lunatic Cultist takes 75% damage from the Resurrection Butterfly.
- Duke Fishron takes 135% damage from the Resurrection Butterfly.
- Moon Lord's Core takes 10% damage from True Biome Blade's Mercurial Tides attunement.
Boss Progression




.png)







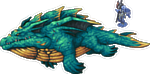
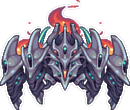


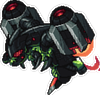

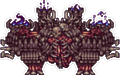







Boss Summoning Items
The Calamity Mod changes most vanilla boss summoning items to be non-consumable: Slime Crown, Suspicious Looking Eye, Worm Food, Bloody Spine, Abeemination, Deer Thing, Gelatin Crystal, Mechanical Eye, Mechanical Worm, Mechanical Skull, and Celestial Sigil.
Calamity adds three additional summoning items for vanilla bosses: Portabulb for Plantera, Old Power Cell as a reusable summon for Golem, and Eidolon Tablet for Lunatic Cultist. Recipes for the Guide Voodoo Doll, Gelatin Crystal, Lihzahrd Power Cell, and Truffle Worm are also added.
Some boss summoning items are sold by Town NPCs after certain points in the game.
| NPC | Item | Price | Availability | |
|---|---|---|---|---|
 Sea King Sea King
|
 |
Truffle Worm | 10 
|
In Hardmode. |
|
Bloodworm | 2 
|
After defeating The Old Duke. | |
 Drunk Princess Drunk Princess
|
 |
Prismatic Lacewing | 10
|
After defeating Plantera. |
See Also
History
- 1.4.3.001:
- Nerfed the damage of the following Thorium Mod bosses in Revengeance and Death Mode:
- Nerfed The Grand Thunder Bird's contact damage from 20 / 30
 / 37
/ 37  / 43
/ 43  to 20 / 30 / 37 / 42 .
 - Nerfed The Grand Thunder Bird's lightning barrage damage from 40 / 80 / 100 / 114 to 40 / 80 / 100 / 112 .
- Nerfed The Grand Thunder Bird's lightning shot damage from 30 / 60 / 75 / 86 to 30 / 60 / 75 / 84 .
- Nerfed The Grand Thunder Bird's tornado damage from 40 / 50 / 57 to 40 / 50 / 56 .
- Nerfed Queen Jellyfish's damage from 25 / 50 / 62 / 71 to 25 / 50 / 62 / 70 .
- Nerfed Viscount's damage from 30 / 60 / 75 / 86 to 30 / 60 / 72 / 79 .
- Nerfed Granite Energy Storm's damage from 35 / 70 / 87 / 100 to 35 / 70 / 84 / 92 .
- Nerfed The Buried Champion's damage from 35 / 70 / 87 / 100 to 35 / 70 / 84 / 92 .
- Nerfed The Star Scouter's damage from 40 / 80 / 100 / 114 to 40 / 80 / 96 / 105 .
- Nerfed Borean Strider's contact damage from 55 / 110 / 137 / 158 to 55 / 110 / 132 / 145 .
- Nerfed Borean Strider's projectile damage from 55 / 110 / 137 / 158 to 55 / 110 / 126 / 136 .
- Nerfed Borean Myte's projectile damage from 40 / 80 / 100 / 114 to 40 / 80 / 92 / 99 .
- Nerfed Coznix, The Fallen Beholder's damage from 50 / 75 / 93 / 107 to 50 / 75 / 86 / 93 .
- Nerfed The Lich's first phase damage from 90 / 180 / 225 / 258 to 90 / 180 / 206 / 223 .
- Nerfed The Lich's second phase damage from 120 / 240 / 300 / 345 to 120 / 240 / 276 / 297 .
- Nerfed Abyssion, The Forgotten One's damage from 60 / 120 / 150 / 172 to 60 / 120 / 138 / 148 .
- Nerfed Aquaius, the Endless Tide's damage from 60 / 120 / 150 / 172 to 60 / 120 / 138 / 148 .
- Nerfed Omnicide, the Life Defiler's damage from 100 / 200 / 250 / 287 to 100 / 200 / 229 / 248 .
- Nerfed Slag Fury, the Primordial Flame's damage from 60 / 120 / 150 / 172 to 60 / 120 / 138 / 148 .
- Nerfed Dying Reality, the Ragnarök's damage from 100 / 200 / 250 / 287 to 100 / 200 / 229 / 248 .
- Nerfed The Grand Thunder Bird's contact damage from 20 / 30
- Nerfed the damage of the following Thorium Mod bosses in Revengeance and Death Mode:
- 1.1.7.901: Bosses from the Thorium Mod are no longer granted immunity to Armor Crunch, Glacial State, and Temporal Sadness.
- 1.1.7.804: Fixed bosses not registering on the Boss Checklist mod's Boss Checklist.
- 1.1.7.5: Added Boss Checklist support for Calamity Bosses.
- 1.1.7.2:
- Buffed Abyssion, The Forgotten One from Thorium Mod's Prepare to Die (Demon Trophy) health and contact damage boosts from 8000 and 60 to 38,000 and 130 respectively, and buffed his Prepare to Die (Celestial Onion) health and damage boosts from 4000 and 40 to 15,000 and 90 respectively.
- Fixed Abyssion, the Forgotten One not being affected by Prepare to Die modes or its added immunities to Armor Crunch, Glacial State, and Temporal Sadness.
- 1.1.7:
- Buffed Abyssion, The Forgotten One from Thorium Mod's Prepare to Die/Cry mode health boost from 16,000 to 26,000.
- Fixed Abyssion, The Forgotten One not being affected by Prepare to Cry mode.
- 1.1.6.17: Made all bosses from the Thorium mod immune to Armor Crunch.
Characters: Enemies (List):  Pre-Hardmode • Pre-Hardmode •  Hardmode • Hardmode •  Post-Moon Lord • Post-Moon Lord •  Event Enemies • Event Enemies •  Bosses • Bosses •  Critters • Critters •  Friendly NPCs Friendly NPCs | ||||||||||||||||||||||||||||||||||||||||||||||||||||||||||||||||||||||||||||||||||||||||||||||||||||||||||||
|---|---|---|---|---|---|---|---|---|---|---|---|---|---|---|---|---|---|---|---|---|---|---|---|---|---|---|---|---|---|---|---|---|---|---|---|---|---|---|---|---|---|---|---|---|---|---|---|---|---|---|---|---|---|---|---|---|---|---|---|---|---|---|---|---|---|---|---|---|---|---|---|---|---|---|---|---|---|---|---|---|---|---|---|---|---|---|---|---|---|---|---|---|---|---|---|---|---|---|---|---|---|---|---|---|---|---|---|---|
| ||||||||||||||||||||||||||||||||||||||||||||||||||||||||||||||||||||||||||||||||||||||||||||||||||||||||||||