Yharon, Dragon of Rebirth
| Type | Boss |
|---|---|
| Environment | Jungle |
| Damage | 300 / 520 |
| Max Life | 1,302,000 / 2,083,200 |
| Defense | 90 |
| DR | 22% |
| KB Resist | 100% |
| Inflicts debuff | 100% chance |
| Debuff duration | 4 seconds (All projectiles except Flarenado and Infernado) 6 seconds (Flarenado) 8 seconds (Contact) 10 seconds (Infernado) |
| Debuff tooltip | Engulfed by roaring flames |
| Immune to |
| Coins | 10 |
|---|
- Item (Quantity)Rate
 Yharon Soul Fragment (25-30 / 30-35
  )100%
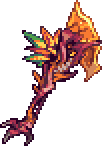
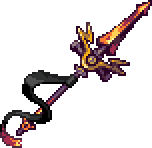
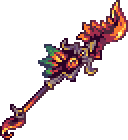
)100%- At least one of the following 8 weapons will always drop:
- 25% / 33.33%
- 25% / 33.33%
- 25% / 33.33%
- 25% / 33.33%
- 25% / 33.33%
- 25% / 33.33%
- 25% / 33.33%
- 25% / 33.33%
- 100%
- 100%
- 10%
 Omega Healing Potion (5-15)100%
- 10%
- 10%
- 14.29%
- 10%
- Jungle Dragon, Yharon (Lore)Jungle Dragon, Yharon (Lore)(Always on first kill)100%
- Treasure Bag (Jungle Dragon, Yharon)Treasure Bag(Jungle Dragon, Yharon)
- •
 Fox Drive(In Revengeance Mode only)
100% - •
 Yharon Relic(In Master or Revengeance Mode only)100%
 / 100%


.png)
.png)
“The loyal guardian of the Tyrant King
Jungle Dragon, Yharon is a major boss fought in the Jungle. He is intended to be fought after The Devourer of Gods. The player should be well equipped and prepared before summoning him as the boss is incredibly challenging.
Defeating Yharon will provide the player with Yharon Soul Fragments and generate Auric Ore in the world, granting the player access to one of the highest tiers of equipment.
Spawn
Yharon does not spawn on his own, and requires the player to summon him by using the Jungle Dragon Egg while in the Jungle.
Behavior
Yharon is incredibly fast and deadly, almost always charging the player at high speeds, dealing an extreme amount of contact damage. Between these charges, he will also perform a plethora of other deadly attacks, from firing a variety of projectiles, summoning many lingering Flarenadoes and Infernadoes, and spawning several minions to fight alongside him.
At the start of the fight, Yharon will summon two massive stationary flame pillars 218.75 / 187.5 ![]() blocks to the left and right of the player (measured from their centers) to serve as arena borders; Hence, the pillars will not be perfectly centered on the player's current position. Touching the flame pillars will deal massive damage, and successfully leaving the arena or flying above Yharon's designated enrage height (660 blocks high) will cause Yharon to become enraged, which massively increases his speed and quintuples his damage until the player returns.
blocks to the left and right of the player (measured from their centers) to serve as arena borders; Hence, the pillars will not be perfectly centered on the player's current position. Touching the flame pillars will deal massive damage, and successfully leaving the arena or flying above Yharon's designated enrage height (660 blocks high) will cause Yharon to become enraged, which massively increases his speed and quintuples his damage until the player returns.
Yharon's charging speed is adjusted based on his distance from the player, meaning that he is difficult to outrun and he can quickly approach the player from anywhere in the world.
Attacks
Phase 1
Subphase 1
- Charges twice consecutively.
- Spawns a line of FlareBombFlare Bombs which start slow, but rapidly accelerate and home in on the player, however cannot turn very well.
- Charges once, and does a fast charge, in which he goes twice as fast and far.
- Yharon will remain stationary for a second and roar before he performs his fast charges. During this telegraph he gains 40% damage reduction.
- Creates two
 Flare Tornado projectiles, which fall to the ground diagonally away from him. Upon contact with a tile or after not hitting a tile for a second, a large Flarenado is spawned.
 - Upon reaching 75% / 85% / 90% health, Yharon transitions to his second subphase.
Subphase 2
- Charges twice, waits, and then once quickly.
- Teleports above the player and turns into a ball of fire, shooting FlareDustFlare Dusts out in a bullet-hell style circle pattern, with random openings of various sizes.
- Yharon cannot deal contact damage or be harmed during this attack, but will lose a small percentage of his maximum HP when using it. This percentage decreases as Yharon nears death.
- Waits for 3 seconds after the flare dust rings and then does 2 slow charges at the player.
- Flies in a loop, creating a ring of FlareDust2Homing Flare Dusts that seek toward the player's initial position after a long delay.
- Creates a BigFlareBig Flare Tornado which homes in on the player. Upon contact, a massive Infernado appears at the player's position.
- Upon reaching 62.5% / 70% / 75% / 80%
 health, Yharon transitions to his third subphase.
Subphase 3
- Charges once normally and then twice quickly.
- Flies in a loop, creating a ring of Homing Flare Dusts that seek toward the player's initial position after a long delay.
- Spawns a line of flare bombs, which fly towards the player, attempting to deal damage by ramming them or shooting giga flares, in the flame's cases.
- Does one normal, then one fast charge.
- Creates a homing Flare Tornado, which spawns a Flarenado upon impact.
- Teleports near the player, and flies repeatedly in a circle, shooting flare dusts out in a different bullet-hell style star-shaped pattern.
- Upon reaching 55% health, Yharon transitions to his second phase.
Phase 2
"The air is getting warmer around you."
- Infernados in this phase are smaller and last for a longer amount of time.
Subphase 4
- Summons a BigFlareBig Flare Tornado that homes in on the player.
- Charges twice normally again before flying horizontally while releasing a wall of Homing Flare Dusts that seek toward the player's initial position after a long delay.
- Charges twice quickly before flying horizontally while firing several gravity-affected YharonFireballYharon Fireballs that, after falling for long enough or upon contact with tiles, quickly launch three Yharon Fireballs into the air that rain back down. These resulting Yharon Fireballs do not split.
- Charges twice normally once more and then flies in a loop, doing the flare dust bullet hell.
- Upon reaching 27.5% / 38.5% / 44% health, Yharon transitions to his fifth subphase.
Subphase 5
- Uses several fast charges in place of the short charges.
- The flare dust bullet hells and the wall of homing flare dust are switched in his attack pattern.
- Upon reaching 13.8% / 22% / 27.5% / 35.8% health, Yharon transitions to his sixth subphase.
Subphase 6
- The flare dust rings are now in the star-shape seen in subphase 3
- Similar to previous subphases with the new inclusion of teleports that occur right before a fast charge.
- All charges in the subphase are fast.
When Yharon is killed, a large ring of FlareDust2Flare Bombs is released at his death point. These travel outward before detonating after a few seconds to allow safe retrieval of Yharon's loot.
In Expert Mode
- Yharon gains an attack at the beginning of subphase 4, 5, and 6, in which he spawns 3 massive rings of flare dust that home in on the player after 3 seconds.
- Yharon switches between his attacks at a faster rate.
- Yharon transitions into subphase 2 at 70% health, and subphase 3 at 40% health.
- Yharon transitions into subphase 5 at 70% health, and subphase 6 at 40% health.
- Yharon's charges are faster and done in much faster succession.
In Revengeance Mode
- Yharon gains a new subphase when below 11% / 16.5% health:
- Teleports to one side of the player, then does 2 fast charges, with both having a shorter telegraph.
- Teleports near the player and does the flare dust bullet hell, and waits for 3 seconds before repeating.
- All attacks deal 10% more damage.
- The spawning position and the border pillars spawn 187.5 blocks away from the starting position.
- Yharon transitions into subphase 2 at 90% health, and subphase 3 at 75% health.
- Yharon transitions into subphase 5 at 44% health and subphase 6 at 27.5% health.
- Charges and teleports closer to the player.
In Death Mode
- Yharon has decreased delays between attacks.
- Most of Yharon's slow charges are replaced with fast charges.
- Yharon spawns in subphase 2, and in subphase 5 after Phase 2 begins.
- Yharon transitions into subphase 3 at 80% health.
- Yharon transitions into subphase 6 at 35.8% health and subphase 7 at 16.5% health.
- Yharon launches more fireballs during his second phase.
- Summons more Infernadoes in place of Flarenadoes.
On the For the worthy seed
- Border pillars spawn 62.5 tiles away from the starting position.
- Idles for half as much time.
Aftermath
- Auric Ore generates in the Cavern layer.
- Titanium Crates now have a chance of containing Auric Ore.
- The Murasama can be used properly.
- The Bandit will begin selling Dragon Scales.
Notes
- Yharon's enrage works differently from other bosses, as it is pre-determined from where the player stands when using the Jungle Dragon Egg.
- Yharon gains 49% DR during any of his phase transitions.
- If Yharon is enraged and not on screen in his second phase, he will despawn in exactly 2.5 seconds.
- Flarenadoes and Infernadoes will not deal damage for a short period after spawning, to prevent cheap hits on the player.
- While Yharon is alive, the world is colored deeply with orange. This will only happen if the Lighting option in the Settings Menu is set to "Color" or "White".
- Although The Dragonfolly and Yharon are intended to be fought after Moon Lord, the recipes for both the Jungle Dragon Egg and the Exotic Pheromones are technically available at the end of Hardmode after defeating Lunatic Cultist and the Solar Pillar, and do not require Moon Lord to be defeated. This means that it is possible to fight The Dragonfolly and Yharon before Moon Lord, although it would be very difficult.
Tips
- For more elaborate strategies on defeating Yharon, including weapon and arena recommendations, see Guide:Jungle Dragon, Yharon strategies.
- Always be cautious when moving horizontally, as the arena flame pillars will instantly kill the player without warning.
- It is advisable to put up solid blocks in front of the pillars to prevent accidentally contacting them. Because the places of the pillars are measured from their bottom-left corners, the actual block to summon Yharon is not in the center of the arena. The arena should have a height of 660 blocks and a width of 311 / 253 blocks. The block to summon Yharon needs to be the 128th / 100th block from the left wall. This will ensure the player never touches the pillars.
- It is advisable to put up solid blocks in front of the pillars to prevent accidentally contacting them. Because the places of the pillars are measured from their bottom-left corners, the actual block to summon Yharon is not in the center of the arena. The arena should have a height of 660 blocks and a width of 311 / 253
- A good tactic to avoid Flarenadoes is to fly to the edge of the arena and let the Detonating Flames hit you, dealing no damage to you and forcing the Flarenado to spawn out of the way of the fight.
- Using a dash accessory that deals damage, such as the Elysian Aegis or Asgardian Aegis, can be very vital against Yharon when he's charging as he will take damage and deal no contact damage when the player is dashing.
- The Rod of Discord or Normality Relocator are great tools to use during the fight to avoid the flarenados and some of his attacks.
Trivia
- The
 Bestiary entry for Yharon, Dragon of Rebirth: "Each dragon once wielded nigh limitless power over their domain, a fundamental power drawn directly from the world's fragmented soul. The dragons were masters of all; life, death, even the great Primordial Light that banishes the eternal night beyond. And yet, one of these majestic beings reached a height of power possibly second only to their king. He who made his kind eternal through his powers of Rebirth... and yet, even eternity did not last."
- Yharon's first phase theme is Infernal Catharsis (Rebirth) which was composed by the artist DM DOKURO.
- This theme is a remake of the original theme, Infernal Catharsis, which played after the player defeated a buffed Mothron in the Solar Eclipse before 1.5.0.001 and is now Music Box exclusive.
- Infernal Catharsis is the only theme that is not on DM DOKURO's official album, due to it being replaced by Rebirth.
- If the Calamity Music add-on mod is disabled, Boss 3 will play instead.
- Prior to the release of the original Infernal Catharsis, Yharon's theme was Kyurem's theme from the game Pokémon Super Mystery Dungeon.
- This theme is a remake of the original theme, Infernal Catharsis, which played after the player defeated a buffed Mothron in the Solar Eclipse before 1.5.0.001 and is now Music Box exclusive.
- Yharon's second phase theme is Roar of the Jungle Dragon, which was also composed by DM DOKURO.
- This song contains full lyrics sung by DM DOKURO himself. The song is a warning from Yharon to his master, Yharim, about the strength and unstoppability of the player character. However, the song's lyrics are considered non-canonical to the mod's official lore.
- If the Calamity Music add-on mod is disabled, the Moon Lord's theme will play instead.
- The firewall borders in the fight are based on an attack used by Senator Armstrong from the game Metal Gear Rising: Revengeance.
- Yharon's design took heavy inspiration from Falzar from the Mega Man Battle Network series.
- Yharon was previously known as "Jungle Phoenix, Yharon".
- Yharon used to have a 4th subphase in phase 1, however this was removed in update 1.4.5.001.
- Yharon can be fought before fighting any other post-Moon Lord bosses, as the Jungle Dragon Egg's recipe requires no post-Moon Lord materials except for Effulgent Feathers.
- The Dragonfolly is a failed clone of Yharon.
- Before 1.5.0.001, Yharon had to be fought on two different occasions. on the first fight, he would fly away at 10% health and buff Solar Eclipses (which are now buffed post-Devourer of Gods). on the second fight, Yharon would reach 10% health and regenerate back to 90% health, in which the second phase began.
- Yharon would use Infernal Catharsis (Rebirth) as his theme during the first fight, and the original Infernal Catharsis would play during phase 1 of the second fight. He still used Roar of the Jungle Dragon as his second phase theme.
- Auric Ore would only generate after defeating the second phase.
- If the Boss Checklist Mod is installed, his unique despawn message will be "Yharon found you too weak to stay near your gravestone."
See also
- Dragon God, Yharon, a removed future variant of this boss.