Revengeance Mode/Boss AI Changes
| Boss | AI changes | |||||||||||||||||||||||||||||||||||||||
|---|---|---|---|---|---|---|---|---|---|---|---|---|---|---|---|---|---|---|---|---|---|---|---|---|---|---|---|---|---|---|---|---|---|---|---|---|---|---|---|---|
King Slime
| ||||||||||||||||||||||||||||||||||||||||
|
King Slime behaves similarly to a slime, performing a high leap every 4 jumps. All jumps are boosted relative to the vertical distance between the slime and the player, increasing his jump speed and height by 3.2% every block and capping at a 100% bonus. The delay between jumps will reduce when his health drops below 80%, 60%, 40%, 20%, and 10%. Additionally, King Slime will occasionally teleport regardless of condition and at a faster rate. He will teleport more often if the player is hidden behind solid tiles, or is at least 20 blocks above him. He will also teleport closer to the player, and will always teleport in front of them, as well as gaining the ability to teleport mid-air if the player is high above the ground. When 5% of his health is lost, the next hit from the player will spawn 2-3 slimes from King Slime. The following slimes can drop from the boss: Spiked Slimes are twice as likely to be dropped. During the rain, Umbrella Slimes have a 10% chance to replace any of the above slimes. Umbrella Slimes have a 20% chance to be replaced with a Rainbow Slime while in Hardmode. Pinky can also replace the other slimes with a 1% chance. When King Slime drops to 75% of his health, he jumps farther and Spiked Slimes become four times as likely to be dropped compared to the other slimes. When King Slime drops to 50% of his health, he summons a
| ||||||||||||||||||||||||||||||||||||||||
| Desert Scourge | ||||||||||||||||||||||||||||||||||||||||
| ||||||||||||||||||||||||||||||||||||||||
Eye of Cthulhu
| ||||||||||||||||||||||||||||||||||||||||
|
The Eye of Cthulhu has two phases and 4 sub-phases during phase 2, it can fly through blocks in all of these. Phase 1It attempts to float directly above the player, while spawning 3–4 Servants of Cthulhu which drop Mana Stars on death. Afterward, it charges at the player three times in succession, before repeating the cycle. Phase 2Upon reaching 75% health, the Eye will transform into its second phase. When this happens, it will spawn 4-5 Servants of Cthulhu. In phase 2 its defense will drop to 0, but its contact damage will increase to 48. In this phase it will do 3 normal dashes towards the player with a small break between each set of 3. Upon reaching 65% health, it gains a rapid chain dash attack. During this subphase it will do 3 normal dashes and then 2-4 rapid chain dashes with a short delay before it repeats. Upon reaching 55% health, it will no longer do normal dashes and instead does 5 rapid chain ones. Upon reaching 40% health, it gains another new attack, a long horizontal dash which spawns many Servants of Cthulhu. During this phase it will do 4-6 rapid dashes and then a horizontal one.
| ||||||||||||||||||||||||||||||||||||||||
Crabulon
| ||||||||||||||||||||||||||||||||||||||||
| ||||||||||||||||||||||||||||||||||||||||
| Eater of Worlds | ||||||||||||||||||||||||||||||||||||||||
|
Segment count increased from 72 in Expert Mode to 79. The Eater of Worlds will try to hit the player directly with its head segment, only stopping to turn around once it has gone past them. The body segments and tail will follow behind the head, with a body segment becoming a head if the Eater of Worlds is split and there are at least 2 segments, as that is the minimum length an Eater of Worlds can be. If the Eater of Worlds splits into multiple worms, each one will act the same as a fully connected version, meaning that they will all attack the player with no regard for each other. All segments share some characteristics:
The Head segment of an Eater of Worlds has the lowest defense and health but the most damage. They also have the ability to shoot Cursed Flames once there are 59 segments remaining. They retain their previous momentum if they have just been transformed from a body segment. The Body segment of an Eater of Worlds is a middle ground of defense and attack between the Head and the Tail. They can also turn into a Head segment if they become the front segment of a Worm, or a Tail segment if they become the back segment of a Worm. The Tail segment of an Eater of Worlds is the most resistant to damage but also deals the least damage. When fought in the Underground Corruption, the Eater of Worlds will be less aggressive. However, when taken out of the Corruption it will enrage and continuously fly towards the player. Unlike in lower difficulties, individual segments do not drop Demonite Ores or Shadow Scales when killed.
| ||||||||||||||||||||||||||||||||||||||||
Brain of Cthulhu
| ||||||||||||||||||||||||||||||||||||||||
|
The Brain of Cthulhu has two phases in Revengeance and Death Mode. This page will not be covering Normal or Expert Modes for the Brain of Cthulhu. If the Brain of Cthulhu is led outside of the Crimson, it will enrage, causing both the Brain and its Creepers to become much faster. It is less aggressive when fought in the Underground Crimson. The Brain and the Creepers are capable of inflicting multiple debuffs upon contact damage.
Phase 1In the first phase of the fight, the Brain itself is invulnerable but will still have contact damage, there will be 25 Creepers that spawn alongside the brain, which must be killed to progress the fight. During this phase the Brain will teleport around the player at an increasing rate as Creepers are killed. It will also move towards the player after teleporting, getting faster the more Creepers are killed. Unlike in lower difficulties, Creepers do not drop Crimtane Ores or Tissue Samples when killed. Phase 2Once the Brain's Creepers have all been killed, the Brain transitions into phase 2 and become vulnerable to damage. During Phase 2, the Brain will continue to teleport around the player and move towards them at an increased speed. There will also be 3 mirror images around the player that will mimic the Brain's movement. They start somewhat transparent but become more opaque as the Brain loses health, making it harder to tell which is the real one. At 30% health the Brain will switch to another attack, where it will fly around the player in a quick loop before dashing towards them before teleporting.
| ||||||||||||||||||||||||||||||||||||||||
The Hive Mind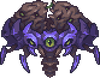
| ||||||||||||||||||||||||||||||||||||||||
| ||||||||||||||||||||||||||||||||||||||||
The Perforators
| ||||||||||||||||||||||||||||||||||||||||
| ||||||||||||||||||||||||||||||||||||||||
Queen Bee
| ||||||||||||||||||||||||||||||||||||||||
|
Queen Bee has two main attacks: charges and stinger attacks. Her minions, Bees and Hornets, can also be problematic to deal with. Queen Bee will attack the player faster the lower her health is. She will enrage when fought on the surface. When starting the fight, Queen Bee will immediately charge at the player horizontally three times, while becoming level with the player's current elevation. She will then fly above the player, keeping a certain height above them even if they go up towards her. While above the player, the Queen Bee will fire stingers at them, periodically stopping to summon Bees. After a certain interval, she will begin the cycle again by charging the player. Her attacks will increase in speed as she loses more health. When reaching 33% health, she will charge at the player four times instead of three and at a higher speed.
| ||||||||||||||||||||||||||||||||||||||||
Skeletron
| ||||||||||||||||||||||||||||||||||||||||
|
Skeletron is made up of three segments, two hands and a head, all of which can go through blocks. The head is the only segment that must be destroyed to defeat the boss, however each hand alive will give the head maximum damage reduction, and while either is still alive the head will not be targeted by summons or homing weapons. Its attack frequency will increase as its health lowers. While the hands are alive, they will attempt to hit the player by swinging towards them. While the head is spinning, the hands will not swing at the player. The head initially will only have one attack but gains more as the fight progresses. Its only attack at the start of the fight is an attack where it will begin spinning, dealing increased contact damage and having decreased defense, while moving towards the player at an increasing speed. Once a hand has been destroyed or the head reaches 75% health, the head will begin shooting homing skulls towards the player every 1.33 seconds. Once both hands have been destroyed the frequency becomes every 0.67 seconds. During its spin attack it will pause shooting skulls. Once both hands are destroyed, the head will begin to teleport, firing a spread of 3 bolts from where it teleports to. When the head reaches 33% health, both hands will respawn. The head will fire skulls and teleport at a slower pace after the hands are respawned.
| ||||||||||||||||||||||||||||||||||||||||
| The Slime God | ||||||||||||||||||||||||||||||||||||||||
| ||||||||||||||||||||||||||||||||||||||||
Wall of Flesh
| ||||||||||||||||||||||||||||||||||||||||
|
The Wall of Flesh constantly moves either right to left or left to right, forcing the player to run from it, as it cannot be moved through. If the player does manage to get behind the Wall, they will be brought back in front of it by the The Tongue. The eyes and mouth of the wall will move vertically to fit between solid blocks, and this movement is speed up in Rev+. If the player gets far enough away or leaves the Underworld in any way, they will be killed instantly due to the Horrified debuff. During the fight, the Wall will constantly spawn Leeches and Hungries to attack the player. Its only direct attack is to shoot lasers which are capped at bursts of three. When reaching 50% health, the Wall will begin using more Death Lasers, which deal more damage and inflict the "On Fire!" debuff. Upon reaching 66% health, the Wall of Flesh will shoot out two homing sickles from its mouth; upon reaching 33%, it will shoot out three homing sickles. As the Wall of Flesh takes more damage, it will increase in speed up to a maximum of 41mph. These health milestones are:
If the player moves too far from the Wall of Flesh, it will enrage and speed up substantially to catch up with them. Once it does catch up, it slows down and releases a barrage of slower moving lasers. The Hungry are spawned at the start of the fight and slowly respawn throughout. They will begin attached to the Wall of Flesh and will try to attack the player by moving towards them. However, at the start of the fight, they will have limited range due to still being attached. They will detach from the Wall of Flesh after taking substantial damage, becoming The Hungry II. They deal more damage the lower the Wall's health is. Leeches will spawn from the Wall of Flesh's mouth with a specific audio cue. They act like most worm enemies when attempting to attack the player. The Wall of Flesh will spawn these at an increasing rate as its health gets lower, eventually releasing them at as a constant stream.
| ||||||||||||||||||||||||||||||||||||||||
Queen Slime
| ||||||||||||||||||||||||||||||||||||||||
|
Queen Slime behaves similarly to a normal slime, performing a high leap every four jumps, after which she will perform one or two of her special attacks. All jumps are boosted relative to the vertical distance between her and the player, increasing her jump speed and height by 3.2% every block and capping at a 100% bonus. The delay between jumps will reduce when her health drops below 80% and 60%. Additionally, Queen Slime will occasionally teleport regardless of condition and at a faster rate. She will teleport more often if the player is hidden behind solid tiles, or is at least 20 blocks above her. She will also teleport closer to the player, and will always teleport in front of them, as well as gaining the ability to teleport mid-air if the player is high above the ground.
| ||||||||||||||||||||||||||||||||||||||||
Cryogen
| ||||||||||||||||||||||||||||||||||||||||
| ||||||||||||||||||||||||||||||||||||||||
The Twins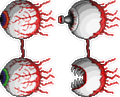
| ||||||||||||||||||||||||||||||||||||||||
Phase 1Spazmatism will alternate between staying horizontal with the player and quickly shooting Cursed Flame shots, and performing 8 quicker but shorter dashes towards the player. Retinazer will alternate between staying diagonally above the player and firing bursts of 3 purple lasers, and performing 3 longer but slower dashes towards the player. Phase 2Both twins will enter phase 2 upon reaching 70% health. If one of them is in phase 1 while the other is in phase 2, the one in phase 2 will take negligible damage. If gravity is reversed, both twins immediately transform into their second phases. While gravity is reversed, Retinazer's lasers fire faster and more frequently. In this phase, Spazmatism will alternate between slowly chasing the player while breathing Shadowflame and performing 5 long and fast dashes towards the player. Retinazer will continuously shoot red lasers at the player, with the pattern of hovering above the player and slowly firing 3 shots followed by hovering to the side of the player and firing a quick burst of 8 shots. Phase 3The Twins will enter phase 3 when they reach 25% health, or the other twin is defeated. In this phase, Spazmatism will start to use a new attack where it will hover beneath the player and shoot semi-homing shadowflame fireballs. Its flamethrower attack is used for less time. Its dashes become longer and faster, and it will move faster while breathing shadowflames. Retinazer will start to perform a new attack, where it will do two long dashes after shooting lasers, firing several homing darts during the first dash. If Retinazer is defeated first, Spazmatism will stop breathing shadowflames and begin performing a longer set of charge attacks, where it will perform 4 regular charges and a final one which will travel further. When dashing, contact damage is increased by 10%. If Spazmatism is defeated first, Retinazer will begin shooting lasers much more quickly and its dash attack will now consist of four dashes, releasing homing darts on the first and last dash. If it becomes day, the Twins will enrage, becoming more aggressive, charging further and firing projectiles more often. Their projectiles also have increased velocity when enraged. Spazmatism's flamethrower will also have a longer range.
| ||||||||||||||||||||||||||||||||||||||||
| Aquatic Scourge | ||||||||||||||||||||||||||||||||||||||||
| ||||||||||||||||||||||||||||||||||||||||
| The Destroyer | ||||||||||||||||||||||||||||||||||||||||
|
The Destroyer's segments are 50% larger than in vanilla. It initially exhibits movement like a typical worm enemy, burrowing through the ground and attempting to ram the player. This means that the Destroyer can only charge at the player from the ground and thus, has a maximum height it can reach in earlier phases. However, due to its extremely fast speed, this height is very large. Destroyer's top speed, fall speed, and turning speed increase as its health gets lower. When it reaches 50% health, it will begin to move more similarly to a Wyvern compared to a regular worm enemy. When it moves like this, it will move more in the air and will not use the ground to accelerate towards mid-air players. It will also have any segments with Probes change their red light to a purple one. As its health lowers, its movement during flying attacks gets more aggressive. It also gains boosts to flying speed and the duration of flying attacks at 25% and 10% health. The Destroyer will occasionally fire lasers towards the player from each of its segments. Initially, only red lasers will be fired that inflict the On Fire! debuff for 4 seconds. At 85% health it will begin to fire green lasers which inflict Cursed Inferno for 2 seconds, and at 70% health it will begin to fire blue lasers that inflict Electrified for 1 second. It will fire lasers less frequently as its health decreases. As it is damaged, the Destroyer's segments will spawn Probes which follow the player while shooting lasers. Once a Probe is removed from a segment, that segment will have 10 less defense. Probes are 20% larger than in vanilla. Probes will despawn if the player moves too far away. The Destroyer enrages during the day. It moves faster and more aggressively, only fires blue lasers which accelerate faster, and its body segments take reduced damage, leaving only the head and tail vulnerable.
| ||||||||||||||||||||||||||||||||||||||||
Brimstone Elemental
| ||||||||||||||||||||||||||||||||||||||||
| ||||||||||||||||||||||||||||||||||||||||
Skeletron Prime
| ||||||||||||||||||||||||||||||||||||||||
|
The head receives a defense buff of 8 per arm alive, and various changes ensue when the arms are killed. If the head reaches 66% health at any time, all the limbs will die. The head's spin attack will not happen while any arms are alive and is significantly faster. Its defense doubles while spinning, regardless of difficulty. The head gains speed as it loses health. The changes to the arms are as follows: Prime Cannon
Prime Laser
Prime Saw and Prime Vice
As limbs die, the other limbs gain increased movement and attack speed. When all the limbs are killed, the head will gain an attack where it moves in a tight circle and fires cursed skull projectiles similar to Skeletron, which it alternates with its spin attack. When the head reaches 40% health, it will begin firing laser circles during its spinning attack. When the head reaches 20% health, it gains a third attack where it fires a barrage of 10 homing missiles. It will cycle through these, starting with the circling attack, its spinning charge, and then its missiles. If day comes and Skeletron Prime is still alive, its current health will increase to 300 if it is below that.
| ||||||||||||||||||||||||||||||||||||||||
Calamitas Clone
| ||||||||||||||||||||||||||||||||||||||||
| ||||||||||||||||||||||||||||||||||||||||
Plantera
| ||||||||||||||||||||||||||||||||||||||||
|
Similarly to Expert Mode, Plantera moves through blocks slowly, using long vines to grapple foreground blocks (and background walls in her second phase), similar to multi-hooks. However, the behaviors of Plantera, her tentacles, and most of her projectiles are significantly different. General
Phase 1Plantera's first phase follows a 20-second cycle that alternates between firing seeds and spores.
Phase 2
| ||||||||||||||||||||||||||||||||||||||||
| Leviathan and Anahita | ||||||||||||||||||||||||||||||||||||||||
| ||||||||||||||||||||||||||||||||||||||||
Astrum Aureus
| ||||||||||||||||||||||||||||||||||||||||
| ||||||||||||||||||||||||||||||||||||||||
Golem
| ||||||||||||||||||||||||||||||||||||||||
|
Golem has three phases in Revengeance and Death Mode. Note that this page will not cover the Golem fight in Normal and Expert Mode. Phase 1Golem spawns above the player's head, falling down to the ground. It will begin to cycle through its attacks. Golem will fire high-velocity bouncing fireballs every three seconds and jump towards the player. Each time Golem jumps it will slam into the ground, creating a line of dust particles. Golem will also throw its fist towards the player at the same rate. Only the left and right fists can be damaged during this phase and must be destroyed to progress the fight. Phase 2After destroying the fists. Golem will begin to fire two yellow lasers at the same rate as the fireballs. Only Golem's head can be damaged during this phase and must be destroyed to progress the fight. Phase 3Golem's head will regen its health to full, detach, and begin flying above the player. Once the Golem body reaches 90% health, the Golem Head will begin to fly in a rectangle pattern. The head will fire two sets of lasers twice and one lingering fireball before moving. The lingering fireball will create an explosion that will linger for four seconds. Golem's body will also begin to fire two lasers. Golem will also launch three bouncing fireballs each time it slams the ground. When the Golem body reaches 10% health, it will fire two additional lasers. Both the head and the body can be damaged in this phase. Only Golem's body needs to be destroyed to end the fight.
| ||||||||||||||||||||||||||||||||||||||||
The Plaguebringer Goliath
| ||||||||||||||||||||||||||||||||||||||||
| ||||||||||||||||||||||||||||||||||||||||
Empress of Light
| ||||||||||||||||||||||||||||||||||||||||
| ||||||||||||||||||||||||||||||||||||||||
Duke Fishron
| ||||||||||||||||||||||||||||||||||||||||
|
Duke Fishron has three phases in Revengeance and Death Mode. This page will not be covering Normal or Expert Modes for Duke Fishron. Phase 1Once summoned, Duke Fishron rises out of the water and begins his pattern as follows:
Phase 2Duke Fishron transitions to phase 2 at 70% health. In phase 2 he has greatly increased speed and aggression, as well as a new repeating pattern:
Phase 3Duke Fishron transitions to phase 3 at 40% health. During this phase he becomes invisible, but his eyes glow brightly. His pattern also changes yet again:
Duke Fishron's teleport location alternates between diagonally above the player to the left or right. During this pattern he will fire a homing blob every 10 seconds that turns into a Cthulhunado on contact with the player. Below 20% health, Duke Fishron stops creating Cthulhunados and gains a new repeating pattern:
| ||||||||||||||||||||||||||||||||||||||||
Ravager
| ||||||||||||||||||||||||||||||||||||||||
| ||||||||||||||||||||||||||||||||||||||||
| Lunatic Cultist | ||||||||||||||||||||||||||||||||||||||||
|
The Lunatic Cultist's attacks are buffed and certain mechanics are changed. Any projectile that homes in on the player can make sharper turns. Specific changes to attacks are as follows: Ritual
Lightning
Ice Mists
Shadow Fireballs & Ancient Doom Projectiles
| ||||||||||||||||||||||||||||||||||||||||
| Astrum Deus | ||||||||||||||||||||||||||||||||||||||||
| ||||||||||||||||||||||||||||||||||||||||
Moon Lord
| ||||||||||||||||||||||||||||||||||||||||
Phase 1The Moon Lord spawns a minute after being summoned and immediately begins attacking, cycling through his roster of attacks. He teleports more frequently based on his distance from the player, attempting to stay close at all times. The Phantasmal Deathray attack sweeps noticeably faster, making it more difficult to avoid. Following the Deathray, the Moon Leech Clots spawned by the Tentacle heal the Moon Lord for 1,250 health each instead of 1,000. Phantasmal Sphere attacks are more spread out and move slowly initially, accelerating over time. Phantasmal Eyes home in for a while longer than normal. Defeating each of the Moon Lord's eyes does not disable them, and will instead spawn several True Eyes of Cthulhu. The Moon Lord's eyes continue attacking afterward, but at a reduced frequency and with lower velocity projectiles. True Eyes of Cthulhu do not use their deathray attack in Revengeance Mode, and will instead stick together and attack in sync. Phase 2After defeating all three of Moon Lord's eyes, his core becomes exposed. Following this, players will take 10% more damage from all sources until the Moon Lord is defeated or leaves. In the second phase, the Phantasmal Deathray will now penetrate blocks, forcing the player to dodge the attack in order to avoid it.
| ||||||||||||||||||||||||||||||||||||||||
Profaned Guardians
| ||||||||||||||||||||||||||||||||||||||||
| ||||||||||||||||||||||||||||||||||||||||
Dragonfolly
| ||||||||||||||||||||||||||||||||||||||||
| ||||||||||||||||||||||||||||||||||||||||
Providence, the Profaned Goddess
| ||||||||||||||||||||||||||||||||||||||||
| ||||||||||||||||||||||||||||||||||||||||
| Storm Weaver | ||||||||||||||||||||||||||||||||||||||||
| ||||||||||||||||||||||||||||||||||||||||
Ceaseless Void
| ||||||||||||||||||||||||||||||||||||||||
| ||||||||||||||||||||||||||||||||||||||||
Signus, Envoy of the Devourer
| ||||||||||||||||||||||||||||||||||||||||
| ||||||||||||||||||||||||||||||||||||||||
Polterghast
| ||||||||||||||||||||||||||||||||||||||||
| ||||||||||||||||||||||||||||||||||||||||
The Old Duke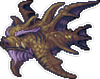
| ||||||||||||||||||||||||||||||||||||||||
| ||||||||||||||||||||||||||||||||||||||||
| The Devourer of Gods | ||||||||||||||||||||||||||||||||||||||||
| ||||||||||||||||||||||||||||||||||||||||
Yharon, Dragon of Rebirth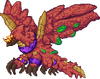
| ||||||||||||||||||||||||||||||||||||||||
| ||||||||||||||||||||||||||||||||||||||||
Exo Mechs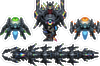
| ||||||||||||||||||||||||||||||||||||||||
| ||||||||||||||||||||||||||||||||||||||||
| Supreme Witch, Calamitas | ||||||||||||||||||||||||||||||||||||||||
|