User:Mysterpumpkin/Sandbox

From Calamity Mod Wiki
Jump to navigation Jump to search

King Slime

  • King Slime
    King Slime.png
    Statistics
    TypeBossSlime
    EnvironmentSurfaceSlime Rain
    DamageContact:
    40 / 67 Expert Mode / 76 Revengeance Mode / 83 Death Mode
    Max Life2000 / 2800 Expert Mode
    Defense10
    KB Resist100%
    Immune toGlacial StateTemporal SadnessGalvanic CorrosionEutrophicationPearl AuraWebbedSlowTime DistortionConfusedPoisonedVenom
    Cold-
    Water-
    SicknessResistant
    Electricity-
    HeatVulnerable
    Drops
    Coins1 Gold Coin
    Map Icon King Slime.png
    Map Icon
    If you were looking for King Slime on the vanilla wiki, click here.

    King Slime is a pre-Hardmode boss. He is intended to be one of the first bosses fought by the player and is considered to be the weakest of all of the bosses. Fighting him is completely optional and not required for game progression, but his defeat may reward the player with money and useful items.

    While in Revengeance and Death Mode, King Slime gains several changes to his AI such as an additional boost to his mobility and a boss servant which attacks the player from a distance.

    Spawn

    King Slime can be spawned by fulfilling any of these conditions:

    • Naturally (albeit very rarely) on grass at the far left or far right of the map;
    • Naturally by defeating 150 slimes during a Slime Rain;
    • Using a Slime Crown.

    Behavior

    In Revengeance Mode

    King Slime behaves similarly to a slime, performing a high leap every 4 jumps. All jumps are boosted relative to the vertical distance between the slime and the player, increasing his jump speed and height by 3.2% every block and capping at a 100% bonus. The delay between jumps will reduce when his health drops below 80%, 60%, 40%, 20%, and 10%.

    Additionally, King Slime will occasionally teleport regardless of condition and at a faster rate. He will teleport more often if the player is hidden behind solid tiles, or is at least 20 blocks above him. He will also teleport closer to the player, gaining the ability to teleport mid-air if the player is high above the ground.

    When 5% of his health is lost, the next hit from the player will spawn 2-3 slimes from King Slime. The following slimes can drop from the boss:

    Spiked Slimes are twice as likely to be dropped. During the rain, Umbrella Slimes have a 10% chance to replace either of the above slimes, which have a 20% chance to be replaced with a Rainbow Slime while in Hardmode. Pinky can also replace the other slimes with a 0.4% chance.

    When King Slime drops to 75% of his health, he jumps farther and Spiked Slimes are four times as likely to be dropped.

    When King Slime drops to 50% of his health, he summons a Crown Jewel. The jewel hovers above the player and pursues them, firing 1 Revengeance Mode / 3 Death Mode ruby bolts every 1.25 Revengeance Mode / 1 Death Mode seconds until the end of the fight. While the jewel is alive, King Slime himself will jump farther towards the player. The chance of Spiked Slimes dropping also doubles.

    In Death Mode

    • The Crown Jewel shoots a spread of three bolts and fires 20% faster.
    • King Slime is three times as large.
    • King Slime jumps farther and falls faster.
    • All Blue, Green, Ice, Red, and Yellow Slimes are replaced with Spiked Slimes.

    During the Boss Rush

    • King Slime has no delay between jumps.
    • King Slime jumps and falls twice as fast.
    • Allows Umbrella Slimes and Rainbow Slimes to be spawned regardless of weather.
    • The Crown Jewel moves 4 times as fast, fires at double speed, and projectile speed is doubled.

    Summons

    Crown Jewel
    Crown Jewel.png
    Statistics
    TypeFlying Enemy
    Damage0 (Contact)
    44 Revengeance Mode / 50 Death Mode (Ruby Bolt)
    Max Life999 Revengeance Mode
    Defense0
    KB Resist100%
    Immune toAll debuffs
    ColdVulnerable
    WaterVulnerable
    SicknessVulnerable
    Electricity-
    Heat-
    Image Name Condition
    Blue Slime Blue Slime Always in Revengeance Mode
    Green Slime Green Slime Always in Revengeance Mode
    Ice Slime Ice Slime Always in Revengeance Mode
    Pinky Pinky Always
    Purple Slime Purple Slime Always in Revengeance Mode
    Rainbow Slime Rainbow Slime During the Rain in Hardmode
    Red Slime Red Slime Always in Revengeance Mode
    Spiked Slime Spiked Slime Always
    Umbrella Slime Umbrella Slime During the Rain or Boss Rush
    Yellow Slime Yellow Slime Always in Revengeance Mode

    Terrain Preparation

    A long platform made out of blocks can make the fight with King Slime trivial as it will remove the need to dodge the Crown Jewel's attacks and deal with the Slimes that will spawn, leaving only the concern of King Slime despawning if the player gets too far.

    Gearing Up

    For a Normal and Expert Mode guide to King Slime, see King Slime strategies on the vanilla wiki.

    Armor

    Accessories

    Movement

    • Hermes Boots or any of its upgrades are heavily recommended so that the player can keep up with King Slime's pace.
    • Any double jump, preferably the Sandstorm in a Bottle or Blizzard in a Bottle, makes it significantly easier to dodge the slimes summoned by King Slime.
      • The Bundle of Balloons combines three double jumps into one, making it very useful, though it requires more effort to obtain.

    Offensive

    • Luxor's Gift is a great accessory which provides powerful damage boosts for all classes.
    • The Shark Tooth Necklace provides armor penetration, increasing the damage of all weapons. This is especially helpful for low damage and fast firing weapons such as the Minishark.
    • The Feral Claws are a good damage accessory for melee players due to their melee speed increase.
    • Mages can make use of the Magic Cuffs, as mana is vital this early in the game.
    • Summoners can boost their minion damage and durability with the Spirit Glyph.
    • The Raider's Talisman is a great accessory for rogues, especially if fully stacked up.
    • The Coin of Deceit is great for stealth based rogues.

    Weapons

    Melee

    • The Cnidarian paired with a string accessory should make the fight simple for melee users.
    • The Starfury is also a good choice, having good range and DPS.
    • The Bladecrest Oathsword is an excellent option, however it may be difficult to obtain this early on.

    Ranged

    • The Minishark is a good option for rangers, especially when paired with the Shark Tooth Necklace.
    • The Boomstick is another great option for rangers.
    • Any bow, preferably the Reed Blowgun or Tendon Bow, paired with Jester's Arrows is very useful for dealing with King Slime's summons, while also doing decent damage to King Slime himself.

    Mage

    • High-tier gem staffs, such as the Diamond Staff or Ruby Staff should deal with King Slime relatively quickly.
    • The Frost Bolt is also a viable option for mages.
    • The Space Gun paired with Meteor armor is very good, however it is somewhat difficult to obtain this early on.
    • The Demon Scythe trivializes the fight, however is very hard to obtain this early on in the game.

    Summoner

    Rogue

    • The Gilded Dagger or Gleaming Dagger are solid choices for rogues.
    • The Crystalline is also very good, at the cost of having low range.
    • Wulfrum Knives are similar in performance to the Gilded/Gleaming Dagger, however they are consumable.
    • The Meteor Fist is really good, however is somewhat difficult to obtain this early on.

    Throwing =

    • Grenades can deal very good damage to King Slime.
  • Skeletron

  • SkeletronSkeletron Head
    Skeletron Head.png
    Statistics
    TypeEnemy
    EnvironmentDungeonNight
    DamageContact:
    32 / 70 Expert Mode / 88 Revengeance Mode / 101 Death Mode
    Spin Attack:
    32 / 91 Expert Mode / 109 Revengeance Mode / 124 Death Mode
    Homing Skull:
    68 Expert Mode / 81 Revengeance Mode / 93 Death Mode
    Shadowflame Bolt:
    76 Revengeance Mode / 87 Death Mode
    Max Life4400 / 8800 Expert Mode / 11000 Revengeance Mode
    Defense10
    0 spinning
    9999 during the day
    KB Resist100%
    Inflicts debuffBleedingBleeding
    100% chance

    Debuff duration4 seconds Revengeance Mode (Contact)
    Debuff tooltipCannot regenerate life
    Inflicts debuffWeakWeak
    100% chance

    Debuff duration2 seconds Revengeance Mode (Homing Skull)
    Debuff tooltipPhysical abilities are decreased
    Immune toShadowflamePenetratedVenomCursed InfernoConfusedPoisonedDaybrokenCelledOn Fire!WebbedTemporal SadnessGlacial StateTime Distortion
    Cold-
    WaterVulnerable
    SicknessResistant
    Electricity-
    Heat-
    Drops
    Coins5 Gold Coin
    If you were looking for Skeletron on the vanilla wiki, click here.

    Skeletron is a pre-Hardmode boss that is usually fought after the The Perforators / The Hive Mind. Defeating it is required to gain unrestricted access to the Dungeon.

    Spawn

    Skeletron does not spawn on its own. It is summoned by speaking to the Old Man at the Dungeon's entrance and selecting the "Curse" option at night.

    Once Skeletron has been defeated for the first time and the Clothier has moved in, the player can summon Skeletron again by killing the Clothier using the Clothier Voodoo Doll. This must be done at night or Skeletron will not spawn.

    Segments

    Skeletron
    Skeletron Hand (NPC).png
    Statistics
    TypeBoss
    EnvironmentDungeonNight
    DamageContact:
    22 / 44 Expert Mode / 55 Revengeance Mode / 63 Death Mode
    Max Life600 / 1560 Expert Mode / 1170 Revengeance Mode
    Defense14
    KB Resist100%
    Inflicts debuffSlowSlow
    50% chance

    Debuff duration1 Expert Mode seconds (Contact)
    Debuff tooltipMovement speed is reduced
    Immune toPoisonedConfusedCursed InfernoShadowflameOn Fire!Venom
    Cold-
    WaterVulnerable
    SicknessResistant
    Electricity-
    Heat-

    Behavior

    Boss behavior is unchanged in Normal and Expert. For more informations regarding these difficulties, check the vanilla wiki page

    In Revengeance Mode

    Skeletron is made up of three segments, two hands and a head, all of which can go through blocks. The head is the only segment that must be destroyed to defeat the boss, however each hand alive will give the head maximum damage reduction, and while either is still alive the head will not be targeted by summons or homing weapons. Its attack frequency will increase as its health lowers.

    While the hands are alive they will attempt to hit the player by swinging towards them. While the head is spinning, the hands will not swing at the player.

    The head initially will only have one attack but gains more as the fight progresses. Its only attack at the start of the fight is an attack where it will begin spinning, dealing increased contact damage and having decreased defense, while moving towards the player at an increasing speed.

    Once a hand has been destroyed or the head reaches 75% health, the head will begin shooting homing skulls towards the player every 1.33 seconds. Once both hands have been destroyed the frequency becomes every 0.67 seconds. During its spin attack it will pause shooting skulls.

    Once both hands are destroyed, the head will begin to teleport, firing a spread of 3 bolts from where it teleports to.

    When the head reaches 33% health, both hands will respawn. The head will fire skulls and teleport at a slower pace after the hands are respawned.

    In Death Mode

    • Begins the fight and respawns with 4 hands instead of 2.
    • Head and hands have reduced health.
    • Head acceleration increases as health decreases.
    • Hand attacks have much more velocity and quicker acceleration.
    • Fires faster Cursed Skulls at a faster rate.
    • Shoots 5 magic bolts instead of 3 after teleporting.

    In Malice Mode

    • Shoots Homing Skulls far more rapidly.

    During the Boss Rush

    • Max health increased to 160,000 / 320,000 Expert Mode / 400,000 Revengeance Mode
    • Sets the time to 7:30pm

    Aftermath

    Terrain Preparation

    • A good arena for Skeletron is an arena that will allow the player to circle the boss at ease. 2-3 layers of platforms above ground with a length of ~150 blocks is usually recommended. Campfires and Sunflowers are also handy and easy to come by to give passive boosts to the player.
      • The platforms should be separated by a 15-20 block gap to avoid obstructing the player's vertical movement when going down.

    Gearing Up

    For a Normal and Expert Mode guide to Skeletron, see Skeletron strategies on the vanilla wiki.

    Armor

    • Aerospec armor is one of the strongest options for all classes.
    • Molten armor is the preferred set for melee users due to its very high defense.
    • Bee armor provides the largest number of minions for summoners.
    • Sulphurous armor is another good option for rogues.

    Accessories

    Movement

    • The Shield of Cthulhu is extremely helpful for dodging the boss's attacks.
    • The Bundle of Balloons is by far the best mobility accessory available to the player at this stage of the game, although its crafting components by themselves are also viable for getting height.
    • Spectre Boots and its upgrades are very helpful to keep distance from Skeletron when it's spinning.

    Offensive

    Weapons

    Melee

    • The Broken Biome Blade has many attunements that can be useful in this fight. Pure Clarity makes for a decent ranged attack, Arid Grandeur deals high damage up close and can be used for mobility, and Decay's Retort can help the player get away from the head during spinning segments.
    • The Air Spinner is a powerful melee weapon, being a fast yoyo shooting projectiles at nearby targets and providing some distance for the player.
    • The Wind Blade is a good option.
    • The Goldplume Spear is another decent choice.
    • The Starfury is also a good choice, having good range and DPS.
    • The Bladecrest Oathsword is an excellent option for this boss.

    Ranged

    • The Bee's Knees has the potential of decimating Skeletron with its deadly bee projectiles.
    • [Galeforce]] is a great option with a fast firing speed and a generous spread of feathers.
    • The Aquashard Shotgun and Bullet-Filled Shotgun are the most powerful guns available.
    • The Star Cannon is extremely effective, albeit very difficult to get ammo for.
    • The Taser is a rewarding but risky weapon, with a long use time punishing missed shots.

    Mage

    • Demon Scythe, while requiring careful positioning, can achieve extreme DPS and wipe out the hands with its infinite penetration and multi-hit properties.
    • Tradewinds is an efficient magic weapon with very high accuracy.
    • The Shaderain Staff or Crimson Rod can be useful when used alongside a primary weapon to increase DPS.
    • The Shadowdrop Staff and Blood Bath are both good options.
    • The Pulse Pistol is a good option that consumes no mana.

    Summoner

    Rogue

    • The Tracking Disk's stealth strike does enormous damage, especially when multiple hands are present.
    • The Turbulance is a powerful Rogue weapon, as it's very high projectile velocity makes sniping the hands easy.
      • The Mycoroot is also a lower-tier option with very high DPS, but has a very limited range, which makes it dangerous to use.
    • Feather Knives deal quite good DPS, especially with their stealth strike.

    Miscellaneous

    • The Slime Mount's increased fall speed helps greatly, acting as a makeshift downward dash.
    • The Marked Magnum can be used by all classes to increase the DPS of their primary weapons with the Marked for Death debuff.

    Tips

    • Homing Skulls, despite their name, have poor homing abilities. They can be easily avoided by circling Skeletron, which will cause the skulls to curve to reach the player and miss.
    • If "stunlocked" by the head, grappling a nearby platform or using the Slime Mount will forcibly pull the player out, which can be a lifesaver.
    • Avoid standing near the shadowflame circle as much as possible, as Skeletron fires bolts as soon as it teleports out, making the bolts much harder to dodge.
    • Watch for the hands movements. They almost always take distance before trying to hit the player, as if Skeletron was building momentum.
  • Wall of Flesh

  • Wall of Flesh
    Wall of Flesh.png
    Statistics
    TypeBoss
    EnvironmentThe Underworld
    DamageContact:
    50 / 150 Expert Mode / 172 Revengeance Mode / 198 Death Mode
    Eye Laser:
    22 / 44 Expert Mode / 68 Revengeance Mode / 78 Death Mode
    Death Laser:
    88 Revengeance Mode / 101 Death Mode
    Max Life8000 / 11200 Expert Mode / 21,280 Revengeance Mode
    Defense12 / 18 Expert Mode
    KB Resist100%
    Inflicts debuffHorrifiedHorrified
    Debuff durationWhile the player is within 900 blocks from the boss.
    Debuff tooltipYou have seen something nasty, there is no escape.
    Inflicts debuffThe TongueThe Tongue
    Debuff durationWhen the player is within 900 blocks behind the boss.
    Debuff tooltipYou are being sucked into the mouth
    Immune toPoisonedVenomConfusedCursed InfernoShadowflameOn Fire!WebbedTemporal SadnessGlacial StateTime Distortion
    ColdVulnerable
    Water-
    SicknessVulnerable
    Electricity-
    HeatResistant
    Drops
    Coins8 Gold Coin
    If you were looking for the Wall of Flesh on the vanilla wiki, click here.

    The Wall of Flesh is the final and strongest pre-Hardmode boss, spawnable only in The Underworld. Once it is defeated, the world permanently converts to Hardmode, which brings new content and challenges.

    Spawn

    The Wall of Flesh is summoned immediately when a Guide Voodoo Doll is destroyed by being dropped into lava in the Underworld while the Guide is alive, killing the Guide.

    The direction the Wall will face, and therefore move, depends on which side of the world the player spawns it. If the Wall is spawned on the right side of the world, it will move right to left. If it is spawned on the left side of the world, it will move left to right.

    Segments

    Wall of FleshWall of Flesh Eye
    Wall of Flesh Eye.png
    Statistics
    TypeBoss
    EnvironmentThe Underworld
    DamageEye Laser:
    22 / 44 Expert Mode / 68 Revengeance Mode / 78 Death Mode
    Death Laser:
    88 Revengeance Mode / 101 Death Mode
    Max Life8000 / 11200 Expert Mode / 21,280 Revengeance Mode
    Defense12 / 18 Expert Mode
    KB Resist100%
    Immune toPoisonedVenomConfusedCursed InfernoShadowflameOn Fire!
    ColdVulnerable
    Water-
    SicknessVulnerable
    Electricity-
    HeatResistant
    Drops
    Coins8 Gold Coin
    Wall of FleshWall of Flesh Mouth
    Wall of Flesh Mouth.png
    Statistics
    TypeBoss
    EnvironmentThe Underworld
    DamageContact:
    50 / 150 Expert Mode / 172 Revengeance Mode / 198 Death Mode
    Max Life8000 / 11200 Expert Mode / 21,280 Revengeance Mode
    Defense12 / 18 Expert Mode
    KB Resist100%
    Immune toPoisonedVenomConfusedCursed InfernoShadowflameOn Fire!
    ColdVulnerable
    Water-
    SicknessVulnerable
    Electricity-
    HeatResistant
    Drops
    Coins8 Gold Coin
    Wall of FleshWall of Flesh Eye
    Wall of Flesh Eye.png
    Statistics
    TypeBoss
    EnvironmentThe Underworld
    DamageEye Laser:
    22 / 44 Expert Mode / 68 Revengeance Mode / 78 Death Mode
    Death Laser:
    88 Revengeance Mode / 101 Death Mode
    Max Life8000 / 11200 Expert Mode / 21,280 Revengeance Mode
    Defense12 / 18 Expert Mode
    KB Resist100%
    Immune toPoisonedVenomConfusedCursed InfernoShadowflameOn Fire!
    ColdVulnerable
    Water-
    SicknessVulnerable
    Electricity-
    HeatResistant
    Drops
    Coins8 Gold Coin

    Behavior

    In Revengeance Mode

    The Wall of Flesh constantly moves either right to left or left to right, forcing the player to run from it, as it cannot be moved through. If the player does manage to get behind the Wall, they will be brought back in front of it by the The Tongue.

    If the player gets far enough away or leaves the Underworld in any way, they will be killed instantly due to the Horrified debuff.

    During the fight, the Wall will constantly spawn Leeches and Hungries to attack the player. Its only direct attack is to shoot lasers which are capped at bursts of three. When reaching 50% health, the Wall will begin using more Death Lasers, which deal more damage and inflict the "On Fire!" debuff.

    As the Wall of Flesh takes more damage, it will increase in speed up to a maximum of 41mph. These health milestones are:

    • 75%
    • 66%
    • 50%
    • 33%
    • 25%
    • 10%
    • 5%
    • 3.5%
    • 2.5%

    If the player moves too far from the Wall of Flesh, it will enrage and speed up substantially to catch up with them. Once it does catch up, it slows down and releases a barrage of slower moving lasers.

    The Hungry are spawned at the start of the fight and slowly respawn throughout. They will begin attached to the Wall of Flesh and will try to attack the player by moving towards them. However, at the start of the fight, they will have limited range due to still being attached. They will detach from the Wall of Flesh after taking substantial damage, becoming The Hungry II. They deal more damage the lower the Wall's health is.

    Leeches will spawn from the Wall of Flesh's mouth with a specific audio cue. They act like most worm enemies when attempting to attack the player. The Wall of Flesh will spawn these at an increasing rate as its health gets lower, eventually releasing them at as a constant stream.

    In Death Mode

    • Shoots Death Lasers from the start of the fight
    • Base speed is 75% faster

    During the Boss Rush

    • Max health increased to 450,000 / 630,000 Expert Mode / 1,197,000 Revengeance Mode
    • Teleports the player to The Underworld
    • Does not create a Demonite or Crimtane brick box when defeated

    Summons

    The Hungry
    The Hungry.png
    Statistics
    TypeSummon
    EnvironmentThe Underworld
    Damage30 / 60 Expert Mode / 69 Death Mode (WoF health >75%)
    45 / 90 Expert Mode / 103 Death Mode (WoF health 75-50%)
    60 / 120 Expert Mode / 138 Death Mode (WoF health 50-25%)
    75 / 150 Expert Mode / 172 Death Mode (WoF health <25%)
    Max Life240 / 336 Expert Mode
    Defense10 / 16 Expert Mode (WoF health >75%)
    20 (WoF health 75–50%)
    30 (WoF health 50–25%)
    40 (WoF health <25%)
    KB Resist-10 / 1 Expert Mode%
    Immune toConfused
    ColdVulnerable
    Water-
    SicknessVulnerable
    Electricity-
    HeatResistant
    The HungryThe Hungry detached
    The Hungry II.png
    Statistics
    TypeSummon
    EnvironmentThe Underworld
    Damage30 / 60 Expert Mode / 74 Revengeance Mode / 80 Death Mode
    Max Life80 / 112 Expert Mode / 117 Revengeance Mode
    Defense6
    KB Resist20 / 28 Expert Mode%
    Immune toConfused
    ColdVulnerable
    Water-
    SicknessVulnerable
    Electricity-
    HeatResistant
    • Item (Quantity)Rate
    • 100% / 20% Expert Mode
    Leech
    Leech.png
    Statistics
    TypeBurrowing Enemy
    EnvironmentThe Underworld
    Max Life60 / 96 Expert Mode / 100 Revengeance Mode
    KB Resist100%
    Immune toConfused
    ColdVulnerable
    Water-
    SicknessVulnerable
    Electricity-
    HeatResistant
    • Item (Quantity)Rate
    • 100% / 20% Expert Mode
    LeechLeech Head
    Leech Head.png
    Statistics
    TypeBurrowing Enemy
    EnvironmentThe Underworld
    Damage26 / 52 Expert Mode / 62 Revengeance Mode / 68 Death Mode
    Max Life60 / 96 Expert Mode / 100 Revengeance Mode
    Defense2
    KB Resist100%
    Immune toConfused
    ColdVulnerable
    Water-
    SicknessVulnerable
    Electricity-
    HeatResistant
    LeechLeech Body
    Leech Body.png
    Statistics
    TypeBurrowing Enemy
    EnvironmentThe Underworld
    Damage22 / 44 Expert Mode / 52 Revengeance Mode / 56 Death Mode
    Max Life60 / 96 Expert Mode / 100 Revengeance Mode
    Defense6
    KB Resist100%
    Immune toConfused
    ColdVulnerable
    Water-
    SicknessVulnerable
    Electricity-
    HeatResistant
    LeechLeech Tail
    Leech Tail.png
    Statistics
    TypeBurrowing Enemy
    EnvironmentThe Underworld
    Damage18 / 36 Expert Mode / 42 Revengeance Mode / 44 Death Mode
    Max Life60 / 96 Expert Mode / 100 Revengeance Mode
    Defense10
    KB Resist100%
    Immune toConfused
    ColdVulnerable
    Water-
    SicknessVulnerable
    Electricity-
    HeatResistant

    Aftermath

    Terrain Preparation

    A platform spanning a large part of The Underworld is useful and avoids getting stuck on the difficult to navigate terrain. The player should ensure there is space above the platforms to allow for more room to dodge the boss's attacks. Building two platforms helps dodging the lasers, but takes more time.

    Since the Wall of Flesh doesn't despawn when all players are dead, it's possible to set up a spawn point in further parts of The Underworld to get another chance after death. However, this will not work if the Wall of Flesh has already passed the spawn point because The Tongue will kill the player while it brings them back in front of Wall of Flesh.

    Gearing Up

    For a Normal and Expert mode guide to Wall of Flesh, see Wall of Flesh strategies on the vanilla wiki.

    Armor

    • Statigel Armor is the best choice for this fight, having high damage bonuses with high defense.
    • Bee armor is another alternative for summoners.

    Accessories

    Movement

    • Skyline Wings are greatly help during this fight, allowing players to have an easier time dodging the Wall's eye lasers and giving them extra mobility in general.
    • The Bundle of Balloons is another decent alternative, but offers less control.
    • Lightning Boots or Frostspark Boots will greatly assist in outrunning the Wall.
    • The Counter Scarf or Shield of Cthulhu are useful accessories allowing the player to dash.
      • The Counter Scarf additionally allows the player to dodge an attack by dashing into it every 15 seconds.
    • The Aero Stone is a great accessory for improving mobility durring the fight.
    • The Frog Leg can be used to increase jump height, which helps in dodging the lasers.

    Offensive

    Weapons

    Melee

    • The Gelitic Blade is a great option that deals reliable damage thanks to its piercing projectile.
    • The Ball O' Fugu is a fantastic option for melee users due to its ability to expel spikes from its ball after being thrown.
    • The God's Gambit can be a very good option, but it may require players to get closer to the boss.

    Ranged

    • The Overloaded Blaster is the preferred option for rangers, allowing players to do consistent damage without having to be in range of the Wall of Flesh.
    • The Gunk Shot is also a great choice due to its high damage output which becomes more consistent the closer the player is to the boss due to its bullet spread. This means it is more useful near the end of the fight, where the Wall's speed increases dramatically.
    • The Archerfish is an amazing option. Musket balls should be used, as they are converted into piercing water streams.
    • The Dragoon Drizzlefish can also work very well, inflicting the Brimstone Flames debuff and being one of the most consistent weapons to clear out The Hungries while still doing good damage to the boss itself.

    Mage

    • The Black Anurian is an all-around great option for mages, providing consistent DPS due to its homing projectiles. Its damage can be increased further by staying closer to the boss.
    • The Abyssal Tome is another great option, though the timed detonation mines require higher skilled play. Usage at the right distance will allow it to achieve very high DPS.
    • The Eldritch Tome can deal incredible damage at close range for comparatively little mana, but is dangerous to use because of its short range.
    • The Abyss Shocker is spectacular at getting rid of The Hungries, but is unreliable and weak against the Wall itself.
    • The Pulse Pistol is good both for clearing out The Hungries and for hitting the eyes and mouth simultaneously, giving it very high DPS. It also does not consume mana. A solid hellbridge may prevent the weapon from doing damage to the lower eye.

    Summoner

    • The Herring Staff is a great all around weapon for summoners, being great at clearing out The Hungries and decimating the Wall of Flesh.
    • The Eye of Night is also a great option, boasting decent damage and a good AI that allows it to keep up with the boss.
    • The Flesh of Infidelity can also perform well.
    • The Corroslime Staff and Crimslime Staff are great weapons for dealing consistent damage to the Wall itself, but struggle to take out The Hungries.
    • The Staff of Necrosteocytes is another good option.

    Rogue

    • The Tracking Disk's stealth strike will deal extraordinary damage against the Wall due to its ability to hit multiple targets.
    • The Kylie is one of the best rogue weapons against the Wall of Flesh, having high base damage as well as great range.
    • The Lionfish is also a great weapon, boasting high damage while also sticking to enemies and injecting the Venom debuff.
    • Gel Darts will pierce through enemies, making them a desirable choice for clearing out The Hungries.
    • Sky Stabbers can be good to lay down mid fight to get some extra damage in, but shouldn't be used as a main weapon.

    Tips

    • Try to keep the boss at a far enough distance to allow time to react to its laser attack, while not being far enough to trigger its enrage.
      • However, if both the boss and the player are close to death, moving far enough away from the boss and causing it to dash will prevent it from firing its death lasers until it catches up, allowing the player to avoid getting fatally hit in the last few moments of the fight.
  • The Twins

  • The Twins
    The Twins.png
    Statistics
    TypeBoss
    EnvironmentSurfaceNight
    Max Life48000 / 72000 Expert Mode / 86400 Revengeance Mode(total)
    Defense10
    KB Resist100%
    Immune toConfusedWebbedTemporal SadnessTime Distortion
    Drops
    Coins12 Gold Coin
    If you were looking for The Twins on the vanilla wiki, click here.

    The Twins are Hardmode bosses that can be fought anywhere on the Surface at night.

    While in Revengeance and Death Mode, the Twins are fought in phase 2 simultaneously, and get a third phase in which their attack patterns become more complex.

    Spawn

    The Twins can be summoned manually using a Mechanical Eye at night in any biome. They also have a 10% chance to spawn randomly at dusk once a Demon or Crimson Altar has been destroyed, as long as they have not been defeated in the current world. Their arrival is announced by the status message: "This is going to be a terrible night...".

    Eyes

    RetinazerFirst Form
    Retinazer.png
    Statistics
    TypeEnemy
    EnvironmentSurfaceNight
    Damage45 / 76 Expert Mode / 87 Revengeance Mode / 100 Death Mode (Contact)
    40 / 76 Expert Mode / 92 Revengeance Mode / 105 Death Mode (Eye Laser)
    Max Life22000 / 33000 Expert Mode / 39600 Revengeance Mode
    Defense10
    KB Resist100%
    Immune toConfusedWebbedTemporal SadnessTime Distortion
    ColdVulnerable
    Water-
    SicknessVulnerable
    Electricity-
    HeatVulnerable
    SpazmatismFirst Form
    Spazmatism.png
    Statistics
    TypeEnemy
    EnvironmentSurfaceNight
    Damage50 / 85 Expert Mode / 97 Revengeance Mode / 112 Death Mode (Contact)
    50 / 88 Expert Mode / 108 Revengeance Mode / 124 Death Mode (Cursed Flame)
    Max Life26000 / 39000 Expert Mode / 46800 Revengeance Mode
    Defense10
    KB Resist100%
    Inflicts debuffCursed InfernoCursed Inferno
    50% chance

    Debuff duration16% for 8 / 16 Expert Mode seconds,
    then 25% for 5 / 10 Expert Mode seconds,
    then 50% for 3 / 6 Expert Mode seconds (Cursed Inferno ball)
    Debuff tooltipLosing life
    Immune toConfusedWebbedTemporal SadnessTime Distortion
    ColdVulnerable
    Water-
    SicknessVulnerable
    Electricity-
    HeatVulnerable
    RetinazerSecond Form
    Retinazer (Second Form).png
    Statistics
    TypeEnemy
    EnvironmentSurfaceNight
    Damage67 / 113 Expert Mode / 129 Revengeance Mode / 149 Death Mode (Contact)
    50 / 92 Expert Mode / 112 Revengeance Mode / 128 Death Mode (Death Laser)
    36 / 68 Expert Mode / 84 Revengeance Mode / 96 Death Mode (Rapid Fire)
    120 Revengeance Mode / 138 Death Mode (Homing Missile)
    Max Life8800 / 20000
    13200 / 33000 Expert Mode
    27720 / 39600 Revengeance Mode
    Defense20
    KB Resist100%
    Inflicts debuffOn Fire!On Fire!
    100% chance

    Debuff duration4 Revengeance Mode seconds (Laser)
    3 Revengeance Mode seconds (Homing Missile)
    Debuff tooltipSlowly losing life
    Immune toConfusedWebbedTemporal SadnessTime Distortion
    ColdVulnerable
    Water-
    SicknessVulnerable
    Electricity-
    HeatVulnerable
    SpazmatismSecond Form
    Spazmatism (Second Form).png
    Statistics
    TypeEnemy
    EnvironmentSurfaceNight
    Damage75 / 127 Expert Mode / 146 Revengeance Mode / 167 Death Mode (Contact)
    60 / 108 Expert Mode / 132 Revengeance Mode / 151 Death Mode (Flamethrower)
    124 Revengeance Mode / 142 Death Mode (Shadowflame Ball)
    Max Life10400 / 26000
    15600 / 39000 Expert Mode
    32760 / 46800 Revengeance Mode
    Defense28
    KB Resist100%
    Inflicts debuffShadowflameShadowflame
    100% chance

    Debuff duration3 Revengeance Mode seconds (Flamethrower)
    2 Revengeance Mode seconds (Shadowflame Ball)
    Debuff tooltipLosing life
    Inflicts debuffBleedingBleeding
    100% chance

    Debuff duration5 Revengeance Mode seconds (Contact)
    Debuff tooltipCannot regenerate life
    Immune toConfusedWebbedTemporal SadnessTime Distortion
    ColdVulnerable
    Water-
    SicknessVulnerable
    Electricity-
    HeatVulnerable

    Behavior

    The Twins will spawn together, connected with a flesh tether. They will both attack the player simultaneously.

    In Revengeance Mode

    Phase 1

    Spazmatism will alternate between staying horizontal with the player and quickly shooting Cursed Flame shots, and performing 8 quicker but shorter dashes towards the player. Retinazer will alternate between staying diagonally above the player and firing bursts of 3 purple lasers, and performing 3 longer but slower dashes towards the player.

    Phase 2

    Both twins will enter phase 2 upon reaching 70% health. If one of them is in phase 1 while the other is in phase 2, the one in phase 2 will take negligible damage. If gravity is reversed, both twins immediately transform into their second phases. While gravity is reversed, Retinazer's lasers fire faster and more frequently.

    In this phase, Spazmatism will alternate between slowly chasing the player while breathing Shadowflame and performing 5 long and fast dashes towards the player. Retinazer will continuously shoot red lasers at the player, with the pattern of hovering above the player and slowly firing 3 shots followed by hovering to the side of the player and firing a quick burst of 8 shots.

    Phase 3

    The Twins will enter phase 3 when they reach 25% health or the other twin is defeated.

    In this phase, Spazmatism will start to use a new attack where it will hover beneath the player and shoot semi-homing shadowflame fireballs. Its flamethrower attack is used for less time. Its dashes become longer and faster, and it will move faster while breathing shadowflames. Retinazer will start to perform a new attack, where it will do two long dashes after shooting lasers, firing several homing darts during the first dash.

    If Retinazer is defeated first, Spazmatism will stop breathing shadowflames and begin performing a longer set of charge attacks, where it will perform 4 regular charges and a final one which will travel further. When dashing, contact damage is increased by 10%. If Spazmatism is defeated first, Retinazer will begin shooting lasers much more quickly and its dash attack will now consist of four dashes, releasing homing darts on the first and last dash.

    If it becomes day, the Twins will enrage, becoming more aggressive, charging further and firing projectiles more often. Their projectiles also have increased velocity when enraged. Spazmatism's flamethrower will also have a longer range.

    In Death Mode

    • As their health gets lower, the speed and acceleration of the twins increases and their attack delay is reduced.

    In Malice Mode

    • Spazmatism's shadowflame attack range in phase 2 is greatly increased.
    • Retinazer charges four times instead of three if Spazmatism is defeated.
    • Spazmatism's time between charges much shorter if Retinazer is defeated.
    • The Twins charge faster in both phases.

    During the Boss Rush

    • Max health increased to 2,750,000 / 4,125,000 Expert Mode / 5,268,750 Revengeance Mode
    • Sets the time to 7:30pm

    Terrain Preparation

    Both regular arenas consisting of multiple layers of Platforms and various buffing furniture (Campfire, Heart Lantern, Star in a Bottle and Candles from Drunk Princess) will work as long as it is a large enough size. However a more consistent strategy uses a very long skybridge (Using Asphalt Block for higher speed) to constantly run away from the Twins, as this makes many of their basic attacks in early phases easy to dodge. However, when later phases are reached a regular arena may be more viable.

    Gearing Up

    For a Normal and Expert mode guide to The Twins, see The Twins strategies on the vanilla wiki.

    Armor

    • Due to the hardmode ore rework, the best available armor depends on how many other mechs have been defeated.
    • Titan Heart armor is always available for Rogues.
    • Mollusk armor has very high stats but makes you quite slow, which can make this high-movement fight difficult.
    • Spider armor is a powerful summoner armor available from the start of hardmode.

    Accessories

    Weapons

    Melee

    • The Yin-Yo combined with the Yoyo Bag is a powerful option for melee users, alowing consistently high damage at a distance.
    • The Flying Knife can also work as an alternative, trading damage and accuracy for longer range.
    • The Caustic Edge's projectile has good range for this fight.
    • The Axe of Purity's purify function works well as a weapon, being a great choice for melee users as the purification powder it shoots can hit both twins.
    • The Earthen Pike's projectiles, while hard to aim, can do massive damage to the Twins and completely remove Retinazer's defense.
      • When combined with a Flask of Ichor, it can also completely remove Spazmatism's defense.
    • The Clam Crusher is a solid choice against the Twins, being able to hit at a distance. However it may do more damage when used at closer range due to the time taken for the flail to return being shorter.

    Ranger

    • The Darkecho Greatbow with Ichor Arrows is a great choice as the crystal dart it shoots will hit both twins, and it has high DPS.
    • The Arbalest is an amazing weapon at taking down the Twins as it has good accuracy for a weapon that fires a spread of arrows.
    • The Mineral Mortar is a splendid weapon at taking out the Twins due to the homing sand sharks. Do take note of its slow projectile velocity however.
    • The Slag Magnum inflicts Armor Crunch and splits into fossil shards on hit, making it an all around good choice.
    • The Titanium Railgun has a slow firing speed, but has great damage and shoots a laser instead of a projectile which may make it easier to aim.
    • The Polaris Parrotfish is a good choice for players confident in their dodging skills as the damage increase form not getting hit can prove substantial.

    Mage

    • The Sky Fracture is a great pick too due to it being easier to aim with and being fairly simple to craft.
    • The Crystal Serpent is an effective weapon, especially if running away from a Twin.
    • The Frigidflash Bolt is a slow but strong weapon.

    Summoner

    Rogue

    • The Prismalline is a great option that can easily hit The Twins with its many projectiles.
    • The Burning Strife is another viable option that is quite easy to get.
    • The Gacruxian Mollusk's homing capability can help with this fight.

    Tips

    • Be sure to damage The Twins at a somewhat equal rate prior to phase 2, to make sure that neither become invulnerable.
    • Try not to have both Twins in phase 3 at the same time, as they will become much more difficult to dodge.
    • While it is easier to leave Retinazer alone towards the end of the fight, it is very difficult to do so due to its lower health. More often than not, you will end up with both Twins in phase 3.
    • Be aware of Retinazer's firing patterns in phase 2, it will shoot 3 lasers at a low firing rate followed by a fast burst. Time your movement so you have enough wing time to avoid the burst by flying diagonally up and away from The Twins to keep yourself safe from Spazmatism.
  • The Destroyer

  • The Destroyer
    The Destroyer.png
    Statistics
    TypeBossBurrowing Enemy
    EnvironmentSurfaceNight
    Max Life80000 / 120000 Expert Mode / 150000 Revengeance Mode
    KB Resist100%
    Immune toAll debuffs
    Cold-
    Water-
    SicknessResistant
    ElectricityVulnerable
    Heat-
    Drops
    Coins30 Gold Coin
    If you were looking for The Destroyer on the vanilla wiki, click here.

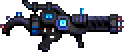
    The Destroyer is a Hardmode boss that can be fought anywhere on the surface at night.

    Spawn

    The Destroyer can be summoned manually using a Mechanical Worm at night in any biome. It can also spawn naturally at dusk with a chance of 10% once a Demon or Crimson Altar has been smashed, as long as it has not yet been defeated in the current world. If spawned this way, its arrival is announced by the status message: "You feel vibrations from deep below..."

    Segments

    The DestroyerThe Destroyer Head
    The Destroyer Head.png
    Statistics
    TypeBurrowing Enemy
    EnvironmentSurfaceNight
    Damage70 / 280 Expert Mode / 308 Revengeance Mode / 354 Death Mode
    Max Life80000 / 120000 Expert Mode / 150000 Revengeance Mode
    Defense0
    KB Resist100%
    Immune toAll debuffs
    Cold-
    Water-
    SicknessResistant
    ElectricityVulnerable
    Heat-
    The DestroyerThe Destroyer Body
    The Destroyer Body.png
    Statistics
    TypeBurrowing Enemy
    EnvironmentSurfaceNight
    Damage55 / 93 Expert Mode / 111 Revengeance Mode / 128 Death Mode (Contact)
    44 / 72 Expert Mode / 92 Revengeance Mode / 105 Death Mode (Death Laser)
    100 Revengeance Mode / 115 Death Mode (Frost Laser)
    108 Revengeance Mode / 124 Death Mode (Homing Laser)
    92 Revengeance Mode / 105 Death Mode (Metal Scrap)
    Max Life80000 / 120000 Expert Mode / 150000 Revengeance Mode
    Defense30 / 40 Death Mode
    KB Resist100%
    Inflicts debuffOn Fire!On Fire!
    100% chance

    Debuff duration4 seconds Revengeance Mode
    Debuff tooltipSlowly losing life
    Inflicts debuffCursed InfernoCursed Inferno
    100% chance

    Debuff duration2 seconds Revengeance Mode
    Debuff tooltipLosing life
    All damage taken increased by 20% Revengeance Mode
    Inflicts debuffElectrifiedElectrified
    100% chance

    Debuff duration1 second Revengeance Mode
    Debuff tooltipYou cannot move
    Immune toAll debuffs
    Cold-
    Water-
    SicknessResistant
    ElectricityVulnerable
    Heat-
    The DestroyerThe Destroyer Tail
    The Destroyer Tail.png
    Statistics
    TypeBurrowing Enemy
    EnvironmentSurfaceNight
    Damage40 / 68 Expert Mode / 81 Revengeance Mode / 93 Death Mode
    Max Life80000 / 120000 Expert Mode / 150000 Revengeance Mode
    Defense35
    KB Resist100%
    Immune toAll debuffs
    Cold-
    Water-
    SicknessResistant
    ElectricityVulnerable
    Heat-

    Behavior

    When the Destroyer spawns, it will be coiled up and its segments will be mostly folded in on each other. For ten seconds after it has spawned it will be near-invulnerable and able to fly similar to a Wyvern.

    In Revengeance Mode

    The Destroyer initally exhibits movement like a typical worm enemy, burrowing through the ground and attempting to ram the player. This means that the Destroyer can only charge at the player from the ground and thus, has a maximum height it can reach in earlier phases. However, due to its extremely fast speed, this height is very large. When it reaches 50% health, it will begin to move more similarly to a Wyvern compared to a regular worm enemy. When it moves like this, it will move more in the air and will not use the ground to accelerate towards mid-air players. It will also have any segments with Probes change their red light to a purple one. Upon reaching 25% health, it will begin to dive bomb the player by rapidly changing direction in the air.

    The Destroyer will occasionally fire lasers towards the player from each of its segments. Initially, only red lasers will be fired that inflict the On Fire! debuff for 4 seconds. At 85% health it will begin to fire green lasers which inflict Cursed Inferno for 2 seconds, and at 70% health it will begin to fire blue lasers that inflict Electrified for 1 second. It will fire lasers less frequently as its health decreases.

    As it is damaged, the Destroyer's segments will spawn Probes which follow the player while shooting lasers. Once a Probe is removed from a segement, that segment will have 10 less defense. The Probes will despawn if the player moves too far away.

    The Destroyer enrages during the day. It moves faster and more aggressively, only fires blue lasers which accelerate faster, and its body segments take reduced damage, leaving only the head and tail vulnerable.

    In Death Mode

    • The Destroyer has more segments and spawns more Probes.
    • Laser fire rate is dramatically increased.
    • Acceleration and top speed increase as health decreases.

    During the Boss Rush

    • Max health increased to 2,500,000 / 3,750,000 Expert Mode / 4,687,500 Revengeance Mode
    • Sets the time to 7:30pm

    Summons

    Probe
    Probe.png
    Statistics
    TypeSummon
    Damage0 (Contact)
    50 / 88 Expert Mode / 101 Death Mode (Probe Laser)
    Max Life200 / 300 Expert Mode
    Defense20
    KB Resist20%
    Immune toAll debuffs
    Cold-
    Water-
    SicknessResistant
    ElectricityVulnerable
    Heat-


    Resistances

    • All segments take reduced damage from non-minion piercing projectiles in Expert Mode. Projectile damage is divided by the number of times it pierces. Infinite piercing deals 50% damage.
    • All segments reduce damage from grenade-type projectiles by 80%. A list of affected projectiles is below.
    Resisted grenades
    [link]Click/tap here to reveal this content. (there may be a slight delay)[/link]
    This table requires JavaScript to be enabled and site tooltips to be turned on to be displayed.
    You can also view the data on another page.

    Terrain Preparation

    The player should make a long arena to help avoid the Destroyer's many lasers, and to help with avoiding its charges as its health gets lower. Making it tall can also help make the first half of the fight easier.

    Gearing Up

    For a Normal and Expert mode guide to The Destroyer, see The Destroyer on the vanilla wiki.

    Armor

    • Due to the hardmode ore rework, the best available armor depends on how many other mechs have been defeated.
    • Titan Heart armor is always available for Rogues.
    • Mollusk armor has very high stats but makes you quite slow, which can make this high-movement fight difficult.
    • Spider armor is a powerful summoner armor available from the start of hardmode.

    Accessories

    Weapons & Equipment

    Melee

    • Swords can do immense damage to the destroyer but require being very close.
      • The Avalanche, for instance, is a strong choice.
    • The Fractured Ark, despite being a pre-Hardmode weapon, does excellent damage with decent range.
    • The Fetid Baghnakhs are a high-DPS but short-range option.

    Ranger

    • Although not great in vanilla, Calamity makes the Pearlwood Bow a great choice due to the rainbows it adds, which are great at dealing with the Destroyer's many segments.
      • Do note, each time the bow is shot, the rainbows get replaced, so players might want to use this weapon sparingly or as a support weapon.
    • The Proporse Pistol is another great choice due to its piercing rounds.
    • Th Dart Rifle with Cursed Darts or the Daedalus Stormbow with Holy Arrows do high damage to the Destroyer.

    Mage

    • Both the Demonic Pitchfork and the Frigidflash Bolt are great due to their slight pierce and high damage.
    • The Nimbus Rod will do huge damage on its own but also release many probes.
    • The Poseidon is one of the best weapons available at this stage due to its homing and piercing.

    Summoner

    • The Ancient Ice Chunk is a great option because it can hit multiple segments in one clasp.
    • The Ballista Cane or its upgrade can add good DPS to the fight.

    Rogue

    • The Gacruxian Mollusk is great with the many sparks it leaves in its path that can slightly home into the Destroyer.
    • The Blast Barrel is an excellent choice that can make quick work of the Destroyer if the player can make them explode and leave shrapnel on the ground.
    • The Kelvin Catalyst is another solid option, albeit difficult to craft.

    Tips

    • The fight can generally be treated similar to a regular worm boss until the Destroyer reaches 50% health, which is where the player should be aware that it can now be much more agile in the air.
      • Remember that it will telegraph when it can fly by its segments changing from red to purple.
  • Skeletron Prime

  • Skeletron PrimeSkeletron Prime Head
    Skeletron Prime.png
    Statistics
    TypeBoss
    EnvironmentSurfaceNight
    Damage47 / 79 Expert Mode / 90 Revengeance Mode / 104 Death Mode (Contact) (Doubled if spinning)
    50 / 100 Expert Mode / 124 Revengeance Mode / 142 Death Mode (Death Laser)
    132 Revengeance Mode / 151 Death Mode (Missile)
    112 Revengeance Mode / 128 Death Mode (Skull)
    132 Revengeance Mode / 151 Death Mode (Homing Missile)
    Max Life28000 / 42000 Expert Mode / 60900 Revengeance Mode
    Defense24 (+8 per arm alive) Revengeance Mode (Doubled if spinning)
    KB Resist100%
    Immune toShadowflamePenetratedVenomCursed InfernoConfusedPoisonedDaybrokenCelledOn Fire!WebbedTemporal SadnessGlacial StateTime Distortion
    Cold-
    Water-
    SicknessResistant
    ElectricityVulnerable
    Heat-
    Drops
    Coins12 Gold Coin
    If you were looking for Skeletron Prime on the vanilla wiki, click here.

    Skeletron Prime is a Hardmode mechanical boss which is essentially a more difficult version of Skeletron.


    While in Revengeance and Death Mode, Skeletron Prime gains various projectile changes to both the head and limbs, and the boss gets an overall stats buff. The head gains more attacks and behaviours as the limbs are killed.

    Spawn

    Skeletron Prime can be manually summoned using a Mechanical Skull at night (7:30 PM to 4:30 AM) in any biome. It can also spawn naturally upon dusk with a chance of 10% once a Demon or Crimson Altar has been smashed, as long as it has not yet been defeated in the current world. If spawning naturally, its arrival is announced by the status message: "The air is getting colder around you..."

    Arms

    Prime Cannon
    Prime Cannon.png
    Statistics
    TypeBoss Part
    EnvironmentSurfaceNight
    Damage30 / 51 Expert Mode / 61 Revengeance Mode / 70 Death Mode (Contact)
    132 Revengeance Mode / 151 Death Mode (Missile)
    Max Life7000 / 10500 Expert Mode / 6825 Revengeance Mode
    Defense23
    KB Resist100%
    Immune toOn Fire!ConfusedPoisonedVenom
    Cold-
    Water-
    SicknessResistant
    ElectricityVulnerable
    Heat-
    Prime Saw
    Prime Saw.png
    Statistics
    TypeBoss Part
    EnvironmentSurfaceNight
    Damage56 / 95 Expert Mode / 114 Revengeance Mode / 131 Death Mode (Contact)
    Max Life9000 / 13500 Expert Mode / 8775 Revengeance Mode
    Defense38
    KB Resist100%
    Immune toOn Fire!ConfusedPoisonedVenom
    Cold-
    Water-
    SicknessResistant
    ElectricityVulnerable
    Heat-
    Prime Vice
    Prime Vice.png
    Statistics
    TypeBoss Part
    EnvironmentSurfaceNight
    Damage52 / 88 Expert Mode / 105 Revengeance Mode / 121 Death Mode (Contact)
    Max Life9000 / 13500 Expert Mode / 8775 Revengeance Mode
    Defense34
    KB Resist100%
    Immune toOn Fire!ConfusedPoisonedVenom
    Cold-
    Water-
    SicknessResistant
    ElectricityVulnerable
    Heat-
    Prime Laser
    Prime Laser.png
    Statistics
    TypeBoss Part
    EnvironmentSurfaceNight
    Damage29 / 49 Expert Mode / 58 Revengeance Mode / 67 Death Mode (Contact)
    50 / 100 Expert Mode / 124 Revengeance Mode / 142 Death Mode (Death Laser)
    Max Life6000 / 9000 Expert Mode / 5850 Revengeance Mode
    Defense20
    KB Resist100%
    Immune toOn Fire!ConfusedPoisonedVenom
    Cold-
    Water-
    SicknessResistant
    ElectricityVulnerable
    Heat-

    Behavior

    The Prime Laser and Cannon move faster.

    In Revengeance Mode

    The head recieves a defense buff of 8 per arm alive, and various changes ensue when the arms are killed. At any time, if the head reaches 66% health, all the limbs will die. The head's spin attack will not happen while any arms are alive, and it is significantly faster. Defense while spinning is doubled, regardless of difficulty. The head gains speed as it loses health.

    The changes to the arms are as follows:

    Prime Cannon

    • Fires rockets instead of of bombs. Alternates between firing single rockets and three rockets at once.
    • When this limb is killed, the head will begin to fire rockets
    • Alternates attacks with the Prime Laser

    Prime Laser

    • No longer fires lasers in a cone
    • Alternates between firing single lasers and laser circles
    • When this limb is killed, the head will begin to fire laser circles
    • Alternates attacks with the Prime Cannon

    Prime Saw and Prime Vice

    • More aggresive AI

    As limbs die, the other limbs gain increased movement and attack speed. When all the limbs are killed, the head will begin to fire cursed skull projectiles in a similar way to Skeletron. When the head reaches 33% health, every other spin attack is replaced with a barrage of martian missiles, the cursed skulls only fire before the missiles attack, and the spin time is reduced by 2 seconds. If day comes, and Skeletron Prime is still alive, its current health will increase to 300 if it is below that.

    In Death Mode

    • Fires skulls more frequently when spinning
    • If gravity is reversed, the head gains a speed boost
    • Hands and head increase further in velocity and acceleration as their health decreases

    During the Boss Rush

    • Max health increased to 1,100,000 / 1,650,000 Expert Mode / 1,980,000 Revengeance Mode
    • Sets the time to 7:30pm

    Terrain Preparation

    Due to Skeletron Prime's diverse attacks, it is recommended that the player makes a decently sized arena with about 20-25 gaps between each platform, to allow easy movement without getting stuck between each floor. The arena should be big enough to allow circling Skeletron Prime in its later phases, during its cursed skull attack, and to allow an easy way to run away from its deadly spin charge that spews out lasers.

    Gearing Up

    For a Normal and Expert mode guide to Skeletron Prime, see Skeletron Prime on the vanilla wiki.

    Armor

    • Due to the hardmode ore rework, the best available armor depends on how many other mechs have been defeated.
    • Titan Heart armor is always available for Rogues.
    • Mollusk armor has very high stats but makes you quite slow.
    • Spider armor is a powerful summoner armor available from the start of hardmode.

    Accessories

    Weapons

    Melee

    • The Caustic Edge is a great pick for melee users due to its easy to aim projectile.

    Ranged

    • The Dart Pistol or Dart Rifle can be great choices for Skeletron Prime.
    • The Frostbite Blaster does excellent damage and can hit multiple parts at once.
    • The Needler is another viable option which is quite easy to get your hands on.

    Magic

    • The SHPC's left-click attack can damage many parts of Skeletron Prime at once, while the right-click attack is better for the head.
    • Poseidon does good multi-target, homing damage.
    • Frigidflash Bolt is a bit weaker but can do good damage.

    Summoning

    Rogue

    All classes

    • The Golden Shower is very helpful for increasing DPS and getting around Skeletron Prime's high defense

    Tips

    • The player should be aware of the hands and remember that for each arm destroyed, the rest get faster.
    • Good area-of-effect damage works well for the limbs, and mobility should be prioritized.
    • Once all arms are destroyed, the player should be aware of Skeletron Prime's spin attack, which can be devastating if they are caught inside it.
    • In the cursed skull attack, a good strategy is circling Skeletron Prime from afar to avoid its homing skulls.
  • Plantera

  • PlanteraPhase 1
    Plantera.png
    Statistics
    TypeBoss
    EnvironmentUnderground Jungle
    Damage50 / 100 Expert Mode / 115 Revengeance Mode / 130 Death Mode (Contact)
    44 / 76 Expert Mode / 96 Revengeance Mode / 110 Death Mode (Seed)
    54 / 96 Expert Mode / 120 Revengeance Mode / 138 Death Mode (Poison Seed)
    62 / 108 Expert Mode / 136 Revengeance Mode / 156 Death Mode (Thorn Ball)
    Max Life30000 / 42000 Expert Mode / 96600 Revengeance Mode
    Defense42
    KB Resist100%
    Immune toVenomConfusedPoisonedWebbedTemporal SadnessGlacial StateTime Distortion
    ColdVulnerable
    Water-
    SicknessResistant
    Electricity-
    HeatVulnerable
    Drops
    Coins15 Gold Coin
    PlanteraPhase 2
    Plantera (Phase 2).png
    Statistics
    TypeBoss
    EnvironmentUnderground Jungle
    Damage70 / 140 Expert Mode / 161 Revengeance Mode / 185 Death Mode (Contact)
    140 Revengeance Mode / 161 Death Mode (Spore Gas)
    Max Life30000 / 42000 Expert Mode / 96600 Revengeance Mode
    Defense21
    KB Resist100%
    Immune toVenomConfusedPoisonedWebbedTemporal SadnessGlacial StateTime Distortion
    ColdVulnerable
    Water-
    SicknessResistant
    Electricity-
    HeatVulnerable
    Drops
    Coins15 Gold Coin

    Spawn

    Plantera will not spawn on her own, she is summoned by breaking a Plantera's Bulb in the Underground Jungle, or by using a Portabulb anywhere in the Jungle.

    Segments

    Plantera's Hook
    Plantera's Hook.png
    Statistics
    TypeBoss Part
    EnvironmentUnderground Jungle
    Damage70 / 140 Expert Mode / 161 Revengeance Mode / 185 Death Mode (Contact)
    Max Life30000 / 42000 Expert Mode / 96600 Revengeance Mode
    KB Resist100%
    Immune toVenomConfusedPoisonedWebbedTemporal SadnessGlacial StateTime Distortion
    Plantera's Tentacle
    Plantera's Tentacle.png
    Statistics
    TypeBoss Servant
    EnvironmentUnderground Jungle
    Damage70 / 140 Expert Mode / 161 Revengeance Mode / 185 Death Mode (Contact)
    Max Life30000 / 42000 Expert Mode / 96600 Revengeance Mode
    Immune toVenomConfusedPoisonedWebbedTemporal SadnessGlacial StateTime Distortion

    Behavior

    Plantera's enrage mechanic receives changes in all modes; she will no longer enrage outside of the Underground Jungle, but will enrage at the Surface.

    In Revengeance Mode

    Similarly to Expert Mode, Plantera moves through blocks slowly, using long vines to grapple foreground blocks (and background walls in her second phase), similar to multi-hooks. She has a third phase under 25% health and has more projectiles throughout the fight.

    The changes made by Revengeance Mode include:

    • The petals fired in phase 1 are significantly faster.
    • Shoots Thorn Balls during Phase 3, only 3 can exist at one time.
    • Summons tentacles at 75%, 50%, and 20% life.
    • The more tentacles that are alive, the higher her defense is.
    • In phase 2 she fires seeds, moves faster to catch up to the player and belches lingering spore clouds that linger and spread out over time when all tentacles are dead.
    • Hook and projectiles spread decrease as health decreases.
    • Hooks no longer spawn tentacles.
    • Becomes more aggressive the less active tiles there are around her.
    • If enraged during the day, she will regain health over time.
    • If enraged during the night, she gains a massive defense boost.

    In Death Mode

    • Petal firerate dramatically increased.
    • Attempts to ram the player more often.
    • Top speed, acceleration, maximum hook range, and number of tentacles spawned increase as her health decreases.
    • Tentacles move faster.

    During the Boss Rush

    • Max health increased to 1,600,000 / 2,240,000 Expert Mode / 5,152,000 Revengeance Mode

    Aftermath

    Terrain Preparation

    • Due to Plantera's enrage, it is highly recommended to construct its arena in the Cavern layer, while in the Jungle biome.
    • The player should strive to make a decently sized arena to allow more room to avoid Plantera's petal shots and spores, while not enraging it specially on Revengeance Mode or higher difficulties.

    Gearing Up

    Armor

    Accessories

    • Rangers can utilize the Magic Quiver if they are using bows.
    • The player can utilize accesories like the Ambrosial Ampoule to help with the Venom and Poison debuffs, as well as increasing life regeneration.

    Weapons & Equipment

    Melee

    Ranged

    • The Darkecho Greatbow's ricocheting crystal darts and overall high damage put it at a great spot at dealing with Plantera and her tentacles.
    • The Corroded Caustibow can be utilized to make quick work of the tentacles with its debuffs and trail.
    • The Brimstone Fury is another good option for dealing good damage to Plantera

    Magic

    • Both Valkyrie Ray and Arctic Bear Paw are powerful options due to their piercing capabilities that can greatly help with Plantera's tentacles.
    • The Ion Blaster is another great option if used at its highest potential.

    Summoner

    Rogue

    • The Scourge of the Seas is an excellent choice due to its lingering clouds that can deal great damage to Plantera and her tentacles.
    • The Kelvin Catalyst can be of use due to its piercing capabilities to attack both Plantera and her tentacles.
    • The Totality Breakers are another excellent crowd control weapon for damaging both Plantera and her tentacles, if Calamitas Clone was defeated first.
    • The Skyfin Bombers are another excellent option for dealing with Plantera and her tentacles, specially on stealth builds and its homing.
    • The Spent Fuel Container is another excellent crowd control weapon for Plantera and her tentacles.

    Tips

    • Unlike Normal/Expert Plantera, the circle method is less effective here due to Planetera's lingering spore clouds, and her 3 petal shots in phase 2.
      • Try to change your direction or path to avoid the petals, spike balls and spore clouds.