User:Doze/Calamity FAQ
| This is a Guide page. This means the page will walk you through a specific task, strategy, or enemy/boss fight. This guide was last updated for version 2.0.2.003. |
This page is to contain questions that I hear frequently asked about Calamity.
Dashes
Dash Types
Bonk
These dashes bounce off enemies when they hit them, providing 6 immunity frames (1/10th of a second)
Ram
These dashes go through an enemy when running into them, dealing damage and providing 12 immunity frames. Generally speaking, these are the most valuable type overall.
Scarf Dodge
These dashes have the ability to be able to avoid both enemy contact damage and projectile damage while dashing, but they have a 30 second cooldown. Uniquely, this has a seperate cooldown than other dodge or reflect accessories such as Amalgamated Brain or The Evolution. Depending on the boss and playstyle, these can be stronger than dashes with rams.
No Effect
These dashes have no unique effect on hitting an enemy or a projectile. Obviously, this type of dash is easily the worst, but the other abilities provided by the accessory or the dash length may make up for that, such as Master Ninja Gear having a dodge effect.
Other
These dashes are not triggered in the usual way and have unique effects. With the exception of God Slayer Armor's God Slayer Dash, these are all triggered through using an item. God Slayer Dash is instead triggered through using a keybind.
 Old Lord Claymore
Broken Biome Blade (Decay's Retort) Glorious End
Biome Blade (Decay's Retort)
Biome Blade (Extant Abhorrence)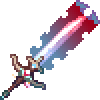
True Biome Blade (Sanguine Fury)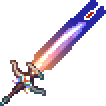
True Biome Blade (Mercurial Tides)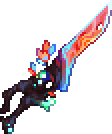 Ark of the Elements
 Relic of Deliverance
 Phosphorescent Gauntlet
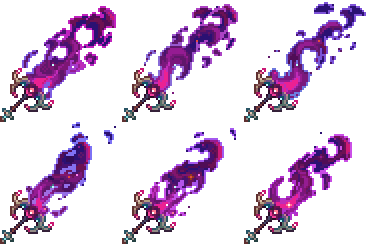
Galaxia (Polaris' Gaze)
Galaxia (Andromeda's Stride) God Slayer armor
 The Final Dawn
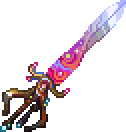 Ark of the Cosmos
 Exoblade
 Flamsteed Ring
Recommended Dash Progression
Note: This list is only talking about dash accessories, not "Other" category dash items.
- The first dash you can get is the Shield of Cthulhu
- Once Skeletron is defeated, Counter Scarf is avaliable. It cannot bonk or ram enemies, but has a longer dash than Shield of Cthulhu and has a Scarf Dodge.
- After one Mechanical Boss has been defeated, Evasion Scarf is avaliable, with a longer dash and provides more damage boosts than Counter Scarf.
- After two Mechanical Bosses and Cryogen has been defeated, Ornate Shield is craftable. This is better than Evasion Scarf for any bosses you will want to ram, such as Destroyer or Plantera, but worse for bosses like Twins, or Calamitas Clone. It also synergizes well with Daedalus Armor, in which case it may be better than Evasion Scarf even without a ram.
- Once Calamitas Clone and Plantera are defeated, Asgard's Valor is craftable and is the recommended general-purpose dash item until Providence is killed.
- Shield of the High Ruler is also a good choice, with a longer dash than Valor and better defensive stats, in exchange for being a bonk instead of a ram.
- After Providence has been defeated, Elysian Aegis can be made. Due to it's activated Elysian Guard ability providing tremendous offensive and defensive stats, at the cost of reduced acceleration, it can be considered better than Evasion Scarf even if you are not ramming a boss.
- Once Devourer of Gods has been defeated, Asgardian Aegis can be made as the final dash item for most players.
- Statis' Void Sash can also provide good mobility and is tied with Deep Diver for the longest dash in the game, but has no ram ability.
Dash Lengths
- Shield of Cthulhu - 229px (14.3 blocks)
- Counter Scarf - 237px (14.8 blocks)
- Evasion Scarf - 283px (17.7 blocks)
- Ornate Shield - 298px (18.7 blocks)
- Asgard's Valor - 331px (20.7 blocks)
- Plaguebringer armor - 390px (24.4 blocks)
- Shield of the High Ruler - 391px (24.4 blocks)
- Tabi - 399px (24.9 blocks)
- Master Ninja Gear - 399px (24.9 blocks)
- Statis' Ninja Belt - 399px (24.9 blocks)
- Crystal Assassin armor - 404px (25.3 blocks)
- Elysian Aegis - 450px (28.1 blocks)
- Solar Flare armor - 486px (30.4)
- Asgardian Aegis - 487px (30.4 blocks)
- Statis' Void Sash - 649px (40.6 blocks)
Other notes
- For traditional dashes, Armor dashes take priority over all other dashes. If no armor dash is equipped, the dash furthest down in the player's accessory slots is used.
- Calamity's Dash Keybind is bugged with vanilla dash types (Shield of Cthulhu, Tabi, Solar Armor, Master Ninja Gear, Shield of the High Ruler, Statis' Ninja Belt, Crystal Assasin armor) to dash in the direction you are facing, instead of the direction your movement key is held.
Reforges
What reforge should I use?
This question is very much up to personal preferences; there's five good options depending on class and preference, being Lucky, Violent, Warding, Menacing, and Silent. Warding is the best for defense, while Silent vs Lucky vs Menacing depends on class and stats. See the Lucky vs Menacing section for more details, but in short all classes but Summoner use Lucky, unless crit chance would go above 100%. Silent is used by stealth rogue in moderation, usually no more than 2-3 accessories should have it. Violent is used by melee weapons that benefit from melee speed, and should be split half-and-half with Lucky.
Lucky vs Menacing?
If you're summoner, always use Menacing, as minions cannot critically hit. For all other classes, Lucky is generally best unless you'd go over 100% crit chance.
But, why?
It's the principle of diminishing returns; More of the same stat is less effective overall.
All below examples will assume you have 100 base damage.
- If you have 0% extra damage, you'll have 100 damage. Add +15% (15% extra damage total) to that, and you'll have 115 or a 15% damage increase overall
- If you had 100% extra damage already, you'd have 200 damage. Add +15% (115% extra damage total) to that, and you go from 200 to 215, or a 7.5% damage increase overall.
As you can see, the 15% damage became only a 7.5% overall damage increase as your damage boosts went higher. This also applies to crit chance:
- If you had 0% extra damage and add 4% crit, you'll have 100 damage and add a 4% chance to deal 100 extra damage, or now deal 104 damage on average (a 4% dps increase from having 0% crit)
- If you had 100% extra damage and add 4% crit, you'll go from 200 average damage to 208 average damage (a 4% increase from having 0% crit)
- However, if you had 0% extra damage and 50% crit and add 4% more crit, you'll go from 150 average damage to 154 average damage, or a 2.66% dps increase.
Because armor and accessories give more damage than crit chance, crit chance is usually lower and therefore less effected by diminishing returns than damage. Because of that, it's better to go for Lucky than Menacing unless you're so high that you'd be above 100% crit.
It is notable that, because crits are applied after defense modifiers, on weapons with sufficiently low damage and an enemy with sufficiently high defense, Menacing can be better. However, this is very rarely, if ever, the case.
Finally, weapons with on-crit effects benefit even more from lucky over menacing.
Arcane
Arcane is only applicable early-game due to Terraria having a hardcoded limit of 550 mana. No amount of gear or upgrades can bypass this. Because you can hit this cap in mid-late game without any Arcane reforges, once this cap is hit Arcane will do quite literally nothing.
Quick
Quick is only applicable early-game due to having negligible effects on wings. Quick is very strong on ground movement and balloon jumps, but once the player uses wings for primary movement Quick is not worth it as a full suite of Quick will only add 5-10mph to endgame wings, and much less on earlier ones.
Wings
Wings vs Tracers
Wings and tracers is a common debate in the Calamity community; which is better tends to depends on your use case but Wings are commonly agreed to be better. The reason for this is that Tracers provide little to no increase in speed over the fastest wings of the same tier, while having considerably less flight time. This is especially true of Elysian Tracers, which are slower at base than the only other wings of the tier: Silva Wings. This is the least true for Celestial Tracers, as they have a unique ability to provide 30 extra iframes when taking over 200 damage.
The largest thing to consider for Tracers vs Wings is how much you will need to be running on the groud. Generally speaking, flying is better than running for the majority of bosses that Tracers are avaliable for. This is because flying is faster than running already. Tracers also get more effect from movement speed increases than Wings do, and tend to have higher acceleration.
Wing Speeds
WIP
Vanilla Progression Changes
Early Hardmode Rework
In Calamity; Hardmode ores (Cobalt, Palladium, Mythril, Orichalcum, Adamantite, and Titanium) as well as Hallowed Bars have their places in progression move. Breaking a demon altar will no longer spawn ores, and instead give you Soul of Night. They also do not spawn a random evil block in the world. Instead, the progression of these materials is as follows:
- Kill Wall of Flesh to spawn in Cobalt Ore and Palladium Ore.
- Kill one Mechanical boss to spawn in Mythril Ore and Orichalcum Ore. The mech will not drop Hallowed Bars, and has 20% lower stats.
- Kill a second Mechanical boss to spawn in Adamantite Ore and Titanium Ore. The mech will not drop Hallowed Bars, and has 10% lower stats.
- Kill the final Mechanical boss to allow all three mechs to drop Hallowed Bars and spawn Hallowed Ore in the underground hallow.
Note that at the present time, all the Hardmode ores can be obtained from fishing crates before defeating any mechanical bosses. This is a bug known by the developers, and will likely be fixed.
Reduced Linearity
Calamity adds quite a few changes to when bosses are able to be fought to reduce linerity of the game and allow freedom of play. These changes are as follows:
- Vernal Pass has giant Plantera Bulbs that bloom in Hardmode, which can then be broken to fight Plantera at any point.
- Old Power Cell and Temple Key can be crafted to allow Golem to be fought at any point in Hardmode.
- Duke Fishron can be fought up to three times at any stage of the game with the Truffle Worms found in the Mushroom Shrine
- Prismatic Lacewing spawns at any time in Hardmode, allowing Empress of Light to be fought earlier.
- Eidolon Tablet can be obtained from Eidolists at any point in Hardmode, allowing Lunatic Cultist to be fought earlier.
Money Farming
These numbers were averaged from 10 kills each (except Exos, which was done for 3), in Expert Revengance.
| Boss | Money Dropped | Drops sell for | Total Gain |
|---|---|---|---|
| 13 |
13 |
25 | |
| 26 |
12 |
39 | |
| 26 |
14 |
41 | |
| 34 |
27 |
61 | |
| 20 |
36 |
53 | |
| 1 |
41 |
1 | |
 |
174 |
26 |
201 |
