User:Habble420/Habble's Unreasonably Melty and Tax Evading Ranger Guide to Infernum
| This is a Guide page. This means the page will walk you through a specific task, strategy, or enemy/boss fight. This guide was last updated for version 2.0.2.003. |
Forenote
Let's get some things straight. First of all,
- This guide was made for Infernum mod version 1.8.17, which means THIS GUIDE IS OUTDATED FOLLOWING THE 1.9 UPDATES, it is currently being remade.
- I am not an official from Infernum mod team.
- My experience is a standalone subject and does not reflect their opinions nor does it mean I know every technical information about Infernum mod.
- Do take notice that Infernum mode bosses and certain other things do not have the exact same properties that base Calamity does.
- Do take notice that Infernum mode bosses and certain other things do not have the exact same properties that base Calamity does.
- If my information is lacking, please contact me via Discord
Secondly,
- This guide is focused on minmaxing viability as much as possible in the current stage of progression and teaching you how to play out the fights as Ranger.
- In such way, intended progression will not be strict towards the use of certain options in here.
- If they do not require excessive sequence breaks, they will be permitted.
With that out of the way, let's do some tax evasion.
Bosses
King Slime
Loadout
| Boss Summon | Weapon | Ammo | Armor | Accessories | Equipment | Notable Buffs |
|---|---|---|---|---|---|---|
Strategy
The big baddy for all Infernum newbies, King Slime(KS).
For the most part, what we'll be doing is the same as any other King Slime fight, except there are no slime minions! Yay!
- (100%-75%)
 Running straight is a strat all too familiar to us by now and here is no exception. King Slime hops are the same so keeping the boss at the edge of your screen shouldn't be an issue. If you have trouble aiming, consider shooting towards the top section of King Slime so that whenever it jumps your shots will still hit without recalibration.
 - (75%-30%)
 Crown Jewel predictive shots do not take into account how fast you move with the few speed buffs you have alongside Lightning Boots(≤) so they will completely whiff if you do not happen to turn around and/or jump right as it shot one, even then it's a rare occasion... remember not to try and kill it because it will just instantly respawn back.
 - (30%-0%)
 Close to the end you will notice the ninja inside pop out of the gelatinous king and start shooting shurikens at you. That ninja's agression varies based on how close you are to it. While nearby it, it will throw them on lengthy intervals and with less amounts. While far away, short intervals and many shurikens. You can still choose to run away from it however since the shurikens can't really catch up. The ninja is invulnerable and will also respawn back if you go too far away from it.
Desert Scourge
Loadout
| Boss Summon | Weapon | Ammo | Armor | Accessories |
|---|---|---|---|---|
Strategy
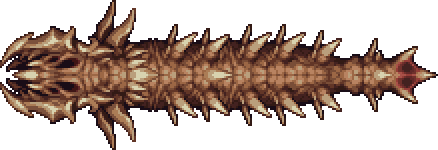
Worm boss 1#, now listen carefully... the trick to defeat worm bosses is- dies from waiting for Infernum 1.9
Anyway, there is only one trick for every boss, that is to circle them. Worm bosses are no exception.
- (100%-55%)
 Desert Scourge(DS)'s basic attack is just trying to get on your face. This will be a very recurring thing so make sure to keep circling by alternating between the ground/platform layers with Ivy Whip
  to hook up and going around it to avoid it. It will also spit a spread of sand darts sometimes whenever you pass by these "dashes", not to fret as they are easy to avoid as long as you don't overshoot or anything, doesn't prevent the circling in process. Other than that, DS may also look to go underground and then do a reverse-rain of sand darts, for this you will need to stand still on your first layer of platforms(above ground level) and look for any openings in case they are headed your way. Occasionally you will start to hear the wind pick up. That indicates the upcoming sandstorm particles which come from the sides towards your general direction. They won't usually clutter up but in case they do, make sure you can hook away or drop down swiftly to avoid unnecessary hits. Finding an opening may be easier at times as well.
 - (55%-25%)A singular attack is added onto the roster and it is a ground slam. You will see DS attempting to rise up, roar then slam down to the ground whenever the attack is performed. If you see the horizontal direction that it's rising up to, it's safe to assume they will slam the same direction so keep away as after the slam will rise gusts of sandstorms, pretty much unavoidable on ground level without excessive running so stand on the first layer of your platforms and don't stay close to the Scourge as it's slamming because there will also be sand darts coming your way somewhat geometrically. It should be easy to find openings in this geometrical spread of sand darts and jump through so long as you've kept away from the slam but it's better that you keep going the same way you were as the second and last slam of the cycle is gonna happen but this time DS isn't likely to slam the other way so keep running until you're at a safe distance and basically do the same thing as the first time.
- (25%-0%)Not much has changed. Only the Scourge now being able to spawn Vultures
 on occasion. They shouldn't be an issue so either keep them atop a platform layer since they can't drop down through platforms or just melt them alongside the Scourge.
Eye of Cthulhu
Loadout
Strategy
- (100%-80%) Infernum Eye of Cthulhu(EoC)
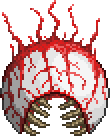
 is rather interesting. It gains a lot of new attacks and these attacks have their own tricks. For the most part we've got the basic dash which you should be running away from with a steady pace. Then it will spawn a lot of servants
  who go crazy and fast at it, better shred those before they zoom across your screen or you will end up with unpredictable trajectories. For another attack we've got one where EoC goes above you and while sweeping across, drops these bloodballs which do not go through platforms but will explode into spikes which will rise up and rain down, through tiles even.
- (80%-35%)
 Faster and more attacks. One of which you get the eye spinning around then charging at you. Just, don't run or jump straight onto the spin dash's angle and it should work itself out. For clearance, wait until the spin is done to move around and avoid the dash. As for the now more numerous spike rain, don't move around too much, there should be plenty big a gap wherever you're standing and if there's any spikes coming you can just move out of the way. Those spikes will not stick onto any blocks until they are on the same/lower horizontal level you are on, which means you can drop down to the ground level, let them stick and come back up to not let their hazardous behaviour remain in effect around where you need to be fighting.
 - (35%-0%) We've got one more bloody attack coming in. Rest of the roster get even faster at 15%-. For this one, the shots are many in quantity but do not chase very far nor turn around well so just making distance normally or circling will let you avoid them easily.
Crabulon
Loadout
Strategy
This is an easy one, so long as you have as flat a surface as possible with NO PLATFORMS, it will ignore them a lot of the times. A ground level arena is perfect. Otherwise you might feel like it's too jank around here...
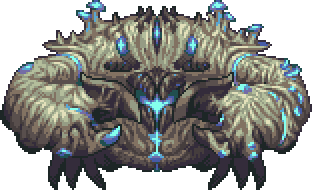
Infernum Crabulon is one of the tamest bosses when stood close to. In fact, it will not start attacking right as it's spawned unless provoked. Well we don't care about that, our goal is just to shred it as fast as possible while avoiding trouble.
- (100%-85%)
 This crab has very few attacks, starting out with the jump. The jump is very straightforward. It will attempt to jump to wherever you are standing or if on the move, wherever you're going so it's easy to bait it to overshoot. Since we'll be standing very close, you just need to look out for when the crab stops moving to assume the upcoming jump, then run under it to the other side. Then will come a spread of shrooms abovehead, these will also overshoot as long as you stand close to crab. That's about it for the first phase.
 - (85%-45%)Second phase adds a single attack which does two things. Spawn mushrooms pillars from the ground then after crab pauses for a bit, do a jump that is smaller but releases spore clouds around which at first do not do anything, after some time passes they will be an active hazard on the screen before eventually fading away. They never really get in your way but if they do, do small hops over them as to not get caught off guard in the act by crab into a punishing jump.
- (45%-0%)We will now see the crab's claws in action occasionally. It will stretch its arms then slam them down, spawning mushy projectiles alike the rest of its kit from the ground, rising up then raining down in a line. For this attack, you will need to stay as close to crab's body as possible as the crab will reposition to try and line up its claws right above you but to no avail. This spot in between its claw and body is the safest place to be for the attack and it will perform this the same way for all three attempts before it cycles to other attacks.
Eater of Worlds
Loadout
| Boss Summon | Weapon | Ammo | Armor | Accessories |
|---|---|---|---|---|
Strategy
It is recommended that you use an underground corruption arena for this fight as EoW has less aggression underground than on surface. Due to the way we'll fight it, you won't need to zoom off into the distance either. Just basic circling in a mediocre sized arena(I used 130x130~ dimensions).
- (1 Worm)It's just a single long worm that will do very simple and straightforward charges. Rise up and charge down in front of you. It will also
spit out cursed flames that explode into 5 different directions to either of its sides. You must pay attention to the cursed flames while circling as they can and will get in your way most of the time. At one point vilethorn pillars will pop up from the ground much like crab's mushroom pillars and the worm(s) will have less aggression while this attack is in effect. Basic attacks perform like usual however, according to lesser aggression.![]()
![]()
- (2 Worms)Double worms, double(not really) speed, double trouble. Nothing's really changed besides that however except the addition of a shadowflame rain attack where the worms will hover above and create shadowflame clouds which with their droplets will inflict shadowflame so take care not to get close.


- (4 Worms)Quadruple worms, quadruple(ok this isn't that funny) speed, quadruple trouble. These ones are actually rather fast compared to the earlier phases in the fight and will most oftenly get in your way before you can outrun them which wouldn't be the case before, circling still works just fine with apt focus and attention albeit a bit hard due to the circumstances. Last attack in the roster is, a ground slam. The easiest attack by far. All the worms will rise up high and then slam down to the ground, releasing a shockwave at ground level(its vertical radius is only a few blocks tall) that goes across pretty much your entire arena in wideness. Standing atop a platform layer will guarantee you won't be touched by this attack ever.
Brain of Cthulhu
Loadout
| Boss Summon | Weapon | Ammo | Armor | Accessories |
|---|---|---|---|---|
Symbols
𓆣 - Use with related bug
Ω - Use together
* - Difficult/Tedious to obtain at this stage
≤ - Variants/Upgrades, downgrades do not work
† - Has a significant downside in usage

