Guide:Yharon, Dragon of Rebirth strategies: Difference between revisions
LudicrousFPS (talk | contribs) No edit summary |
LudicrousFPS (talk | contribs) No edit summary |
||
| Line 34: | Line 34: | ||
*[[The Sponge]] is useful for providing defensive boosts as well as a jump boost. |
*[[The Sponge]] is useful for providing defensive boosts as well as a jump boost. |
||
*The [[Affliction]] also provides decent all around boosts to survivability and defense. |
*The [[Affliction]] also provides decent all around boosts to survivability and defense. |
||
*The [[Dynamo Stem Cells]] |
*The [[Dynamo Stem Cells]] are useful for the immunity to the highly damaging [[Dragonfire]] debuff, which Yharon inflicts with all attacks. In addition, they provide 10% more move speed. |
||
==== Offensive ==== |
==== Offensive ==== |
||
| Line 45: | Line 45: | ||
*Melee players using Yoyos should equip a [[Yoyo Bag]] to increase the range and effectiveness of the yoyo. |
*Melee players using Yoyos should equip a [[Yoyo Bag]] to increase the range and effectiveness of the yoyo. |
||
*Ranged players benefit from the [[Dynamo Stem Cells]], as they provide immunity from the high damaging Dragonfire debuff that Yharon inflicts, as well as providing decent offensive boosts and 10% more movement speed. |
|||
**Due to this, other classes can also consider using them to boost their survivability and movement speed. |
|||
*Summoner players should use the [[Profaned Soul Artifact]] as it summons Profaned Guardian minions that provide defensive and offensive bonuses as well as an excellent additional source of damage. |
*Summoner players should use the [[Profaned Soul Artifact]] as it summons Profaned Guardian minions that provide defensive and offensive bonuses as well as an excellent additional source of damage. |
||
*If playing a hybrid class with summoner, the [[Eldritch Soul Artifact]] is a good option, especially for Mage or Rogue, providing boosts for all classes. |
*If playing a hybrid class with summoner, the [[Eldritch Soul Artifact]] is a good option, especially for Mage or Rogue, providing boosts for all classes. |
||
Revision as of 03:33, 6 October 2022
| This is a Guide page. This means the page will walk you through a specific task, strategy, or enemy/boss fight. This guide was last updated for version 2.0.1.001. |
Map icon
| Type | Boss |
|---|---|
| Environment | Surface |
| Damage | 300 / 520 |
| Max Life | 1,300,000 / 2,080,000 |
| Defense | 90 |
| DR | 22% |
| KB Resist | 100% |
| Inflicts debuff | 100% chance |
| Debuff duration | 1 second (All projectiles except Flarenado and Infernado) 1.5 seconds (Flarenado) 2 seconds (Contact) 2.5 seconds (Infernado) |
| Debuff tooltip | Engulfed by roaring flames |
| Immune to |
| Cold | Vulnerable |
|---|---|
| Water | - |
| Sickness | Vulnerable |
| Electricity | - |
| Heat | Resistant |
| Coins | 10 |
|---|
- Item (Quantity)Rate
 Yharon Soul Fragment (25-30 / 30-35
  )100%
)100%- At least one of the following 8 weapons will always drop:
- 25% / 33.33%
- 25% / 33.33%
- 25% / 33.33%
- 25% / 33.33%
- 25% / 33.33%
- 25% / 33.33%
- 25% / 33.33%
- 25% / 33.33%
- 100%
- 100%
- 10%
 Omega Healing Potion (5-15)100%
- 10%
- 10%
- 14.29%
- 10%
- 1%
 Yharon, Resplendent Phoenix (Lore)(Always on first kill)100%
 Treasure Bag(Yharon)
- •
 Fox Drive(In Revengeance Mode only)
100%- •
 Yharon Relic(In Master or Revengeance Mode only)100%
 / 100%


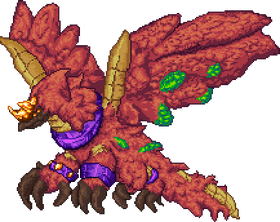
Jungle Dragon, Yharon is typically the third to last Calamity boss that you will face in your playthrough, fought after The Devourer of Gods. Yharon is summoned by using a Jungle Dragon Egg in the Jungle biome at any time.
This guide will mention items exclusive to Expert and Revengeance Mode with no special formatting and will follow the intended progression.
Terrain Preparation
Although Yharon must be summoned in the Jungle, leaving the biome will not enrage him. However, Yharon summons two massive stationary flame pillars 218.75 / 187.5 ![]() blocks to the left and right of you from the block you use the Jungle Dragon Egg. Going outside of these flame pillars will render Yharon nearly invincible.
blocks to the left and right of you from the block you use the Jungle Dragon Egg. Going outside of these flame pillars will render Yharon nearly invincible.
Build walls before where the border flame pillars are placed. These will function as a barrier to prevent you from accidentally touching the border pillars, which will instantly kill you. Yharon will enrage if you go too high or low from where the Jungle Dragon Egg was used, to avoid this build a roof 660 blocks up from the starting position. The Depth Meter will help you know when to build the roof (note that 2 units in the Depth Meter is equal to 1 block).
Generally, rails should be used instead of platforms, as you will want to stay in the air at all times. Platforms also have the added disadvantage of lowering your fall speed, as you must land on them before falling through. These rails should be spaced around 30-35 blocks apart. Great vertical and horizontal mobility is a must for this fight, considering the high mobility of the boss itself. Campfires, Heart Lanterns, and Drunk Princess Candles can be placed throughout the arena for their stat boosts, however be careful not to exceed the buff cap of 22 buffs.
If you are annoyed at hopping on a minecart instead of entering your mount when pressing the quick mount key near rails, you can try putting the mount item in your hotbar and hotkeying to it. Alternatively, platforms hammered into stairs will allow free fall through them like rails as long as you are holding the down key.
Gearing Up
Armor
- God Slayer armor is the preferred choice for Ranged, Melee, and Rogue.
- Silva armor is the highest-tier choice for Mages and Summoners.
- Omega Blue armor has higher damage than God Slayer armor for Melee, Ranger, and Rogue without stealth. It additionally provides a third ripper with its set ability. However, your survivability is severely impacted by the lack of positive life regen.
- Fearmonger armor is a good option for a hybrid summoner loadout, focusing on minion damage.
Accessories
Movement
- As you want to be in the air for nearly all of the fight, using Silva Wings is generally the best option due to their superior flight time and greater air speed compared to the Elysian Tracers.
- The Community is a very good option providing both offensive and defensive bonuses as well as 15 percent additional flight time.
- The Asgardian Aegis is generally preferred over Statis' Void Sash for this fight. The utility of the Aegis' ram benefits survivability much more than the Sash's dodge, as you are able to negate Yharon's contact damage on every dash rather than every 90 seconds.
- A more detailed paragraph on the utility of ramming is located in the fight section.
Defensive
- The Core of the Blood God should be prioritized, as it halves Yharon's high contact damage every 20 seconds, in addition to providing other boosts to survivability and a slight boost to damage.
- The Rampart of Deities is a strong defensive option, providing additional immunity frames and damage reduction while also reducing the potion cooldown by 15 seconds.
- The Sponge is useful for providing defensive boosts as well as a jump boost.
- The Affliction also provides decent all around boosts to survivability and defense.
- The Dynamo Stem Cells are useful for the immunity to the highly damaging Dragonfire debuff, which Yharon inflicts with all attacks. In addition, they provide 10% more move speed.
Offensive
- Depending on your class, you should make these post-Devourer of Gods accessories:
- The Elemental Gauntlet for Melee players.
- The Elemental Quiver for Ranged players.
- The Ethereal Talisman for Mage players.
- Nucleogenesis for Summoner players.
- The Nanotech for Rogue players.
- Melee players using Yoyos should equip a Yoyo Bag to increase the range and effectiveness of the yoyo.
- Summoner players should use the Profaned Soul Artifact as it summons Profaned Guardian minions that provide defensive and offensive bonuses as well as an excellent additional source of damage.
- If playing a hybrid class with summoner, the Eldritch Soul Artifact is a good option, especially for Mage or Rogue, providing boosts for all classes.
- Should you know Yharon's attack patterns very well, the Dimensional Soul Artifact is an excellent choice for boosting your DPS with high damage bonuses at the cost of increasing the damage you take by 15%.
- The Reaper Tooth Necklace can improve DPS if you are using weapons that have a low use time or ignore immunity frames.
Weapons
Weapons dropped from The Devourer of Gods or crafted with Cosmilite Bars should suffice in most situations.
Melee
- The Greatsword of Blah homes and deals great DPS, making it the preferable choice for melee users.
- The Terrarian, despite being from a much lower tier, still deals very high DPS, especially with a Yoyo Bag. However, it has limited range.
- The Enforcer can deal very high damage, but is a true melee weapon and requires more experience with the boss to use it at its full potential.
- Galaxia is versatile but risky, with its highest-damage attunements requiring close range.
- The Excelsus is another sword that deals good damage and provides a bit of extra DPS if Yharon is hit with the blade.
- Devil's Devastation is a powerful option when landing the sky shots.
- Galaxy Smasher is an extremely strong option at the cost of very low range.
Ranged
- The Anti-materiel Rifle is an extremely powerful option that deals massive damage.
- The Daawnlight Spirit Origin should be paired with this weapon to achieve its maximum potential.
- The Scorched Earth is another good option that homes.
- The Alluvion is bow that deals high damage with its typhoon arrows and monsoons. It requires Wooden Arrows in order to be used effectively.
- The SDFMG is a good gun and is very easy to land hits with when using Holy Fire Bullets.
- The Starmada is an additional option that has more expensive ammunition, but does high amounts of damage when fully charged up.
- The Norfleet has very high DPS, but a slow fire rate.
Mage
- The Primordial Ancient is an excellent choice that boasts high damage as well as a decent range.
- The Voltaic Climax is another option that does decent damage and homes. However, it has a limited range. Use it when Yharon is spinning or stationary for the most damage.
- Recitation of the Beast is another amazing weapon that homes in and deals high damage.
- The Tesla Cannon has excellent DPS. However, it decreases in strength as its charge runs out. This can be mitigated by bringing a backup to switch out to.
Summoner
- Filling all minion slots with the Saros Possession summon results in ludicrous amounts of DPS, far more than other summons for the tier. With enough damage, Yharon can even be brought to a near standstill due to constantly changing phases, completely trivializing the fight.
- The Staff of the Mechworm is another good alternative, dealing similar amounts of DPS. However, it is more effective on a stationary target, resulting in it struggling to catch up to Yharon in some subphases.
- The Corvid Harbinger Staff and the Endo Hydra Staff are great options, as they are fast and deal high DPS.
- The Kaleidoscope, though being from a much lower tier, is still the best whip currently available, and is great at providing additional DPS.
- The Cadaverous Carrion can be used to deal extra DPS. Frequent resummoning is required in order for maximum potential.
Rogue
- A full stack of God's Paranoia is extremely powerful against Yharon, outclassing most other rogue weapons of the tier. Both stealth and spam result in similar amounts of DPS.
- Penumbra and Hypothermia are also great options but require aim.
- The Eradicator can also work well, particularly when Yharon is spinning or stationary.
Miscellaneous
- The Rod of Discord is very useful for escaping unfavorable situations, especially if you can reliably hotkey to it fast.
- The Normality Relocator is more of a sidegrade than a direct upgrade to the Rod of Discord. While it has the advantage of being bound to a hotkey and can be used even when using a weapon with slow use time, it has a cooldown that is 33% longer than the Rod of Discord's (20 seconds instead of 15). The increased fall speed is also generally unfavorable in this fight.
- The Pogo Stick mount provides the same fall speed as the Slimy Saddle, Gelatinous Pillion, or Suspicious Looking Jelly Bean, but can move faster horizontally. Importantly, it will not bounce on targets, a trait of the Slime mount that can result in taking high damage or even death.
- While the Pogo Stick has greater horizontal speed, it does not have as much horizontal control, so it is not a complete upgrade from the various slime mounts.
- The Bobbit Hook is very useful for propelling the player upwards/to the side, as well as for resetting flight time.
The Fight
This fight rundown will assume you built your arena according to the Terrain Preparation section in this guide.
Attacks
Charges
Yharon can do two types of charges aimed directly at the player's position. One is a slow charge which does not cover that much distance. The other is a fast charge, telegraphed by a roar, that covers a significantly further distance. Make liberal usage of dashes or fast upward/downward movement to dodge these.
Ramming charges is also an excellent way to dodge them. To ram, dash with the Asgardian Aegis and make contact with Yharon. If done correctly (hit him midway through the dash), you will get 12 immunity frames. This may not seem like a lot, but it is more than enough to dash through Yharon and avoid contact damage. For the best results, dash towards Yharon when he charges at you. This is also easier with fast charges, as the increased speed makes it easier to go through Yharon during the immunity frames. In fact, fast charges are fast enough that you can also perform a ram by dashing in the same direction as Yharon. This is harder to pull off, but can grant a greater positioning advantage. The ability to ram consistently is a great asset, as it provides another surefire way to avoid contact damage. It also allows for a wider range of movement, as you can move in directions that you otherwise could not. This means you can more easily avoid other things in the fight such as projectiles. Note that ramming and avoiding contact damage will still give you the Dragonfire debuff, which can take a significant toll on your health if you ram recklessly.
In later subphases, Yharon can teleport at set points in the pattern before doing a fast charge. He will always teleport to a random diagonal direction around you. Avoid flying or falling into Yharon by anticipating the teleport charge and either hovering in place or moving straight up/down. Focus on where Yharon's map icon is to get his position. Ramming is also quite useful here.
Fireballs
Yharon breathes fireballs that weakly home onto the player. Stay on the move.
Flare rings
Yharon spins in place, spawning fireballs which move outwards from Yharon as they are spawned. Try to keep your distance.
Flarenado
Yharon pauses, then summons two projectiles which fall until they contact a block, then spawn stationary flarenadoes. These are small and aren't too much of a threat. Try to avoid having them in the middle of the arena.
Infernado
Yharon pauses, then spawns a homing projectile which spawns a massive Infernado when it contacts the player. Lead them to the edge of the arena to make them significantly easier to manage. They have a generous grace period before starting to deal damage once they spawn, but do not risk a hit and get out fast.
Bullet hells
Yharon teleports above the player, disappears in a flaming circle, and becomes invulnerable while spawning compact rings of fireballs. Depending on his current subphase, these will either be slower rings that move slightly horizontally outwards, or faster projectiles which form star shapes. To dodge the slow bullet hells, get a sufficient distance away from Yharon. The fireballs should form loose "tunnels" that you can pass through (this is less apparent when further away, and more apparent when Yharon shoots the fireball rings faster at lower health percentages). These tunnels are much more obvious when you are directly horizontal with Yharon rather than above or below him. For the fast bullet hells, just get away and dodge the fireballs. The fast bullet hells are easier to manage due to the lack of lingering projectiles getting in the way of other attacks.
Big flare rings
This attack is exclusive to Expert Mode and above. It occurs at the start of the patterns for subphases 4, 5, and 6. Yharon moves in and remains stationary at a position close to the player. He then spawns three massive rings of fireballs which home into the player's current position after a delay. Move away from Yharon when he starts moving again, then cause the ring shots to miss by changing direction. Do not go back to the area where the rings were spawned until after they miss you.
Fire charge
In phase 2, Yharon can perform one of two attacks at set points in his pattern:
- Yharon pauses in place, then dashes straight at the player's position while leaving a trail of stationary fireballs. Try to make him charge out of the arena so the projectiles will not get in your way later.
- Yharon aligns himself above the player diagonally, then flies over them, spawning a carpet bomb of gravity-affected Yharon Fireballs which split into more Yharon Fireballs upon hitting blocks or after a few seconds. These are very good at area denial, so move opposite of where he charges and do not revisit the area immediately after. Like the flare charge, try to make him charge out of the arena so the projectiles will not bother you later on. If you are caught in the carpet bomb, fall downward instead of trying to move above the fireballs, or they will split and still hit you.
In Combat
Phase 1
Yharon will spawn offscreen, meaning you should be prepared to dodge him as he approaches you. At the start of the fight, two flame pillars will appear on each side 218.75 / 187.5 ![]() blocks away from where you use the Jungle Dragon Egg. The walls you should have built (see Terrain Preparation) will prevent them from instantly killing you. Do not even bother trying to escape the arena, as Yharon will enrage, massively increasing his speed and quintupling his damage.
blocks away from where you use the Jungle Dragon Egg. The walls you should have built (see Terrain Preparation) will prevent them from instantly killing you. Do not even bother trying to escape the arena, as Yharon will enrage, massively increasing his speed and quintupling his damage.
In Phase 1, (subphases 1, 2, and 3), Yharon will start at a random position in his pattern. This does not mean that the pattern itself is random, merely wherever Yharon starts in it. Due to this, try not to stay too close to Yharon during phase transitions to prevent being hit by unpredictable attacks. It is important to have a good knowledge of Yharon's patterns for each of these subphases, so you know where in the pattern he started and can adjust more easily. The complete pattern of all of Yharon's subphases is located at the bottom of the fight section for reference.
Subphase 1 is relatively simple with no notably dangerous attacks. Keep moving and you should be fine.
Subphase 2 starts at 75% / 85% ![]() / 90%
/ 90% ![]() / 100%
/ 100% ![]() health (subphase 1 is skipped in Death Mode). Starting in subphase 2, Yharon will do bullet hells. In subphase 2, after the bullet hell and a brief waiting period ends, Yharon will do two small dashes at you before doing a spiral attack, where he flies in tight circles and shoots fireballs outward from him. The dashes can easily catch unprepared players who are focused on evading projectiles off guard.
health (subphase 1 is skipped in Death Mode). Starting in subphase 2, Yharon will do bullet hells. In subphase 2, after the bullet hell and a brief waiting period ends, Yharon will do two small dashes at you before doing a spiral attack, where he flies in tight circles and shoots fireballs outward from him. The dashes can easily catch unprepared players who are focused on evading projectiles off guard.
To avoid this sequence of attacks, lead Yharon to the edge of the area when he starts the bullet hell and move to the other side. Fly up and dash to avoid his slow charges. Now, the fireballs should form loose horizontal "tunnels" that you can pass through. Dodging the slow bullet hells in phase 1 this way is generally more consistent than flying up or falling down.
Subphase 3 starts at 62.5% / 70% ![]() / 75%
/ 75% ![]() / 80%
/ 80% ![]() health. Subphase 3's pattern includes more fast charges and a new bullet hell variant: the fast bullet hell. Fittingly, the fireballs here are faster and are in a star pattern. Fast bullet hells are generally easier to dodge due to fewer lingering projectiles, but make sure you have room to fall or fly above Yharon when he does one.
health. Subphase 3's pattern includes more fast charges and a new bullet hell variant: the fast bullet hell. Fittingly, the fireballs here are faster and are in a star pattern. Fast bullet hells are generally easier to dodge due to fewer lingering projectiles, but make sure you have room to fall or fly above Yharon when he does one.
Phase 2
Upon reaching 55% health, Yharon will transition into phase 2. While transitioning, Yharon will change color, and the background music will change. Yharon will start subphase 4 as soon as the transition to phase 2 starts. Note that Yharon is not invulnerable here, just like during all phase transitions, so keep your fire up.
At the end of the transition, Yharon will continue subphase 4 starting at the second fire charge (except in Death Mode, where Yharon will go immediately to subphase 5). Notably, subphase 4 contains no fast charges and does not have charges immediately after the slow bullet hell (except in Classic Mode, where there are no big flare rings in his pattern). Around now, the slow bullet hell's fireballs will be more clumped up due to being fired faster at lower health, making traversing through the rings easier.
Subphase 5 starts at 27.5% / 38.5% ![]() / 44%
/ 44% ![]() / 55%
/ 55% ![]() health. This subphase has a greater amount of bullet hell attacks, and includes fast charges again. Notably, a spot at the front of the pattern contains a fast dash immediately followed by a short dash, which can easily catch unsuspecting players off guard. Try using a falling mount to avoid the charge sequence.
health. This subphase has a greater amount of bullet hell attacks, and includes fast charges again. Notably, a spot at the front of the pattern contains a fast dash immediately followed by a short dash, which can easily catch unsuspecting players off guard. Try using a falling mount to avoid the charge sequence.
Subphase 6 starts at 13.8% / 22% ![]() / 27.5%
/ 27.5% ![]() / 35.8%
/ 35.8% ![]() health. Here, all charges are fast, and teleports precede some charges. Know when these teleports occur so you do not get caught off guard and hit for massive damage. The bullet hell in the pattern can be randomly a slow or fast bullet hell.
health. Here, all charges are fast, and teleports precede some charges. Know when these teleports occur so you do not get caught off guard and hit for massive damage. The bullet hell in the pattern can be randomly a slow or fast bullet hell.
In Revengeance Mode or above, Yharon gains a new subphase, subphase 7, that starts at 11% ![]() / 16.5%
/ 16.5% ![]() health. This subphase's pattern contains only three attacks before looping: a teleport fast dash, another fast dash, and a bullet hell (which can randomly be slow or fast). While simple, this subphase is very difficult, and the nonstop charges combined with the many lingering projectiles from frequent bullet hells can easily spell doom to an attempt. Worse, it can be hard to get damage in due to Yharon being invulnerable much of the time because of the bullet hells. It is highly recommended to save Adrenaline or Rage for this phase to bring a swift end to the fight. If you do not have access to any sort of ripper, then it is not the end of the world. Subphase 7 can be made significantly easier if you keep a level head and have good movement.
health. This subphase's pattern contains only three attacks before looping: a teleport fast dash, another fast dash, and a bullet hell (which can randomly be slow or fast). While simple, this subphase is very difficult, and the nonstop charges combined with the many lingering projectiles from frequent bullet hells can easily spell doom to an attempt. Worse, it can be hard to get damage in due to Yharon being invulnerable much of the time because of the bullet hells. It is highly recommended to save Adrenaline or Rage for this phase to bring a swift end to the fight. If you do not have access to any sort of ripper, then it is not the end of the world. Subphase 7 can be made significantly easier if you keep a level head and have good movement.
Start all bullet hells at the edge of your arena. If you get a slow bullet hell, maneuver your way to the other side of the arena, dodge the teleport dash by dashing away from the fireballs, then move through a horizontal tunnel of fireballs back to the first side, which should give you room to dodge Yharon's second charge and put you in a good position for the next bullet hell. If you get a fast bullet hell, try to maneuver inside of all the rings of fireballs to Yharon before he starts the teleport dash to prevent them from getting in your way. As with before, end the second charge on the edge of the arena.
Tips
- Disabling backgrounds can help you focus more on the fight.
- Having the overlay map open can greatly assist in getting the exact location of Yharon even when he is off screen. The overlay can be made more transparent with the PgDn (Page Down) key should you find that it causes too much visual clutter. A zoomed out minimap also works well if you are used to using that instead.
- If you have been attempting to beat this boss for a while with no avail, take a break. A frustrated player only plays worse, and coming back to the fight with a fresh mindset can be just the thing you need to win once and for all.
Attack Pattern
Yharon has many different attack patterns that change depending on what subphase he is in. Attack patterns will loop until Yharon transitions to the next subphase. Knowing Yharon's attack pattern is very helpful to avoid being caught off guard by dangerous attacks by having knowledge of them in advance, significantly increasing your chance of victory.
Note that the big flare rings attack is omitted in Classic Mode.
Subphase 1
- Slow charge
- Slow charge
- Fireballs
- Slow charge
- Fast charge
- Flarenadoes
Subphase 2
(75% / 85% ![]() / 90%
/ 90% ![]() / 100%
/ 100% ![]() health)
health)
- Slow charge
- Slow charge
- Fast charge
- Bullet hell (slow)
- Slow charge
- Slow charge
- Flare ring
- Infernado
Subphase 3
(62.5% / 70% ![]() / 75%
/ 75% ![]() / 80%
/ 80% ![]() health)
health)
- Slow charge
- Fast charge
- Fast charge
- Flare ring
- Fireballs
- Slow charge
- Fast charge
- Infernado
- Bullet hell (fast)
Subphase 4
(55%)
- Big flare rings
- Slow charge
- Slow charge
- Fire charge
- Fast charge
- Fast charge
- Fire charge
- Slow charge
- Slow charge
- Bullet hell (slow)
Subphase 5
(27.5% / 38.5% ![]() / 44%
/ 44% ![]() / 55%
/ 55% ![]() health)
health)
- Big flare rings
- Fast charge
- Slow charge
- Bullet hell (slow)
- Fire charge
- Fast charge
- Slow charge
- Fire charge
- Fast charge
- Slow charge
- Bullet hell (slow)
Subphase 6
(13.8% / 22% ![]() / 27.5%
/ 27.5% ![]() / 35.8%
/ 35.8% ![]() health)
health)
- Big flare rings
- Fast charge
- Teleport fast charge
- Bullet hell (slow or fast)
- Fire charge
- Fast charge
- Teleport fast charge
- Fire charge
Subphase 7
(11% ![]() / 16.5%
/ 16.5% ![]() health)
health)
- Teleport fast charge
- Fast charge
- Bullet hell (slow or fast)