Golem
| Type | Boss |
|---|---|
| Environment | Jungle Temple |
| Max Life | 64,000 / 96,000 |
| Immune to |
| Cold | - |
|---|---|
| Water | Vulnerable |
| Sickness | Resistant |
| Electricity | - |
| Heat | - |
| Coins | 60 |
|---|
- Item (Quantity)Rate
 Beetle Husk (4-8)100%
 Essence of Sunlight (5-10 / 8-13
  )100%
)100%- At least one of the following 7 items will always drop:
 Stynger
- +
 Stynger Bolt (60-99)
- +
- 100%
- 10%
 Picksaw(If one is not in the player's inventory)100%
 Greater Healing Potion (5-15)100%
- 14.29%
- 10%
- 1%
 Golem (Lore)(Always on first kill)100%
 Treasure Bag(Golem)
 Guardian Golem(In Master or Revengeance Mode only)
 Golem Relic(In Master or Revengeance Mode only)
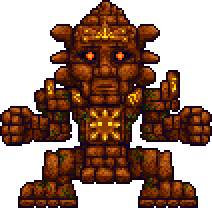
Golem is a Hardmode boss fought in the Jungle Temple. It can only be fought after Plantera has been defeated in the current world.
While in Revengeance and Death Mode, Golem has a buffed AI that is much stronger and more complex than the fight in Normal and Expert modes.
Spawn
Golem does not spawn on its own, instead, it is summoned by either right-clicking the Lihzahrd Altar located in the Jungle Temple with a Lihzahrd Power Cell or using a Old Power Cell anywhere in the Jungle Temple after Plantera has been defeated.
Segments
First Phase
Golem FistLeft Golem Fist Statistics
Sounds Hurt Killed |
Golem FistRight Golem Fist Statistics
Sounds Hurt Killed |
Second Phase
Golem HeadAttached Statistics
Sounds Hurt Eye Beam Fireball |
Third Phase
GolemCore Statistics
Sounds Hurt Killed Eye Beam Stomp |
Golem HeadFree Statistics
Sounds Hurt Killed Eye Beam Fireball Inferno Bolt |
Behavior
In all modes, if Golem is fought outside of the Jungle Temple, it will enrage, increasing the speed of its attack pattern and defense. The free golem head will not inflict contact damage. Additionally, all body parts inflict Armor Crunch.
In Revengeance Mode
Golem has three phases in Revengeance and Death Mode. Note that this page will not cover the Golem fight in Normal and Expert Mode.
Phase 1
Golem spawns above the player's head, falling down to the ground. It will begin to cycle through its attacks. Golem will fire high-velocity bouncing fireballs every three seconds and jump towards the player. Each time Golem jumps it will slam into the ground, creating a line of dust particles. Golem will also throw its fist towards the player at the same rate. Only the left and right fists can be damaged during this phase and must be destroyed to progress the fight.
Phase 2
After destroying the fists. Golem will begin to fire two yellow lasers at the same rate as the fireballs. Only Golem's head can be damaged during this phase and must be destroyed to progress the fight.
Phase 3
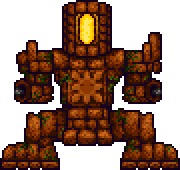
Golem's head will regen its health to full, detach, and begin flying above the player. Once the Golem body reaches 90% health, the Golem Head will begin to fly in a rectangle pattern. The head will fire two sets of lasers twice and one lingering fireball before moving. The lingering fireball will create an explosion that will linger for four seconds. Golem's body will also begin to fire two lasers. Golem will also launch three bouncing fireballs each time it slams the ground. When the Golem body reaches 10% health, it will fire two additional lasers. Both the head and the body can be damaged in this phase. Only Golem's body needs to be destroyed to end the fight.
In Death Mode
- Golem jumps much further and more rapidly.
- The Golem Head in phase 2 fires lasers more rapidly.
- The Golem Body fires four lasers regardless of health in phase 3.
- The Golem Head fires lingering fireballs regardless of health in phase 3.
In the Boss Rush
Aftermath
- Several Plague themed enemies begin spawning in the Jungle, indicated by a sound.
- The Bandit will begin selling the Ethereal Extorter.
- The Drunk Princess will begin selling Moonshine, Moscow Mule, Cinnamon Roll, and Tequila Sunrise.
- The Wizard will begin selling the Spectre Staff, Inferno Fork, Shadowbeam Staff and Magnet Sphere.
- The Arms Dealer will begin selling the Tactical Shotgun, Sniper Rifle and Sniper Scope.
- The Cyborg will begin selling the Rocket Launcher and Martian Distress Remote.
- The Witch Doctor will begin selling Butterfly Dust.
- Shockstorm Shuttles will begin dropping Martian Conduit Plating.
- Devil Fish and Chaotic Puffers will begin dropping Scoria Ore.
- Abyssal Crates now have a chance of containing Scoria Ore and Scoria Bars.
- Jungle Crates and Bramble Crates now have a chance of containing Plague Cell Canisters.
Terrain Preparation
- Take advantage of the space in the Jungle Temple altar room and make sure to clear out any Traps that may be present.
- While fighting Golem outside of the Jungle Temple enrages it, fighting Golem on the Surface can make the fight easier for experienced players due to the large open space available.
Gearing Up
- For a Normal and Expert mode guide to Golem, see Golem strategies on the vanilla wiki.
Armor
- Reaver armor is available as a multi-class armor. The Reaver Helm is suited for defensive play and the Reaver Visage adds more mobility.
- Rangers may use Shroomite armor.
- The best armor available for rogues is Umbraphile armor, which pairs well with Penumbra Potions.
- Mages have Spectre armor as a strong option, especially when switching between the helmets.
- Summoners can use Spooky armor, Tiki armor or Fathom Swarmer armor. If using the latter, it may be preferable to flood Golem's chamber.
Accessories
- Angel Treads or Mothron Wings can provide the needed mobility for the fight.
- Every class can use the Avenger Emblem or their specific class emblem. Mages may prefer the Celestial Emblem.
- The Mechanical Glove is useful for melee users.
- Rogues can benefit from the lifesteal of the Vampiric Talisman and the stealth strike and dodge effects of the Abyssal Mirror.
- Summoners have access to the Papyrus Scarab, Starbuster Core or Statis' Blessing to augment minion slots.
- Any dashing accessory such as the Master Ninja Gear or Asgard's Valor can allow the player to quickly dodge the Golem Head and its several projectiles.
Weapons & Equipment
Melee
- The Ark of the Ancients can deal massive damage to Golem when using its parry and scissors system.
- The Scourge of the Corruptor can spawn lingering projectiles just before beginning the fight, giving players a way to deal large damage to Golem as it spawns in.
Ranger
- The Eternal Blizzard is an excellent pick for Golem, due to its strong Icicle Arrows.
- The Sandstorm's sand blasts deal great damage to Golem, making quick work of the fight.
- Its ammo is also simple to gather, as Sand Blocks are very common.
Mage
- The Astralachnea Staff's homing fangs allow players to focus more on dodging, while still dealing decent damage to Golem.
- Lashes of Chaos is a very powerful option for Mages due to the large area of effect projectile it fires.
- The Spectre Staff is even stronger in Calamity than Vanilla, with hard-hitting homing projectiles.
Summoner
- The Hive Pod combined with the Plantation Staff can make quick work of Golem.
- The Borealis Bomber is another useful summon, but requires constant resummoning of the Aureus Bomber.
Rogue
- Both the Brackish Flask and the Duststorm in a Bottle are extremely effective against Golem due to their lingering projectiles.
- The Heavenfallen Stardisk decimates Golem, but requires more effort to use effectively.
- The Stellar Knife can be a powerful option for Rogue players if the altar room is large enough for the knives to move freely in.
- The Terra Disk is a good option for Rogue players as the splitting projectiles can deal large damage to Golem's fists.
Tips
- Moving in a horseshoe shape is not recommended for this fight on Revengeance and Death Mode, as the lingering explosions are often still present when rebounding to the other side.
- While not required, destroying the Golem Head during the third phase can make the rest of the fight much easier and less overwhelming.
- Using Rage or Adrenaline can help quickly take out the head.


