Bosses: Difference between revisions
No edit summary |
(moved Mauler to before NT since he's an AR miniboss now) |
||
| Line 450: | Line 450: | ||
It drops an abundance of [[Plague Cell Canister]]s, which can be crafted into several plague-related items. It also occasionally drops the [[Plagued Fuel Pack]], a rogue-based accessory. |
It drops an abundance of [[Plague Cell Canister]]s, which can be crafted into several plague-related items. It also occasionally drops the [[Plagued Fuel Pack]], a rogue-based accessory. |
||
| ⚫ | |||
| ⚫ | |||
| ⚫ | |||
| ⚫ | |||
| ⚫ | |||
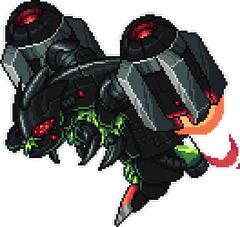
| ⚫ | The '''Mauler''' is a mutant shark mini-boss with 165,000 ({{expert|330,000}}) health. It is passive at first, only attacking the player if they get too close or deal damage to it. Once aggressive, it swims extremely fast towards the player while shooting sulphuric mist at them. It also explodes if it is out of the water for too long. It spawns during the [[Acid Rain]] [[event]] after [[Polterghast]] has been defeated. |
||
| ⚫ | |||
|} |
|} |
||
| Line 486: | Line 477: | ||
They drop an abundance of [[Lumenyl]], [[Ectoplasm]] and [[Voidstone]], as well as the [[Soul Edge]], the [[Eidolic Wail]] and the [[Eidolon Staff]] after [[Polterghast]] has been defeated. |
They drop an abundance of [[Lumenyl]], [[Ectoplasm]] and [[Voidstone]], as well as the [[Soul Edge]], the [[Eidolic Wail]] and the [[Eidolon Staff]] after [[Polterghast]] has been defeated. |
||
| ⚫ | |||
| ⚫ | |||
| ⚫ | |||
| ⚫ | |||
| ⚫ | |||
| ⚫ | The '''Mauler''' is a mutant shark mini-boss with 165,000 ({{expert|330,000}}) health. It is passive at first, only attacking the player if they get too close or deal damage to it. Once aggressive, it swims extremely fast towards the player while shooting sulphuric mist at them. It also explodes if it is out of the water for too long. It spawns during the [[Acid Rain]] [[event]] after [[Polterghast]] has been defeated. |
||
| ⚫ | |||
|} |
|} |
||
Revision as of 05:09, 6 October 2022
Bosses are aggressive, resilient enemies that offer a substantial challenge to players. Defeating a boss is usually instrumental in advancing the game in some way. Each has its own particular way of being summoned. For example, most bosses have associated summoning items that can be used to spawn them manually under certain conditions, while there are others that will appear after the player interacts in a certain way with the environment. Event bosses will only appear during their respective events and leave when the event ends. Mini-bosses also exist and spawn naturally in various biomes under various conditions, which pose a lesser yet still difficult challenge for unsuspecting players.
The Calamity Mod expands on the number of bosses that can be challenged throughout the game, each featuring unique AI and drops. Most require the use of boss summoning items in order to spawn, but others have more unique prerequisites. The initial defeat of bosses (both vanilla and Calamity) typically results in some form of change within the world, be it new enemies appearing or a meteor crash, indicated by status messages to direct players towards the new content. Many also drop lore entries, usually explanations about what they are and why they exist. The mod currently adds twenty-seven new boss encounters.
The Calamity Mod's new difficulty modes, Revengeance Mode and Death Mode, increase the challenge even further, often to levels that require rigorous training and complete knowledge of the boss fights.
Most bosses in Calamity are designed to be more difficult than those of vanilla Terraria, offering a challenge even to seasoned players, but are not required to progress through the vanilla game's content. To make up for this, they often drop more powerful equipment and open up new tiers of progression. During an active boss fight, the Boss Zen debuff will activate, which reduces enemy spawn rates, and the boss health bar will appear on-screen so the player can always keep track of their progress through the fight.
After the player has killed the Moon Lord, a whole new level of progression is unlocked, containing several very powerful bosses that will push the game's mechanics to their limits. These serve to test the player's skill and game knowledge and allow for additional tiers of weapons and items beyond what Terraria's endgame has to offer.
Unprepared players will find these bosses to be spectacularly difficult, but if proper preparations are made, all of them can be defeated at their respective level of progression. Players are advised to make use of arenas, potions and any other kind of aid they can muster before confronting these challenging bosses.
Pre-Hardmode Bosses
Desert Scourge
- For elaborate strategies on defeating the Desert Scourge, including Weapon and Arena recommendations, see Guide:Desert Scourge strategies.
|
The Desert Scourge is a large, dry, spiked worm with 2,600 health (4,160 The Desert Scourge drops weapons themed around water and electricity, as well as many Pearl Shards, an early game crafting material. It also drops many Angler quest rewards such as the Weather Radio or the Angler Earring. Additionally, it allows blocks in the Sunken Sea to be mined and enables Sandstorms. |
Crabulon
- For elaborate strategies on defeating Crabulon, including Weapon and Arena recommendations, see Guide:Crabulon strategies.
|
Crabulon is a mushroom crab with 3,000 health (4,800 Crabulon drops mushroom-themed weapons and materials related to the Glowing Mushroom biome. |
The Hive Mind
- For elaborate strategies on defeating the Hive Mind, including Weapon and Arena recommendations, see Guide:The Hive Mind strategies.

|
The Hive Mind is a large, brain-like amalgamation with 7,000 health (11,200 The Hive Mind drops weapons themed around corruption and the dark, as well as Rotten Matter, which can be used to craft its drops and other items. After defeating it for the first time, Aerialite Ore will generate underground. |
The Perforators
- For elaborate strategies on defeating the Perforators, including Weapon and Arena recommendations, see Guide:The Perforators strategies.
|
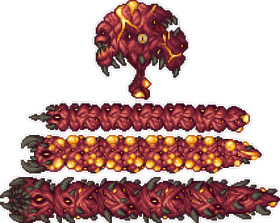
The Perforators are a trio of fleshy worms, along with a main hive boss, with 9,420 total health split over the 4 bosses (16,709 The Perforators drop weapons themed around flesh and blood, as well as Blood Samples, which can be used to craft their drops and other items. After they have been defeated for the first time, Aerialite Ore will generate underground. |
The Slime God
- For elaborate strategies on defeating the Slime God, including Weapon and Arena recommendations, see Guide:The Slime God strategies.

|
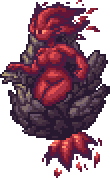
The Slime God consists of two separate, giant slimes (the Ebonian Slime God and Crimulan Slime God, both the size of King Slime) and a smaller Slime God Core. It has 10,800 total health split over the 3 bosses (17,280 The Slime God itself will fly around very quickly, attempting to charge at the player while leaving most of the fighting to its Ebonian and Crimulan Slime God bodyguards. These slimes will perform great jumps towards the player while firing lingering mines, orbs and summoning their own minions. When they reach half health, they will split into smaller, weaker slime gods that will continue to attack. The Slime Gods will get stronger depending on which one is killed first. The Slime God drops weapons themed around slime, The Corruption, and The Crimson, as well as Purified Gel, which can be used to craft its drops and several late Pre-Hardmode items. |
Hardmode Bosses
Cryogen
- For elaborate strategies on defeating Cryogen, including Weapon and Arena recommendations, see Guide:Cryogen strategies.

|
Cryogen is a crystal of sealed frost magic with 18,795 health (30,072 Cryogen drops ice-themed weapons. Defeating it for the first time will generate Cryonic Ore in the Ice biome and cause the Archmage town NPC to move into an available house. |
Aquatic Scourge
- For elaborate strategies on defeating the Aquatic Scourge, including Weapon and Arena recommendations, see Guide:Aquatic Scourge strategies.

|
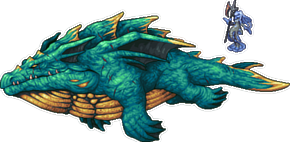
The Aquatic Scourge is a mutated oceanic scourge with 80,000 health (128,000 The Aquatic Scourge drops weapons themed around water and electricity, much like the Desert Scourge to which it is the same species. Defeating it for the first time unlocks the second tier of the Acid Rain event. |
Brimstone Elemental
- For elaborate strategies on defeating the Brimstone Elemental, including Weapon and Arena recommendations, see Guide:Brimstone Elemental strategies.
|
The Brimstone Elemental is a defiled spirit with 30,000 health (48,000 The Brimstone Elemental drops brimstone-themed weapons and accessories. |
Calamitas
- For elaborate strategies on defeating Calamitas, including Weapon and Arena recommendations, see Guide:Calamitas strategies.
| File:Calamitas.png |
Calamitas is a large scarlet eye with 37,500 total health (60,000 Calamitas behaves much like Retinazer, hovering around the player and firing lasers at them, though her lasers will burst into three fast, homing versions after a short time. Upon reaching 75% of her health, she enrages and begins shooting fireballs. Throughout the fight she summons her brothers Catastrophe and Cataclysm. The brothers will spit fireballs and spew a flamethrower, respectively, and charge toward the player. Calamitas also spawns a ring of Soul Seekers around her and swarms of Life Seekers at half health. Calamitas drops several calamitous weapons and materials. |
Leviathan and Anahita
- For elaborate strategies on defeating Leviathan and Anahita, including Weapon and Arena recommendations, see Guide:Leviathan and Anahita strategies.
|
The Leviathan is a colossal aquatic aberration masked by Anahita's amiable appearance. Anahita has 27,400 health (43,840 Anahita will periodically generate an ice shield to protect herself, while attacking the player with a variety of projectiles. The Leviathan will spend most of her time at the player's side, repeatedly launching meteors and summoning minions, while occasionally charging into the player. If either of them are defeated, the boss left alive will become enraged, increasing the aggressiveness of their attacks. The Leviathan (or Anahita, depending on who is killed last) drops ocean-themed weapons and accessories. |
Astrum Aureus
- For elaborate strategies on defeating Astrum Aureus, including Weapon and Arena recommendations, see Guide:Astrum Aureus strategies.
|
Astrum Aureus is a massive astral-infected cyborg with 84,000 health (134,400 Astrum Aureus drops an abundance of Stardust, Fallen Stars and Aureus Cells as well as unlocking several enemy drops in the Astral Infection. Defeating it for the first time unlocks the Astral Chest in the Dungeon. |
The Plaguebringer Goliath
- For more elaborate strategies on defeating the Plaguebringer Goliath, including weapon and arena recommendations, see Guide:The Plaguebringer Goliath strategies.
|
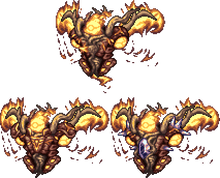
The Plaguebringer Goliath is a bee-like amalgamation of infected flesh and metal with 81,000 health (129,600 The Plaguebringer Goliath drops plague-themed weapons and Infected Armor Plating. |
Ravager
- For more elaborate strategies on defeating Ravager, including weapon and arena recommendations, see Guide:Ravager strategies.
|
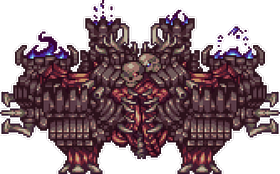
The Ravager is an ancient flesh golem with 141,665 total health (189,525 The Ravager drops flesh and bone themed weapons and two powerful accessories: The Flesh Totem, which cuts enemy contact damage in half every 15 seconds, and the Blood Pact, which doubles the player's maximum health, but allows them to be critically hit at a 25% chance. The Ravager also drops all ingredients to the Core of Calamity and also all the ingredients to the Life Alloy. After Providence is defeated, all of its stats are buffed, its health raises to 708,325 (947,625 |
Astrum Deus
- For elaborate strategies on defeating Astrum Deus, including Weapon and Arena recommendations, see Guide:Astrum Deus strategies.

|
Astrum Deus is a large metal worm that has 200,000 total health (320,000 Astrum Deus drops astral-themed items and an abundance of Lunar Fragments, as well as allowing Astral Ore to be mined. |
Post-Moon Lord Bosses
Profaned Guardians
- For elaborate strategies on defeating the Profaned Guardians, including Weapon and Arena recommendations, see Guide:Profaned Guardians strategies.
|
The Profaned Guardians are the eternal servants to Providence with a total of 125,625 health (191,250 The Profaned Guardians drop the Profaned Core, which is used to summon their Goddess. Each one can also drop a unique usable "Relic" item: Relic of Deliverance, Relic of Resilience, and Relic of Convergence. |
The Dragonfolly
- For elaborate strategies on defeating The Dragonfolly, including Weapon and Arena recommendations, see Guide:The Dragonfolly strategies.
| File:The Dragonfolly.png |
The Dragonfolly is a electrical bird-like dragon clone that has 170,625 health (273,000 The Dragonfolly drops weapons themed around birds and red lightning, as well as Effulgent Feathers, which are used to craft the Jungle Dragon Egg and the Silva armor. |
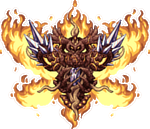
Providence, the Profaned Goddess
- For elaborate strategies on defeating Providence, including Weapon and Arena recommendations, see Guide:Providence, the Profaned Goddess strategies.
|
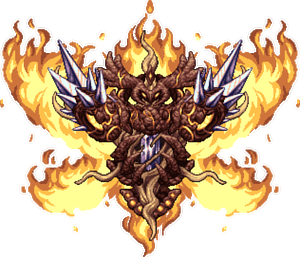
Providence, the Profaned Goddess is a fiery deity of light and dark with 330,000 health (528,000 Providence drops weapons themed around the profaned flame, and an abundance of Unholy Essence and Divine Geodes. If she is spawned in the Hallow, she will drop the highly mobile Elysian Wings. If she is spawned in the Underworld, she will drop the heavily defensive Elysian Aegis. She will always drop the Rune of Kos, a non-consumable item which is used to summon the Sentinels of the Devourer. Uelibloom Ore will generate in Mud Blocks upon her first defeat. |
Storm Weaver
- For elaborate strategies on defeating Storm Weaver, including Weapon and Arena recommendations, see Guide:Storm Weaver strategies.
|
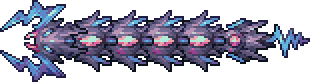
Storm Weaver is a cosmic worm with 825,500 health (1,320,800 Storm Weaver drops Armored Shells, a material used for the Cosmic Worm and several weapons. |
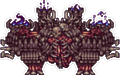
Ceaseless Void
- For elaborate strategies on defeating Ceaseless Void, including Weapon and Arena recommendations, see Guide:Ceaseless Void strategies.
|
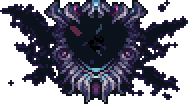
Ceaseless Void is a flying dark portal with 67,200 health (107,520 Ceaseless Void drops Dark Plasma, a material used for the Cosmic Worm and several weapons. |
Signus, Envoy of the Devourer
- For elaborate strategies on defeating Signus, including Weapon and Arena recommendations, see Guide:Signus, Envoy of the Devourer strategies.

|
Signus, Envoy of the Devourer is a cosmic wraith with 224,000 health (358,400 Signus drops Twisting Nethers, a material used for the Cosmic Worm and several weapons. |
Polterghast
- For elaborate strategies on defeating the Polterghast, including Weapon and Arena recommendations, see Guide:Polterghast strategies.

|
Polterghast is a ravenous ethereal amalgamation with 350,000 health (560,000 Polterghast drops phantoplasmic-themed weapons, as well as Ruinous Souls, which are used to craft the Bloodflare armor. Defeating it causes some Abyss and Sulphurous Sea enemies to drop new items, as well as unlocking the final tier of the Acid Rain event. |
The Old Duke
- For elaborate strategies on defeating The Old Duke, including Weapon and Arena recommendations, see Guide:The Old Duke strategies.

|
The Old Duke is an old Fishron with 412,500 health (660,000 The Old Duke drops sulphur-themed weapons. |
The Devourer of Gods
- For elaborate strategies on defeating The Devourer of Gods, including Weapon and Arena recommendations, see Guide:The Devourer of Gods strategies.

|
The Devourer of Gods is an enormous cosmic worm with a total of 888,750 health (1,422,000 The Devourer of Gods drops cosmic-themed weapons, as well as Cosmilite Bars, a versatile Post-Moon Lord material. After its defeat, the player gains access to Nightmare Fuel, Endothermic Energy, and Darksun Fragments from various now-buffed events. |
Jungle Dragon, Yharon
- For elaborate strategies on defeating Yharon, including Weapon and Arena recommendations, see Guide:Jungle Dragon, Yharon strategies.
| File:Jungle Dragon, Yharon.png |
Jungle Dragon, Yharon is a godly dragon with 1,080,625 health (1,729,000 Yharon is incredibly powerful and has dozens of attacks and several phases, each harder than the last. Some of his attacks include summoning massive flarenados, ramming at great speeds, and creating many rings of fireballs while flying in quick loops. After defeating his first phase, his second phase begins with Yharon regaining his health, and then assaults the player with a new set of attacks including launching fireballs, creating rings of flares, and charging alongside teleports. Jungle Dragon, Yharon drops weapons themed around dragons and fire. When defeated for the first time, Auric Ore, one of the final crafting materials, will generate underground. |
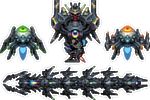
Exo Mechs
- For elaborate strategies on defeating the Exo Mechs, including Weapon and Arena recommendations, see Guide:Exo Mechs strategies.
|
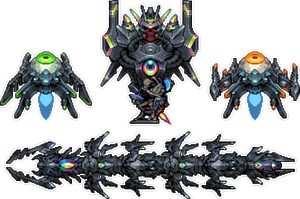
Draedon is a master blacksmith and cyborg scientist, and the player battles against his Exo Mechs: Ares, Apollo, Artemis, and Thanatos. Alongside Supreme Calamitas, they are the final bosses of the Calamity Mod, excluding superbosses. They overall have 3,600,000 health (5,760,000 Each mech drops their own set of complex mechanical weaponry, as well as Exo Prisms, which are used to craft Draedon's Forge and Miracle Matter, and therefore the ultimate Exo weapons. |
Supreme Calamitas
- For elaborate strategies on defeating Supreme Calamitas, including Weapon and Arena recommendations, see Guide:Supreme Calamitas strategies.
|
Supreme Calamitas is an incredibly powerful brimstone witch. Alongside Draedon and the Exo Mechs, she is the final boss of the Calamity Mod, excluding superbosses. She has 1,000,000 health (1,600,000 She drops royal items themed around hatred and the occult, as well as the Ashes of Annihilation crafting material, which are used alongside Exo Prisms to craft Shadowspec Bars, the final crafting material. After her defeat, Calamitas will also spawn as the Brimstone Witch town NPC, allowing the player to utilize the Enchantment system to significantly modify or even transform their items. |
Superbosses
Adult Eidolon Wyrm
| File:Adult Eidolon Wyrm.png |
The Adult Eidolon Wyrm is a Superboss with 2,100,000 health, 3,360,000 It drops the Halibut Cannon, an extremely powerful endgame gun. Additionally, it drops the Eidolic Wail and Soul Edge. |
Mini Bosses
Mini bosses, also spelled mini-bosses or minibosses, are powerful enemies that do not fit the criteria for being a boss — having no dedicated music, typically spawning naturally and more commonly, and having generally weaker stats than most bosses — but still cause the boss health bar to appear and are a greater challenge for the player to defeat than most normal enemies.
Mini bosses almost always drop weapons, accessories, or valuable materials upon defeat.
Giant Clam
|
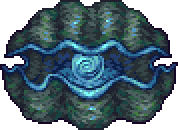
The Giant Clam is a large clam mini-boss with 1,250 (2,500 It drops Navystone, the Amidias' Pendant and the Giant Pearl in Pre-Hardmode, as well as causing the Sea King town NPC to move in if he is not already present in the world. In Hardmode, it additionally drops Mollusk Husks, the Poseidon, the Clamor Rifle, the Shellfish Staff, and the Clam Crusher. |
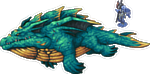
Earth Elemental
|
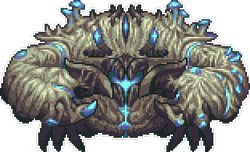
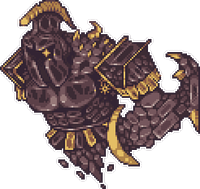
The Earth Elemental is a large armored earth-based mini-boss with 3,800 (7,600 It drops the Aftershock, Slag Magnum and Earthen Pike. |
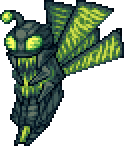
Cloud Elemental
|
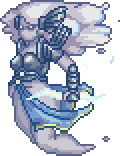
The Cloud Elemental is a well-armored air-based mini-boss with 6,000 (12,000 She drops the Eye of the Storm, which summons a friendly cloud elemental and can be crafted into the Heart of the Elements, as well as the Storm Saber. |
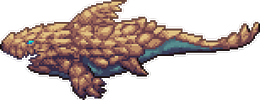
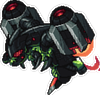
Cragmaw Mire
 |
The Cragmaw Mire is a sulphuric shell-like mini-boss with 4,000 / 6,400 It drops the Spent Fuel Container and the Nuclear Rod. |
Armored Digger

|
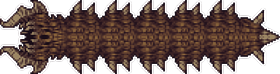
The Armored Digger is a steel worm mini-boss with 20,000 (40,000 It drops Demonic Bone Ash, Dubious Plating, and Mysterious Circuitry. |
Great Sand Shark
|
The Great Sand Shark is a vicious Sandstorm shark mini-boss with 8,000 (12,800 It drops a Grand Scale, which can be used to craft powerful upgrades to previous weapons. |
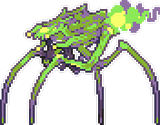
Plaguebringer
|
The Plaguebringer is a bio-mechanical bee mini-boss with 3,000 (6,000 It drops an abundance of Plague Cell Canisters, which can be crafted into several plague-related items. It also occasionally drops the Plagued Fuel Pack, a rogue-based accessory. |
Colossal Squid

|
The Colossal Squid is an enormous cephalopodic mini-boss with 220,000 (440,000 It drops lots of Black Ink, as well as the Calamari's Lament after Polterghast has been defeated. |
Reaper Shark

|
The Reaper Shark is a brutal yet stealthy mini-boss with 190,000 (380,000 After Polterghast has been defeated, it drops the Valediction, Deep Sea Dumbbell, and Reaper Teeth, along with Anechoic Coating. |
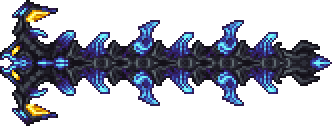
Eidolon Wyrm
|
The Eidolon Wyrm is a large ghostly serpent mini-boss. It has 160,000 (320,000 They drop an abundance of Lumenyl, Ectoplasm and Voidstone, as well as the Soul Edge, the Eidolic Wail and the Eidolon Staff after Polterghast has been defeated. |
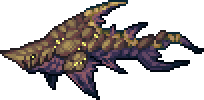
Mauler
|
The Mauler is a mutant shark mini-boss with 165,000 (330,000 It drops several Shark Fins, as well as the Sulphuric Acid Cannon. |
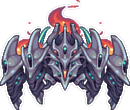
Nuclear Terror
|
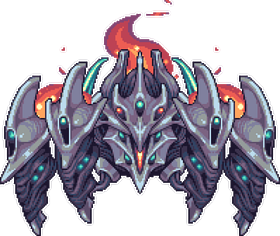
The Nuclear Terror is a radioactive crustacean-like mini-boss with 198,230 health. It attacks the player by teleporting and firing barrages of irradiated shots. It spawns during the Acid Rain event after Polterghast has been defeated. It drops the Phosphorescent Gauntlet and the Gamma Heart. |
Vanilla Boss Additions
The Calamity Mod adds several differences to vanilla bosses ranging from drops to behavior in other difficulty modes.
Resistances
The Calamity Mod also modifies the amount of damage certain projectiles do to certain bosses.
- Creepers take 50% damage from Demon Scythe and true melee damage.
- Eater of Worlds takes 50% damage from Demon Scythe and true melee damage. It also takes 60% damage from Sky Glaze.
- The Destroyer takes 50% damage from Dormant Brimseeker minion and true melee damage.
- The Lunatic Cultist takes 75% damage from the Resurrection Butterfly.
- Duke Fishron takes 135% damage from the Resurrection Butterfly.
- Moon Lord's Core takes 10% damage from True Biome Blade's Mercurial Tides attunement.
Boss Progression


.png)


Boss Summoning Items
The Calamity Mod changes most vanilla boss summoning items to be non-consumable: Slime Crown, Suspicious Looking Eye, Worm Food, Bloody Spine, Abeemination, Mechanical Eye, Mechanical Worm, Mechanical Skull, and Celestial Sigil.
Calamity adds three additional summoning items for vanilla bosses: Portabulb for Plantera, Old Power Cell as a reusable summon for Golem, and Eidolon Tablet for Lunatic Cultist. Recipes for the Guide Voodoo Doll, Lihzahrd Power Cell, and Truffle Worm are also added.
Some boss summoning items are sold by Town NPCs after that boss has been defeated in the world.
| NPC | Item | Price | |
|---|---|---|---|
 Sea King Sea King
|
Truffle Worm | 10 | |
| Bloodworm | 2 | ||
See Also
| Characters: Enemies (List): | ||||||||||||||||||||||||||||||||||||||||||||||||||||||||||||||||||||||||||||||||||||||||||||||||||||||||||||
|---|---|---|---|---|---|---|---|---|---|---|---|---|---|---|---|---|---|---|---|---|---|---|---|---|---|---|---|---|---|---|---|---|---|---|---|---|---|---|---|---|---|---|---|---|---|---|---|---|---|---|---|---|---|---|---|---|---|---|---|---|---|---|---|---|---|---|---|---|---|---|---|---|---|---|---|---|---|---|---|---|---|---|---|---|---|---|---|---|---|---|---|---|---|---|---|---|---|---|---|---|---|---|---|---|---|---|---|---|
| ||||||||||||||||||||||||||||||||||||||||||||||||||||||||||||||||||||||||||||||||||||||||||||||||||||||||||||